Mon Cheri
These are quite possibly the easiest decorated cookies ever.

They start with these:

Do you know what they are? I didn't. I thought they were giant nonpareils. They are actually "sixlets" and are CHOCOLATE! Chocolate, people!
I kind of have a thing for cherries. Maybe it's because I worked for Mary Engelbreit before kiddo came along. Mary is the QUEEN of cherries, in case you didn't know. ;)
You might have seen the bowl of cherries looming in the background in, oh, almost all of my pictures.

The cherries are fake....plastic, and I'll admit, dusty....but that doesn't stop people from trying to eat them when they sit at our kitchen table.
{Spike thinks just *maybe* he can reach them.}
Don't even get me started on the cherry sours from the Sample House in Dallas.
{If you live in Dallas, get in your car RIGHT NOW and go get some. You need them. Really.}

OK, back to the cherry cookies. You will need:
- chocolate square cookies (this chocolate cookie is actually for a super, secret, special project I'm working on...more on that later. Until then, use this one.)
- royal icing, divided and tinted with AmeriColor
Bright White and Leaf Green
- disposable icing bags (2)
- couplers
- tips: #2 & #1
- toothpicks
- red sixlets

Using a #2 tip, outline the cookies in white.
Thin the white icing to the consistency of a thick syrup. Cover with a damp dish towel and let sit for several minutes. Stir gently with a silicone spatula and transfer to a squeeze bottle.

Flood the cookies with the thinned icing. Use a toothpick to guide into corners.

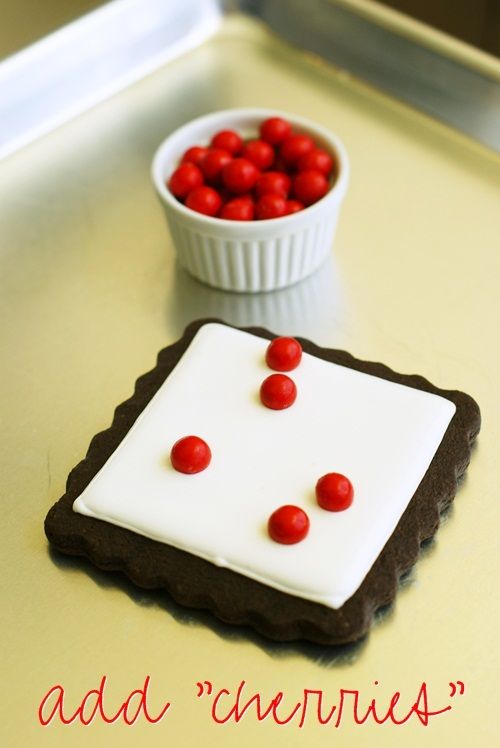
While the icing is still wet, add the sixlets.
Let the icing dry for at least 30 minutes, then add stems, leaves, and dots in green icing with a #1 tip.
Let the cookies dry 6-8 hours or overnight.
That's it! :) Now how about a cookie, mon cheri?

Labels: everyday

0 Comments:
Post a Comment
Subscribe to Post Comments [Atom]
<< Home