Thursday, September 25, 2014

Xanadu, your neon lights will shine...

Birthdays...when we were growing up, my parents instituted a "birthday party rule."  Birthday PARTIES were every other year...on the "off years," we could invite a friend or two to dinner, or to the movies, and over for cake.  I have no idea where they came up with this idea, but we decided to carry on the tradition with kiddo, too.

xanadu decorated cookies + a recipe for vanilla-clementine cut-out cookies
I had been thinking about one of my teenage birthdays...I think I was 12 or 13.  One of the movie theaters in "the city" was having a special showing of Xanadu.  I think the movie came out a couple of years earlier and I already had my white roller skates and knew all of the songs by heart.  My parents took a few of us down for the movie.  I can't remember much else from that birthday...just Xanadu.

xanadu!
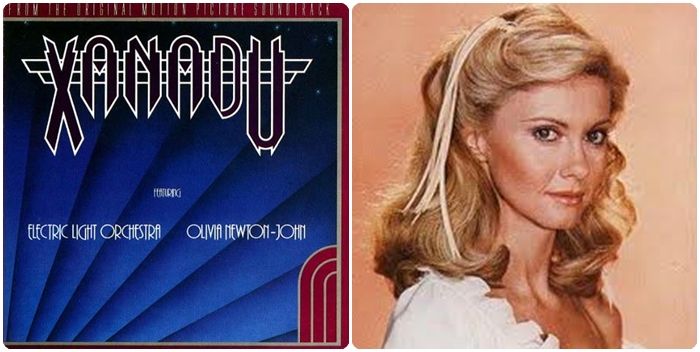
{photo credit olivia-newtonjohn.com}
Please tell me you're a Xanadu fan, too!  I loved all things Olivia Newton-John.  Her voice, her face, her accent, her perfect hair!!!  Remember those thin hair ribbons?  And, that off the shoulder white top?  Oh!  And, that cowgirl outfit?  And Gene Kelly?!?  Oh my gosh...yeah.  I loved Xanadu.

xanadu decorated cookies + a recipe for vanilla-clementine cut-out cookies
In my mind, I was ONJ as Kira....in reality, I was a frizzy-haired girl with braces who was a little (a lot) wobbly on those skates, but man, it was fun to pretend.

decorated cookies: olivia newton-john in Xanadu + a recipe for vanilla-clementine cut-out cookies
The week I was thinking about those birthday memories, I got an email from McCormick.  They're celebrating their 125th (!) birthday this month. Did you know September is the most popular month for birthdays?  I didn't, either!

xanadu decorated cookies + a recipe for vanilla-clementine cut-out cookies
To celebrate, McCormick is igniting a conversation about birthdays and asking people all over the globe to share their favorite birthday flavor story.  For every story shared on McCormick's website or social media channels, McCormick will donate $1 to United Way to feed those in need.

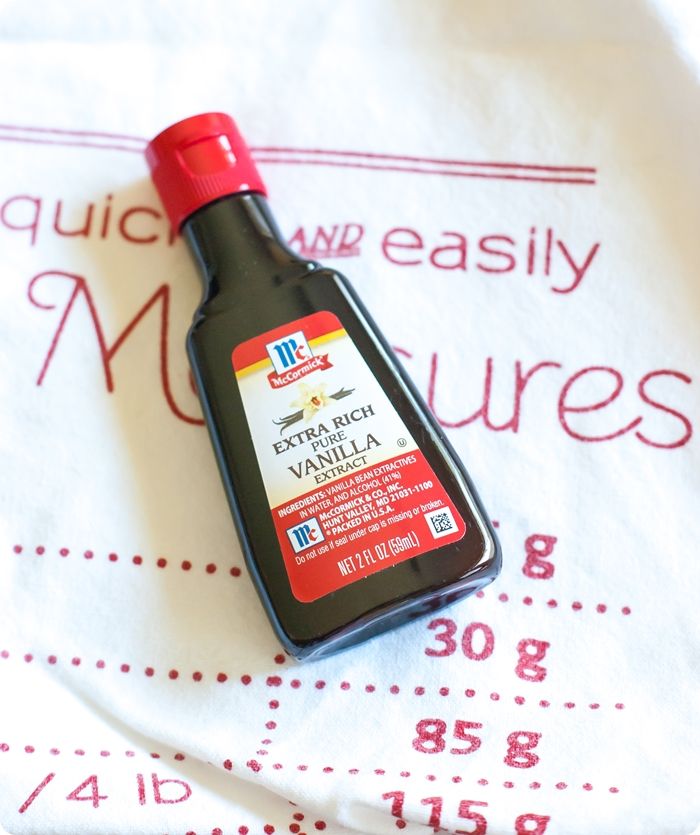
In honor of birthday month, they released a new vanilla extract: Extra Rich Pure Vanilla Extract.
It's luscious and rich...25% stronger than the classic vanilla and the perfect balance between sweet caramel and bourbon-rummy flavors.  It is PERFECT in baked goods...and also to dab a little behind your ears. ♥
McCormick Extra Rich Pure Vanilla Extract + a recipe for vanilla-clementine cut-out cookies

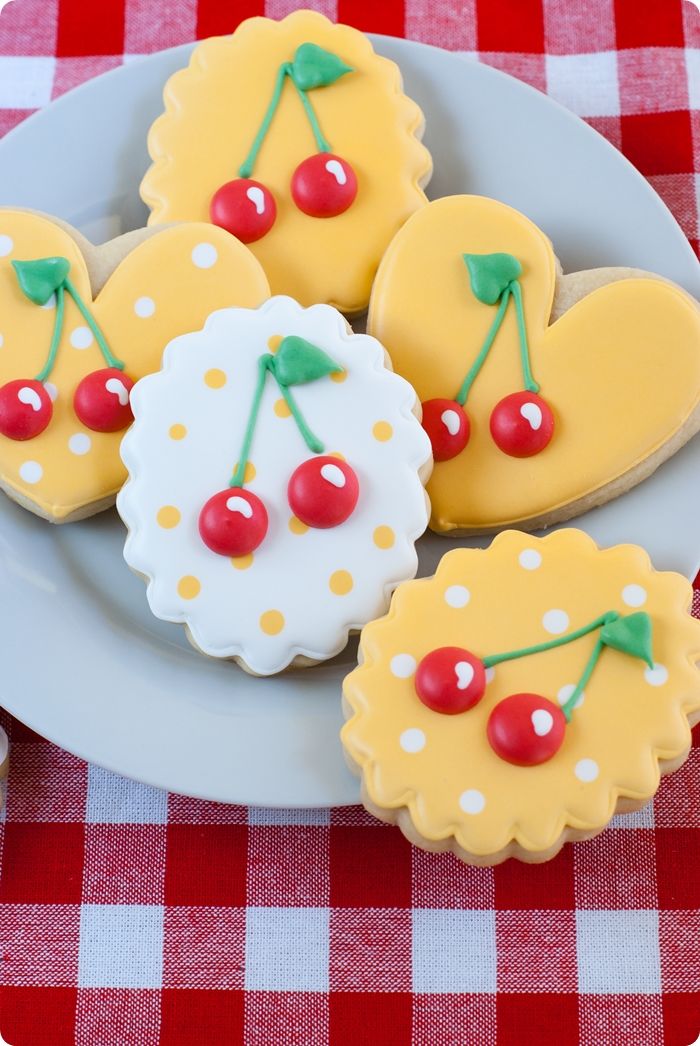
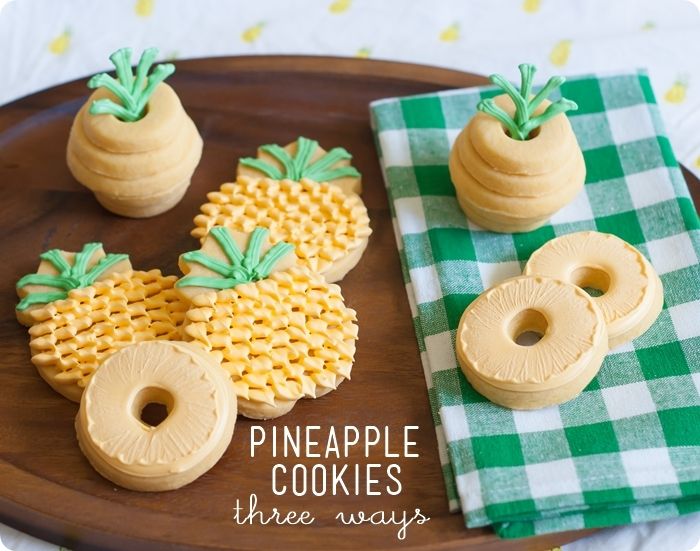
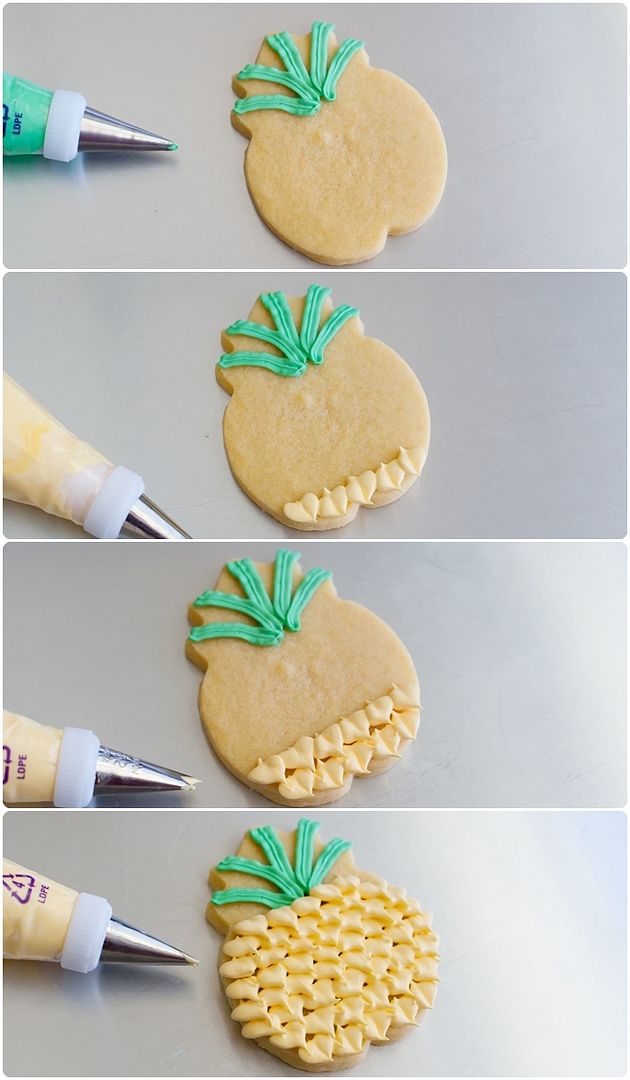
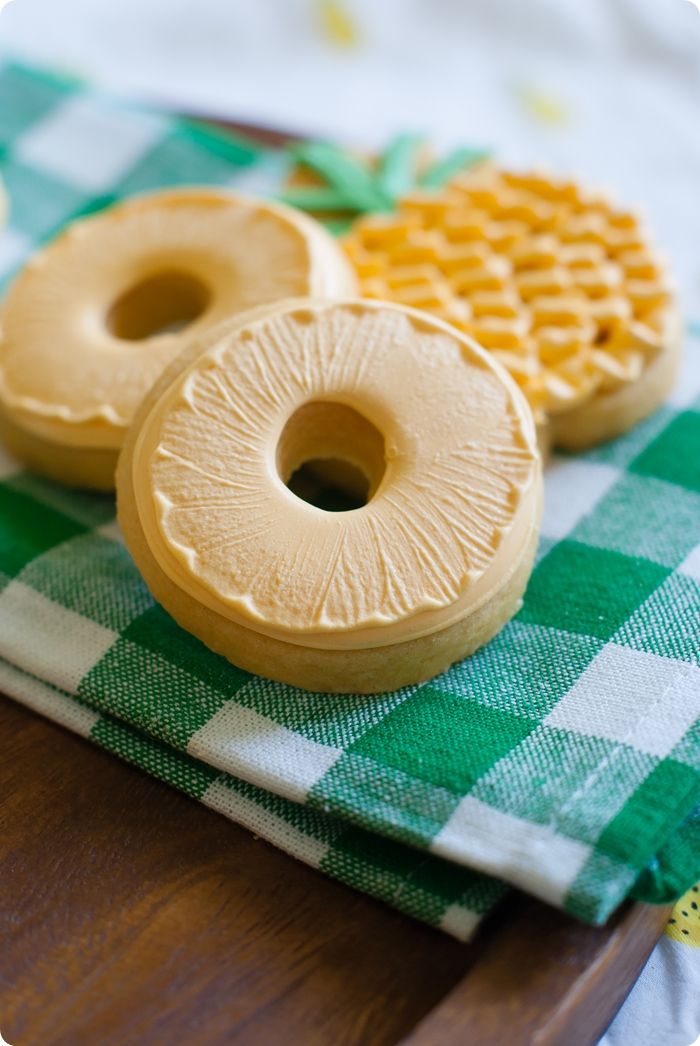
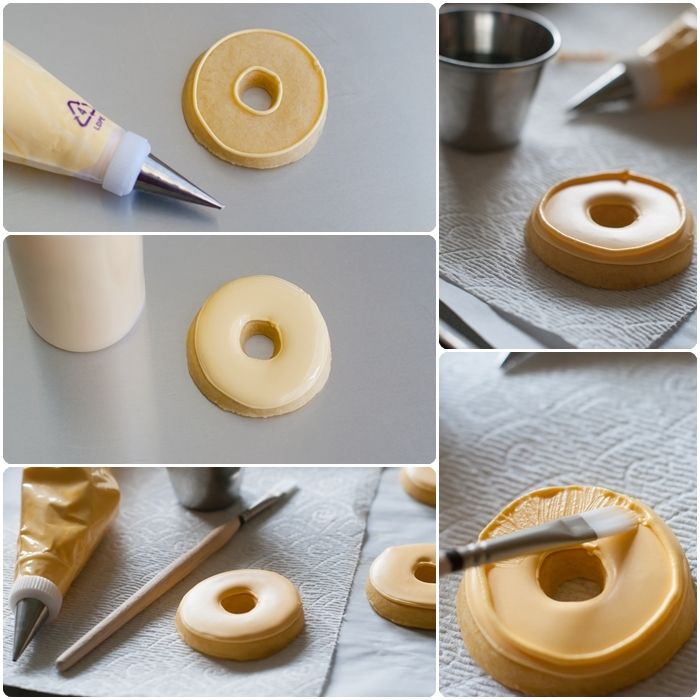
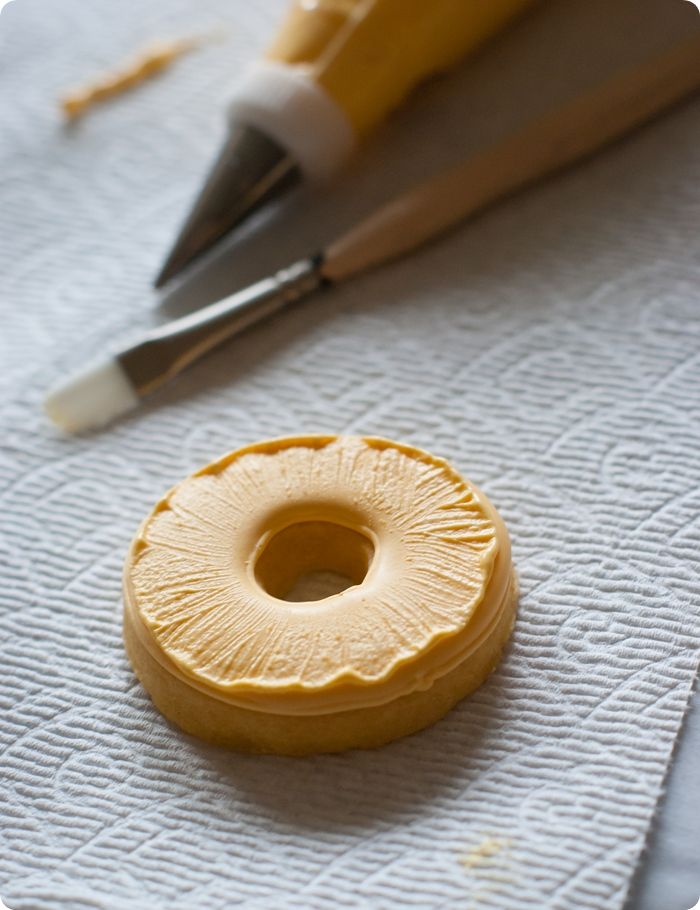
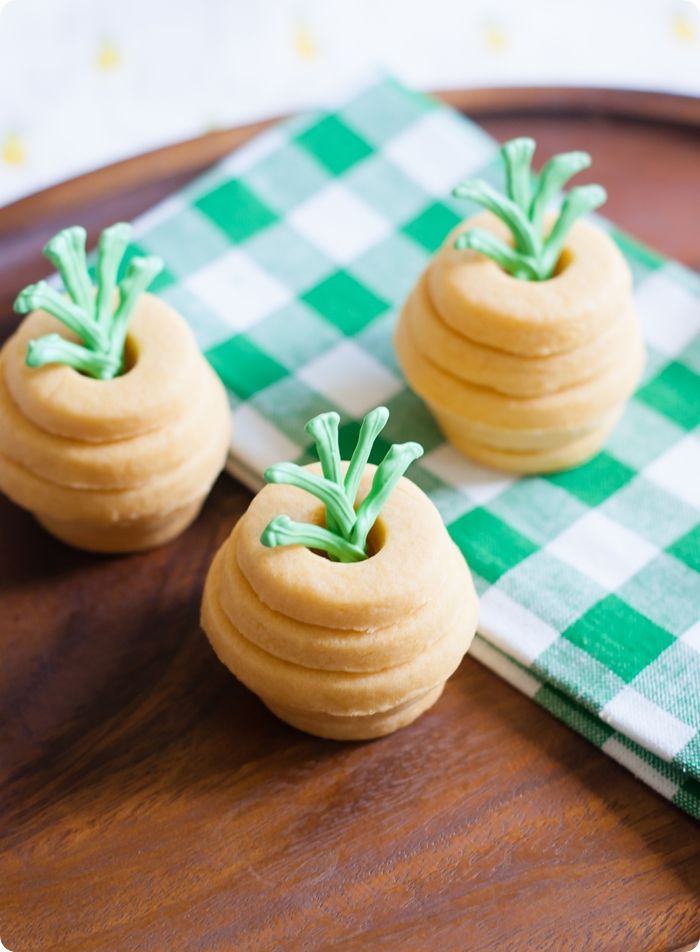
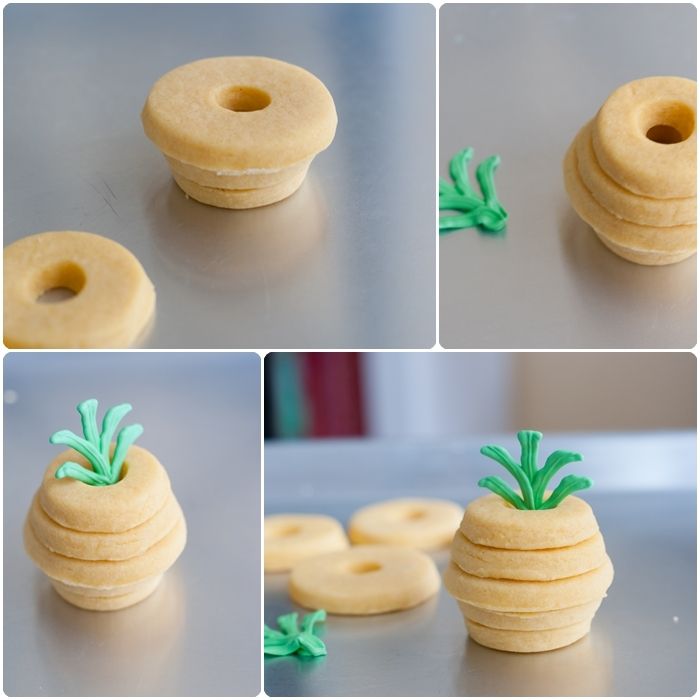
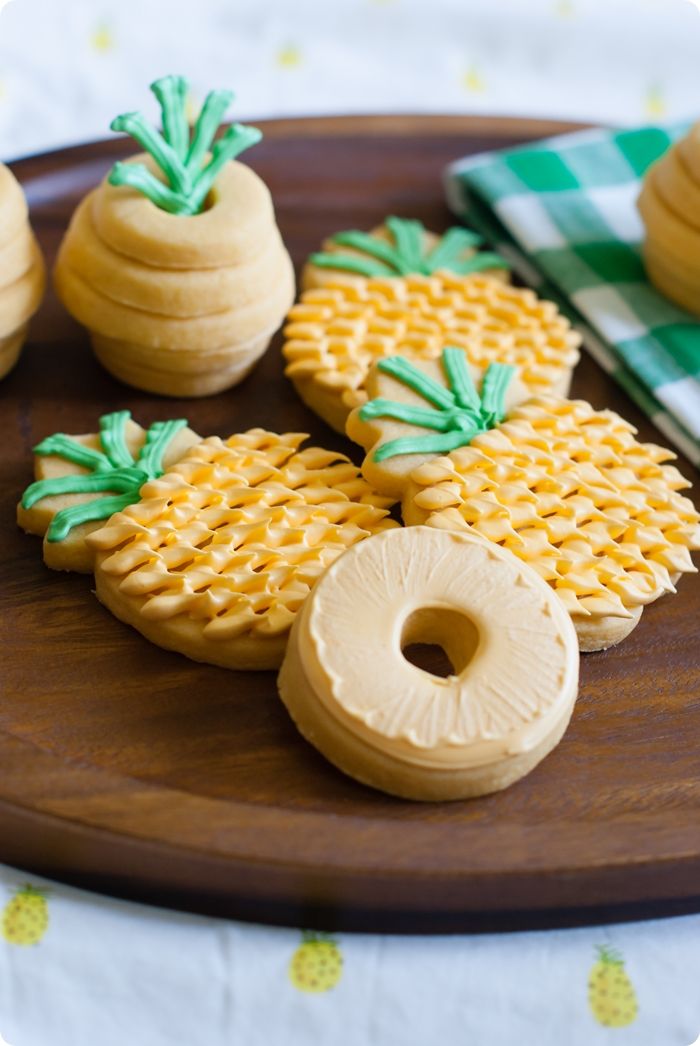
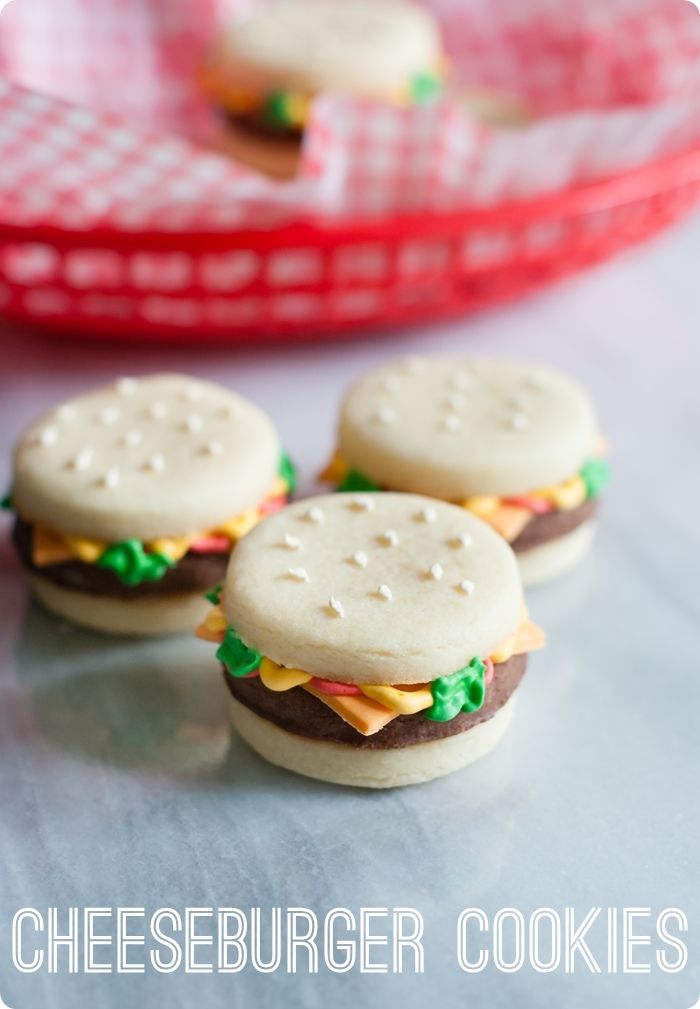
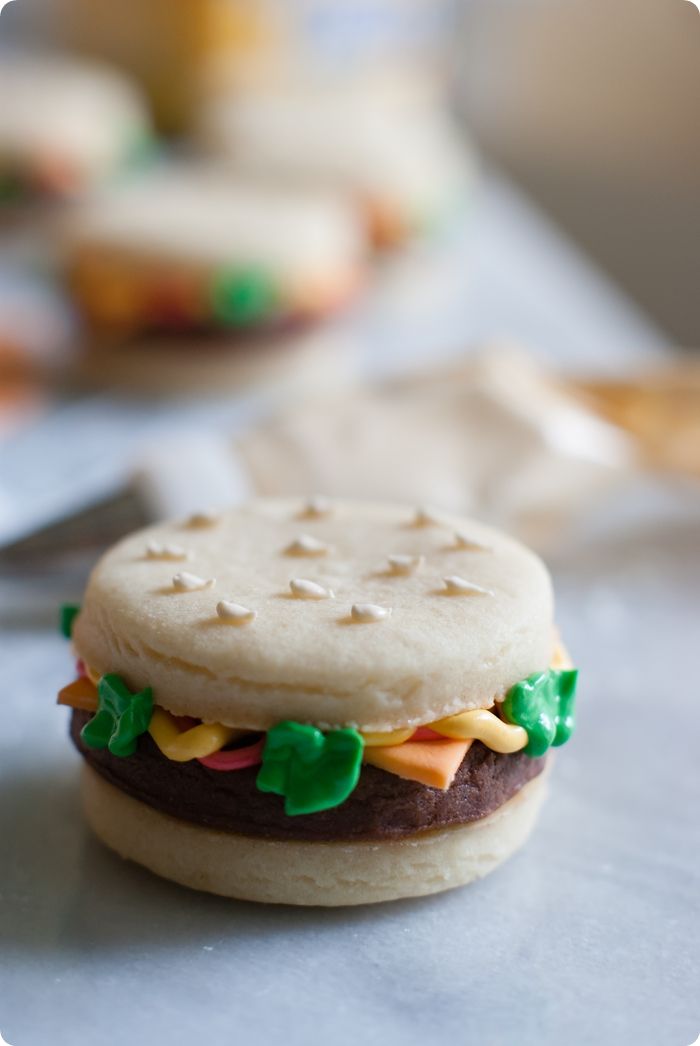
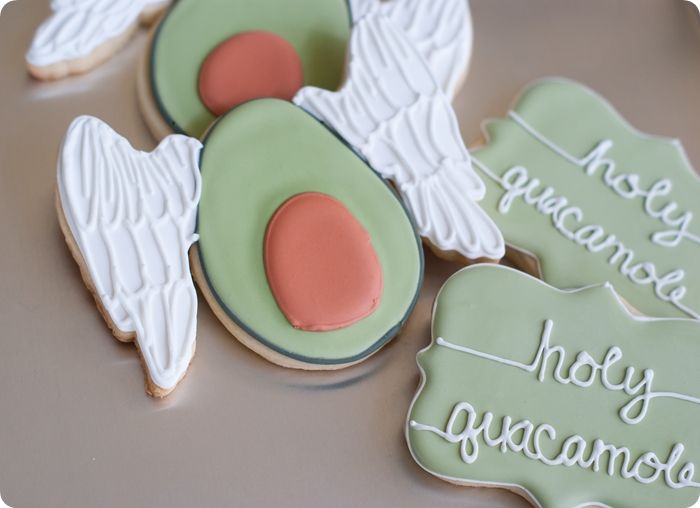
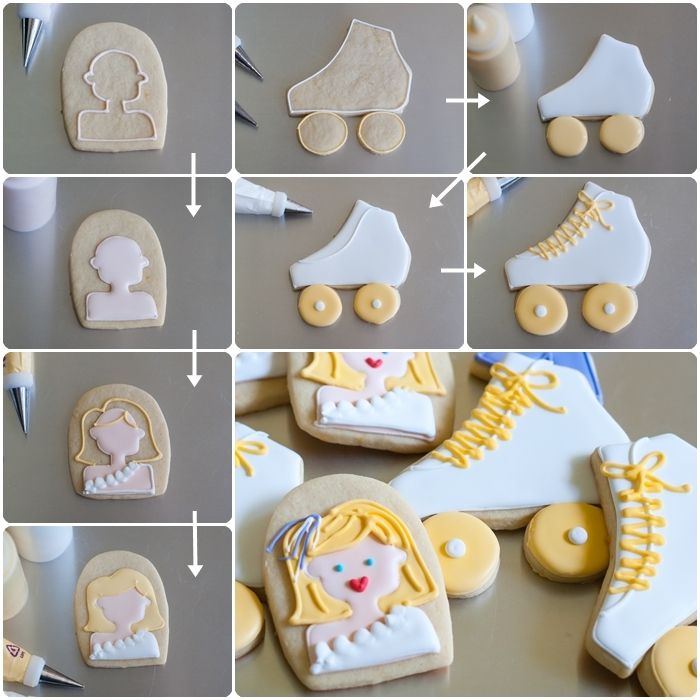
I used it to make Vanilla-Clementine Cut-Outs for the Xanadu-inspired cookies.  The strong vanilla flavor combined with the sweet and fresh clementine is just swoon-worthy.  The cookies also have a little kick of salt that balances out the flavors so well.  I love them almost as much as I love Xanadu. ;)


print recipe photo printrecipe.jpg
Vanilla-Clementine Cut-Out Cookies
{makes about 12 cookies, depending on cutter size}

2 & 1/3 cup unbleached all-purpose flour
1 teaspoon baking powder
1/2 teaspoon kosher salt
3/4 cup unsalted butter, cut into chunks
2/3 cup granulated sugar
1 egg
2 teaspoons McCormick Extra Rich Pure Vanilla Extract
zest of one clementine
1 teaspoon clementine juice

Preheat oven to 350. Whisk the flour, baking powder, and salt together.  Set aside.

In the bowl of an electric mixer, cream the butter and sugar together until light and fluffy.  Add in the egg, vanilla, zest, and juice.  Beat until well combined.  Add in the flour mixture on low speed, mixing until just combined.

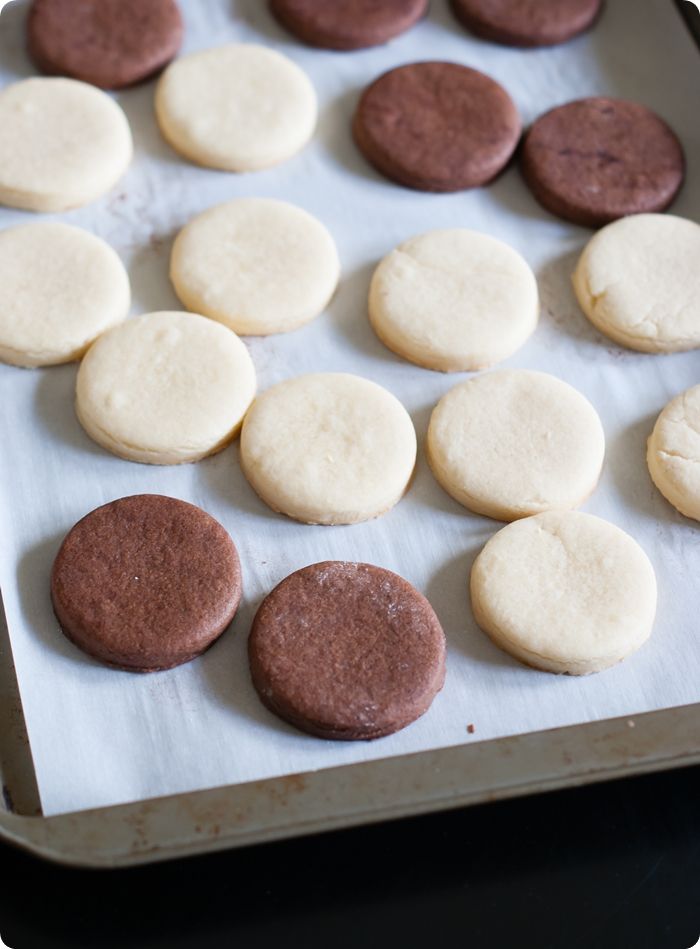
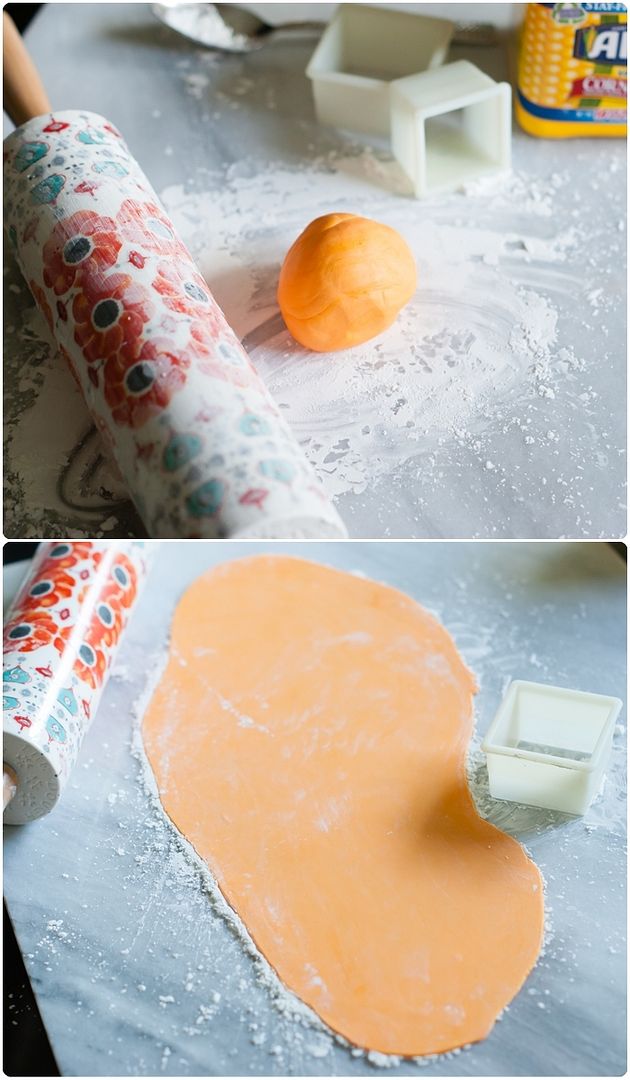
Cover the dough with plastic wrap and refrigerate for at least 30 minutes.  Once chilled, roll to 1/4" thick on a surface dusted with flour, and cut with cookie cutters.  If the dough becomes sticky, refrigerate.  Place shapes onto parchment-lined cookies sheets.  Freeze the shapes for 5-10 minutes before baking to help retain the shape.

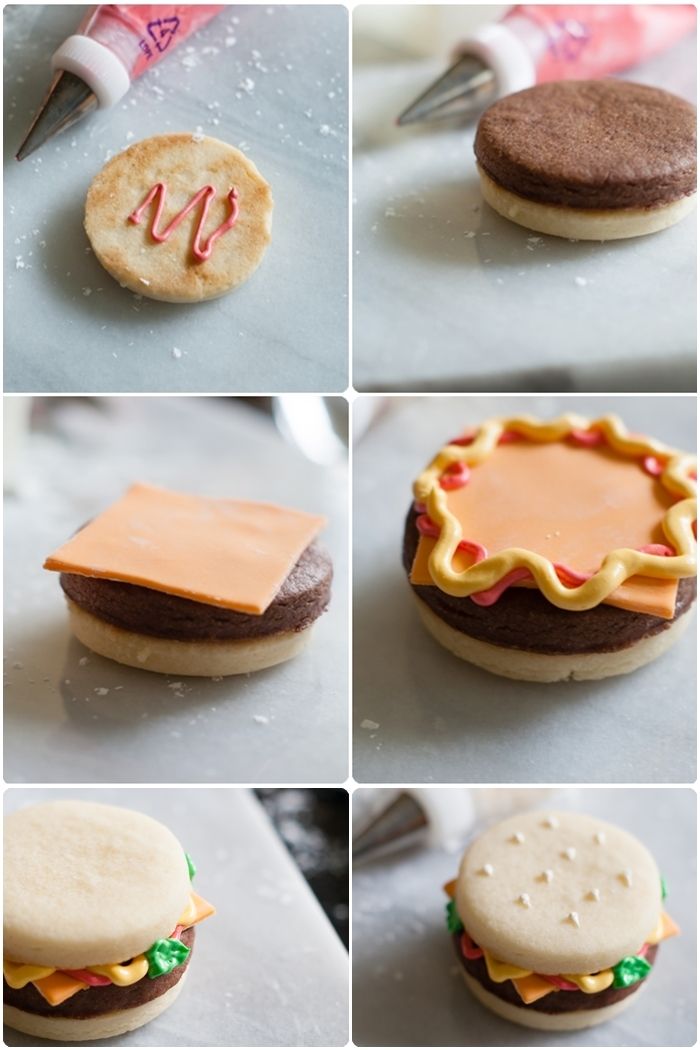
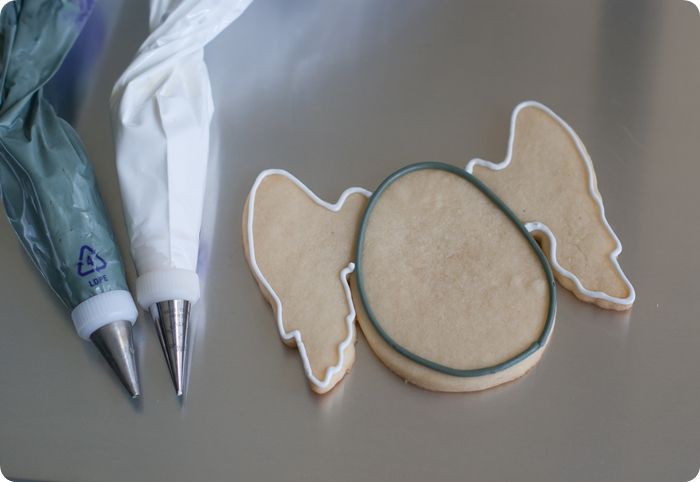
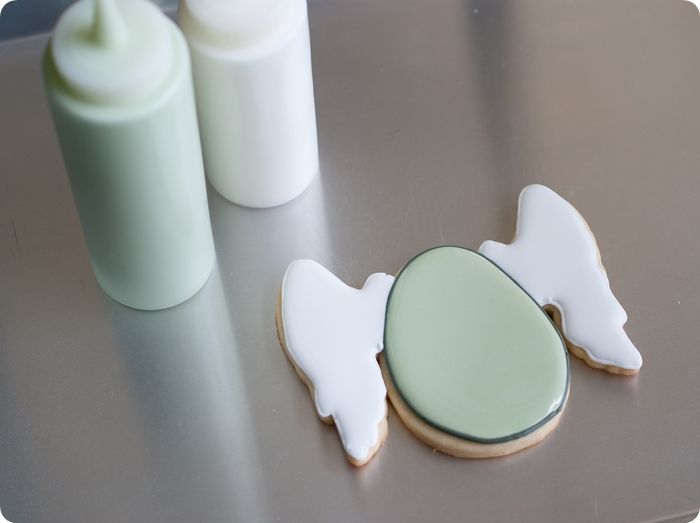
Bake for 9-11 minutes, or until done.  Cool completely on wire cooling racks before decorating.  Use royal icing to decorate.
xanadu cookies decorating tutorial

What's one of your favorite birthday memories?  Does it involve Xanadu?

xanadu and olivia newton-john decorate cookies + a recipe for vanilla-clementine cut-out cookies


Labels: ,

Thursday, September 11, 2014

Life is just a bowl of cherries (cookies).

I have been the biggest cherry lover for the longest time.  I guess it all stems back from my days working for Mary Engelbreit.  You just can't get those cherries out of your system. ;)

decorated cookies with cherries and polka dots!
These cookies are for a little project I'm working on (more on that later!), and I didn't intend to post these on the blog.  BUT!!!  You guys...I just couldn't not post them.  Those cherries with the yellow and the dots just speak to my soul.

No step-by-step photos for these, but I'll walk you through how to make them.

decorated cookies with cherries and polka dots!

To make the cherry cookies, you'll need:


  • heart and scalloped oval cut-out cookies
  • royal icing, divided and tinted with AmeriColor Egg Yellow, Bright White, Super Red, and Leaf Green
  • couplers and tips, #2, #5, and leaf
  • disposable icing bags
  • squeeze bottles

1. Outline the cookies in the base color using a #2 tip.  (Reserve some of this white icing.)

2. Thin the remaining yellow and white icings with water, a bit at a time, stirring with a silicone spatula, until it is the consistency of a thick syrup.  You'll want to drop a "ribbon" of icing back into the bowl and have it disappear in a count of "one thousand one, one thousand two." Four is too thick, one is too thin.  Count of 2-3 is good.  Cover with a damp dishcloth and let sit for several minutes.
Stir gently with a silicone spatula to pop and large air bubbles that have formed.  Pour into squeeze bottles.

3. Fill in the outlines with the thinned icing, working 6-8 cookies at a time.  Use a toothpick to guide the icing to the edges and to pop large air bubbles.

4. Starting with the first cookie filled, drop dots of the contrasting color onto the wet icing.  Let the cookies dry for at least one hour.

5. Thin the red icing as above, but don't thin it as much.  Draw a knife through the center of the icing.  You'll want it to come back together in a count of 20 seconds.  Do the same with the reserved white icing.

decorated cookies with cherries and polka dots!
6. Pour the icing into a piping bag fitted with a #5 tip.  Pipe cherries onto the cookies.  With a #2 tip, add the detail on the cherries with the white icing.

7. Use a #2 tip to add the cherry stems in green.  Switch the tip to a leaf tip and add a leaf.

8. Let the cookies dry uncovered, 6-8 hours or overnight.
decorated cookies with cherries and polka dots!
I now return you to pumpkin season.

Labels:

Thursday, July 10, 2014

Pineapple Cookies, three ways : Color Challenge...yellow

It's Color Challenge time, you guys!!! 
This time, the inspiration color was a sunny yellow for summer.
pineapple cookies, 3 ways ::: tutorial for making each from @bakeat350
I really had "sunshine cookies" on the brain, but then it hit me...pineapples!!!  Not just one, or two, but THREE version of pineapple cookies.  Yes, I've gone pineapple crazy. 


(And, maybe it has a little something to do with getting to work with Kelly again.) ;) 

pineapple cookies, 3 ways ::: tutorial for making each from @bakeat350
The funny thing about making these happy, sunny little cookies this week is that they really matched the mood around here.  You know, sunshine and roses and all that good stuff.  My boys introduced me to Monty Python.  Well, actually, just the song "Always Look on the Bright Side of Life."  I've been singing (and whistling) it all week long. 

I realize the song is a parody, but it still does make me happy.  Even today, when I was getting nervous for America's future when the girl at the yogurt shop couldn't make change...my total was $9.07; I gave her $10.10...I started whistling the song in my head.  I'M SERIOUS!  This may change my entire outlook on life. 

Alright. Back to our sunny, yellow, little pineapples.  Let me walk you through them...

For all of the cookies, you'll start with a basic cut-out cookie dough.  I tinted the dough yellow.  Either add some yellow food coloring (I like this one) in with the egg and extracts, or knead it in once it's made.

pineapple cookies, 3 ways ::: tutorial for making each from @bakeat350
For the spiky royal icing pineapples, you'll need royal icing! (Bet you guessed that.)  Make up 1/2 of this recipe.  Divide it and tint with AmeriColor Leaf Green and Egg Yellow.

pineapple cookies, 3 ways ::: tutorial for making each from @bakeat350
Use a leaf tip to pipe leaves onto the pineapples in green.  Use another leaf tip to pipe the little "spikes" across the cookies, starting on the bottom.

pineapple cookies, 3 ways ::: tutorial for making each from @bakeat350
For the rings, you'll also need royal icing, just in yellow.

Bake the circle cookies, cutting out a center circle.  Once cooled, outline the cookie with the tinted royal icing, using a #2 tip.

To thin icing, stir in water a little at a time, until it is the consistency of a thick syrup.  When you drop a ribbon of icing back into the bowl, it should disappear back into the icing in a count of one-thousand-one, one-thousand-two.  One-thousand-three is ok, four is too thick.

 photo pineapples3waysringtutorialcollage.jpg
Cover the icing with a damp dishtowel for a few minutes to let large air bubbles rise to the surface.  Stir gently, then transfer to a squeeze bottle.  Fill in the outline with the thinned icing, using a toothpick to guide to the edges and pop any large air bubbles that may form.

pineapple cookies ring finished photo pineapples3waystutorial16of24.jpg
Let the cookies dry for 6-8 hours, or overnight.  Once dry, pipe a circle inside the edge of the circle.  Dip a flat (food only) paintbrush in water and blot well on a paper towel.  Drag the icing with the paintbrush towards the center of the cookie.  Repeat all the way around, wiping and re-dipping the paintbrush as necessary.

pineapple cookies, 3 ways ::: tutorial for making each from @bakeat350
For the stacked pineapples, first make the leaves.  Use green royal icing and a leaf tip to pipe leaves onto a sheet of waxed paper.  Let dry completely (several hours or a few days before).  Peel the leaves gently off of the paper.

pineapple cookies stack 1 photo pineapples3waysstackedtutorialcollage1.jpg
Bake circle-shaped cookies in 3 sizes: 2 small, 2 medium, and 1 large.  Cut out a center circle on each. (For small cookies, the end of an icing tip works well here.)

pineapple cookies stack 2 photo pineapples3waysstackedtutorialcollage2.jpg
Stack the cookies: small, medium, large, medium, small.  Add the leaves in the center.  If you'd like, add a bit of royal icing in between the layers.  I skipped this part to make them easier to share.
pineapple cookies, 3 ways ::: tutorial for making each from @bakeat350

Now, go see what these other lovely ladies are doing with the color yellow!  
Yay, yellow!!!  Click the pictures below!

Image Map

Labels: ,

Tuesday, June 24, 2014

Desserts for Dudes: Yes, I'd like some fries with that.

So, dudes.  Over the years, we've made: fried chicken cookies (no, really), beer and hot dog cookies, french fry cookiesIt was time for the CHEESEBURGER COOKIE!!!
how to make stacked cheeseburger cookies ... so fun for a picnic or cookout dessert!

These cheeseburger cookies are made from not one, not two, but three cookies...all stacked together with a little icing and some fondant cheese.  

(Mmmm, fondant cheese. < please say that in a Homer Simpson voice.)

how to make stacked cheeseburger cookies ... so fun for a picnic or cookout dessert!
Angie, the cute dessert mastermind otherwise known as Bakerella, made some sweet cheeseburgers waaaaaay back in 2009 from cupcakes and brownies.  (I know.)  She also has cute little printable boxes to put them in.  That Angie...where would we be without her?

The cheeseburger cookies are really simple to make, especially if you bake the cookies the day before assembling.  If you have some frozen cookie dough stashed away in your freezer, all the better. 

how to make stacked cheeseburger cookies ... so fun for a picnic or cookout dessert!
Make them in any size you'd like.  These cookies are 2" across.  Technically sliders, right? ;)

how to make stacked cheeseburger cookies ... so fun for a picnic or cookout dessert!
To make cheeseburger cookies, you'll need:
chocolate and vanilla cut-outs to make cheeseburger cookies
You'll want twice as many vanilla cookies as chocolate.  I rolled mine out to 1/4" thickness.

rolled fondant for cheeseburger cookies
Roll the fondant on a cornstarch-dusted surface to about 1/8" inch, or thinner.  (Be sure to coat the rolling pin and cookie cutters, too.)

"american cheese slice" fondant for cheeseburger cookies
Cut squares out of the fondant to make cheese slices for the burgers.

cheeseburger cookies howhow to make stacked cheeseburger cookies ... so fun for a picnic or cookout dessert!  to photo hamburgercollage3.jpg
Place one vanilla cookie with the bottom facing up.  Squeeze on some royal icing in the center.  It doesn't matter what color, it's just to hold the "meat" in place. ;)

Place a chocolate cookie on top.  Add a bit of royal icing, then place on the cheese slice.

Pipe red and yellow icing around the edges of the cookies on top of the cheese.  I used a #2 tip for the ketchup and #3 for mustard.  More mustard, more better.

Lightly place another vanilla cookie on top.  Add lettuce around the edge of the cookie in green icing using a leaf tip.

how to make stacked cheeseburger cookies ... so fun for a picnic or cookout dessert!
Use a #1 tip to add sesame seeds with the ivory icing.  (Alternatively, add real sesame seeds to half of the vanilla cookies before baking.)

Let the icing set for at least 30 minutes before handling the cookies.

how to make stacked cheeseburger cookies ... so fun for a picnic or cookout dessert!
The only thing missing is the pickle. 

Labels: , , ,

Monday, May 19, 2014

Gold Chevron Stenciled Floral Thank You Cookies...say that 3 times fast.

gold chevron stenciled floral thank you cookies ... and thoughts on overcoming "cookie decorating perfection angst" ;)
For the past few months, I've been having stencil angst.  Yes, actual angst over an actual piece of plastic for cookie decorating.  For real.

gold chevron stenciled floral thank you cookies ... and thoughts on overcoming "cookie decorating perfection angst" ;)
Maybe you feel this way, too....but sometimes I see pictures of other decorated cookies that are utter perfection and I'm paralyzed.  Cookie paralyzed.

gold chevron stenciled floral thank you cookies ... and thoughts on overcoming "cookie decorating perfection angst" ;)
For example, I love the look stencils can give cookies (you can find some really great ones here).  I ordered several and read up on the best way to use them.  Then, I gave it a try, didn't think they were "perfect" enough, and tossed them.

I stashed the stencils away, but I thought about them a LOT. 

gold chevron stenciled floral thank you cookies ... and thoughts on overcoming "cookie decorating perfection angst" ;)
Fast forward to last month...we spent a few hours at our town's art festival.  The art was beautiful, inspiring, creative...and guess what?  Not perfect.  Actually, the art that was more quirky, less perfect, more real was the art that was my favorite. 

And hello, Bridget.  These are cookies we're talking about, not the Sistine Chapel.

When I had the chance to make some thank you cookies, I busted out the stencils again.  No airbrush, no special stencil magnets, no angst. (Ok, a little angst.)

I guess what I'm trying to say here is...don't let the fear of imperfection keep you from creating.

gold chevron stenciled floral thank you cookies ... and thoughts on overcoming "cookie decorating perfection angst" ;)
In the end, I kind of love that the stenciling on the cookies is a little wonky. 

Let's make a deal.  Let's try to not be paralyzed by the fear of imperfection.  Maybe we won't strive for wonky, but let's embrace it and find the beauty in the rustic, the homemade, the flawed.

gold chevron stenciled floral thank you cookies ... and thoughts on overcoming "cookie decorating perfection angst" ;)

To make these gold chevron stenciled floral cookies ;), you'll need:


gold chevron stenciled floral thank you cookies ... and thoughts on overcoming "cookie decorating perfection angst" ;)
Use  #2 tips to outline the cookies with ivory and turquoise icing.  Reserve some of this piping consistency icing before thinning.

Thin the ivory and turquoise icings with water, a bit at a time, stirring with a silicone spatula, until it is the consistency of a thick syrup.  (Reserve some of the white icing for piping details later.) You'll want to drop a "ribbon" of icing back into the bowl and have it disappear in a count of "one thousand one, one thousand two." Four is too thick, one is too thin.  Count of 2-3 is good.  Cover with a damp dishcloth and let sit for several minutes.

Stir gently with a silicone spatula to pop and large air bubbles that have formed.  Pour into squeeze bottles.

Fill in the outlines with the thinned icing, using a toothpick to guide to the edges and to pop large air bubbles.

Let the cookies dry at least one hour.

thank you chevron rose cookies tutorial 2 photo thankyouchevronrosetutorialcollage2.jpg
For the "thank you" cookies: Use star tips to make rosettes with the star tips in the pink icing.  Use #3 or #4 tips to pipe the base of swirly flowers in peach icing.  Switch the tips on the pink to #1 and add a swirl on top of the peach icing.

Use a leaf tip to pipe leaves in the avocado icing.

Pipe working using a #1 or #1.5 tip.  (I used both 1 & 1.5 PME tips.)

Let the cookies dry, uncovered, 6-8 hours or overnight.

gold chevron stenciled floral thank you cookies ... and thoughts on overcoming "cookie decorating perfection angst" ;)
For the chevron cookies: Let the base color dry completely before stenciling. Place the cookie on a small plate and the plate on a cookie sheet.  Rest the stencil lightly over the top of the cookie, and spray a light coating of gold spray evenly over the top.  Gently lift the stencil off of the cookie, and blot it before placing it onto another cookie.

gold chevron stenciled floral thank you cookies ... and thoughts on overcoming "cookie decorating perfection angst" ;)
Pipe on flowers and leaves as described above.

Be not afraid.  Go forth and cookie! 
gold chevron stenciled floral thank you cookies ... and thoughts on overcoming "cookie decorating perfection angst" ;)

Labels: , , ,

Sunday, May 11, 2014

A week late and a peso short.


(my version of a day late and a dollar short.)
holy guacamole cookie tutorial
So, I had good intentions of having these cookies ready for Cinco de Mayo.  It was an exceptionally busy week around here prior to May 5th.  You guys...I do not do busy well.  My mom was so good at being busy...she did it all with an smile AND kept the house clean.

I planned, though.  I actually baked the cookies ahead of time and popped them in the freezer.  There was a fundraiser I was helping with on Saturday night.  Cinco de Mayo was on Monday.  No problemo, I thought.  I'll wake up Sunday morning, make the icing, decorate the cookies, and have them up on the blog on Monday.
holy guacamole cookie tutorial
Funny thing, plans.  For a number of reasons...EXHAUSTION, a car dying, a laundry pile that had to be tackled, grocery store run (we were down to some questionable cheese, a few eggs, and a can of pumpkin), and a long nap (I mentioned exhaustion, right?)...those cookies just didn't get decorated for Cinco de Mayo.

You know what, though?  Guacamole is a year-round thing.  Please tell me you don't ONLY eat it for Cinco de Mayo.  People, it's vegetables that taste good!!!  (I know, I know...avocados are fruit, but they're green.  Work with me.)

holy guacamole cookie tutorial
The avocado with angel wings cookie is just an Easter egg cookie baked with angel wings on either side.  (Place the shapes right next to each other before baking.  They will fuse together.)  The angel wing cutters are from Truly Mad Plastics...and the egg is one I've had forever.  The wings are prone to breakage, though, so don't plan on shipping these cross-country.


To make Holy Guacamole cookies, you'll need:

holy guacamole cookie tutorial
Use a #4 tip to outline the avocado with the dark green icing. Use a #2 tip to outline the wings with white.  Reserve some of this white icing before thinning the rest.

Thin the lighter avocado and white icings with water, a bit at a time, stirring with a silicone spatula, until it is the consistency of a thick syrup.  You'll want to drop a "ribbon" of icing back into the bowl and have it disappear in a count of "one thousand one, one thousand two." Four is too thick, one is too thin.  Count of 2-3 is good.  Cover with a damp dishcloth and let sit for several minutes.

Stir gently with a silicone spatula to pop and large air bubbles that have formed.  Pour into squeeze bottles as needed.

holy guacamole cookie tutorial
Flood the outlines with the thinned icing.  Use a toothpick to guide to edges and pop large air bubbles.

Let the icing set for at least one hour.

Use the orange-brown icing to make a pit.  Outline with the piping consistency icing and then thin and flood as above.

With the white icing, add detail piping to the wings.

Let the cookies dry uncovered 6-8 hours or overnight.

holy guacamole cookie tutorial

Serve for dessert after eating the real thing.  Ole! 


Labels: