Tuesday, June 24, 2014

Desserts for Dudes: Yes, I'd like some fries with that.

So, dudes.  Over the years, we've made: fried chicken cookies (no, really), beer and hot dog cookies, french fry cookiesIt was time for the CHEESEBURGER COOKIE!!!
how to make stacked cheeseburger cookies ... so fun for a picnic or cookout dessert!

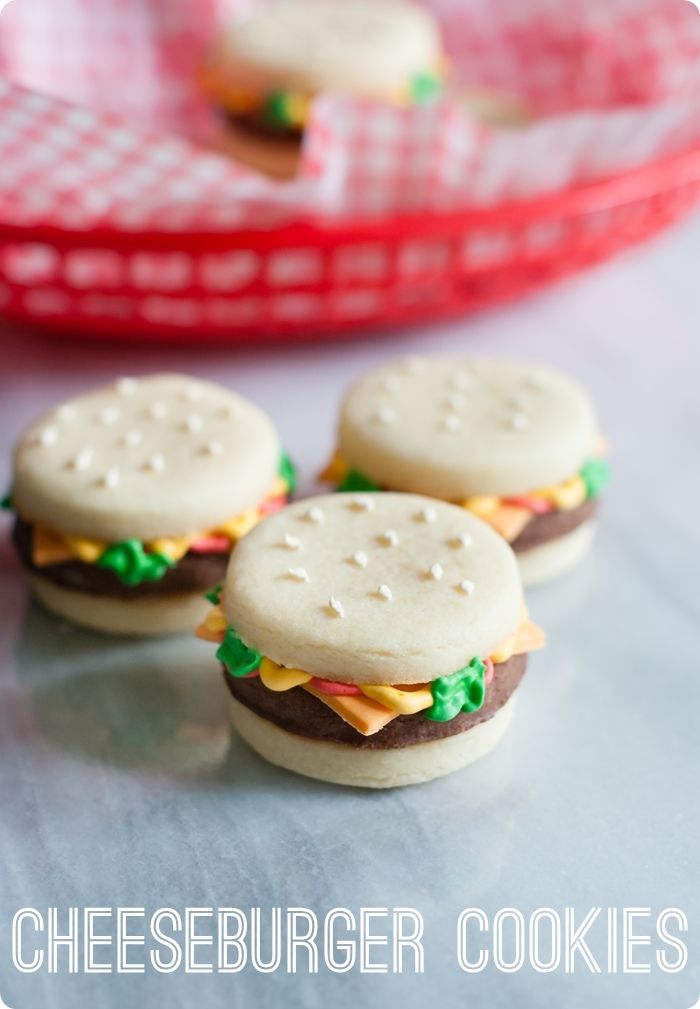
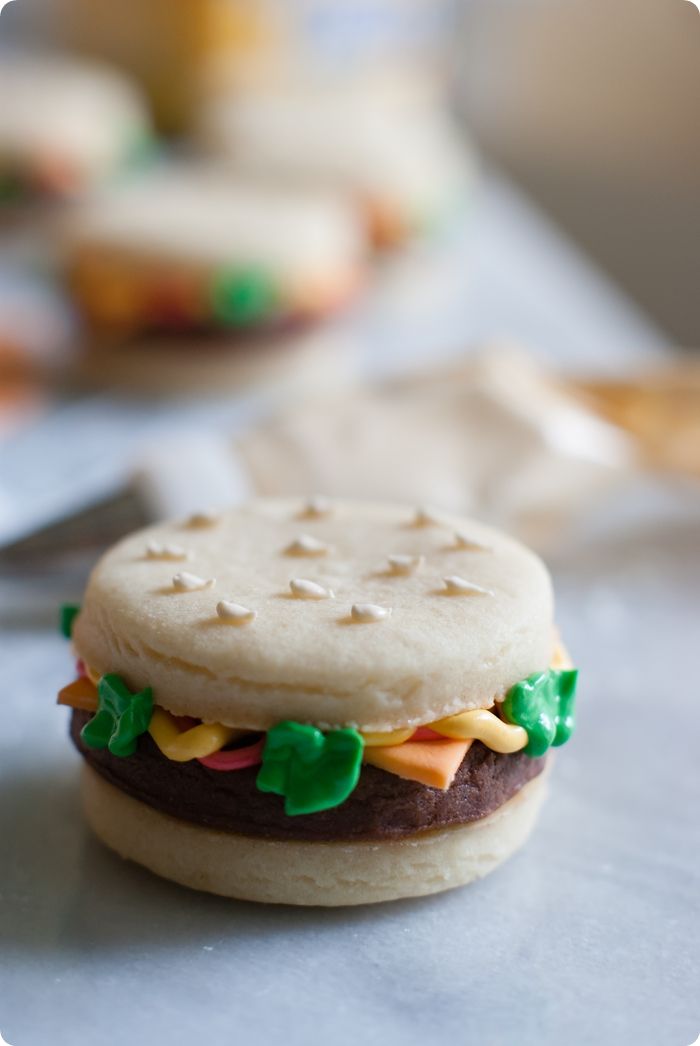
These cheeseburger cookies are made from not one, not two, but three cookies...all stacked together with a little icing and some fondant cheese.  

(Mmmm, fondant cheese. < please say that in a Homer Simpson voice.)

how to make stacked cheeseburger cookies ... so fun for a picnic or cookout dessert!
Angie, the cute dessert mastermind otherwise known as Bakerella, made some sweet cheeseburgers waaaaaay back in 2009 from cupcakes and brownies.  (I know.)  She also has cute little printable boxes to put them in.  That Angie...where would we be without her?

The cheeseburger cookies are really simple to make, especially if you bake the cookies the day before assembling.  If you have some frozen cookie dough stashed away in your freezer, all the better. 

how to make stacked cheeseburger cookies ... so fun for a picnic or cookout dessert!
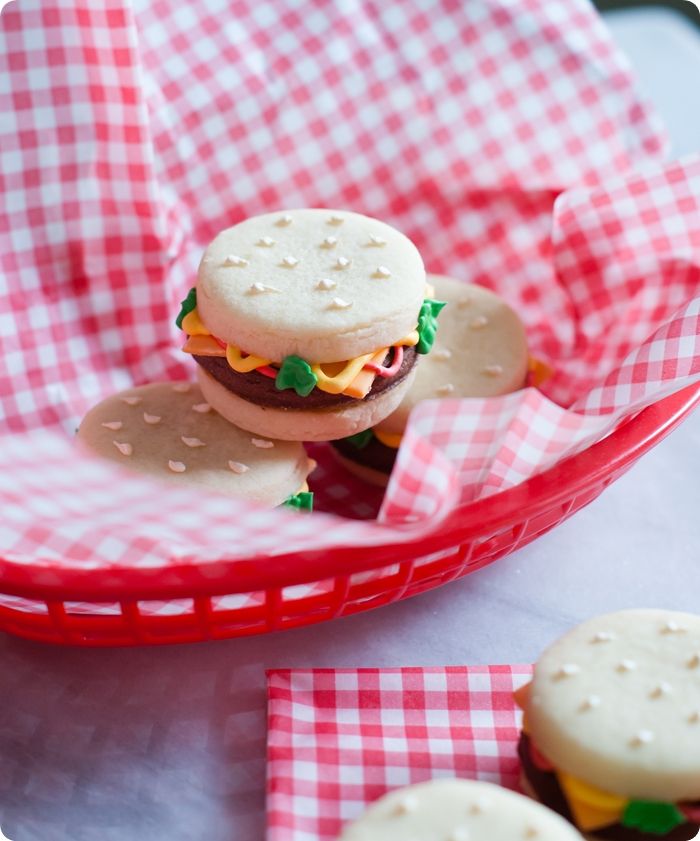
Make them in any size you'd like.  These cookies are 2" across.  Technically sliders, right? ;)

how to make stacked cheeseburger cookies ... so fun for a picnic or cookout dessert!
To make cheeseburger cookies, you'll need:
chocolate and vanilla cut-outs to make cheeseburger cookies
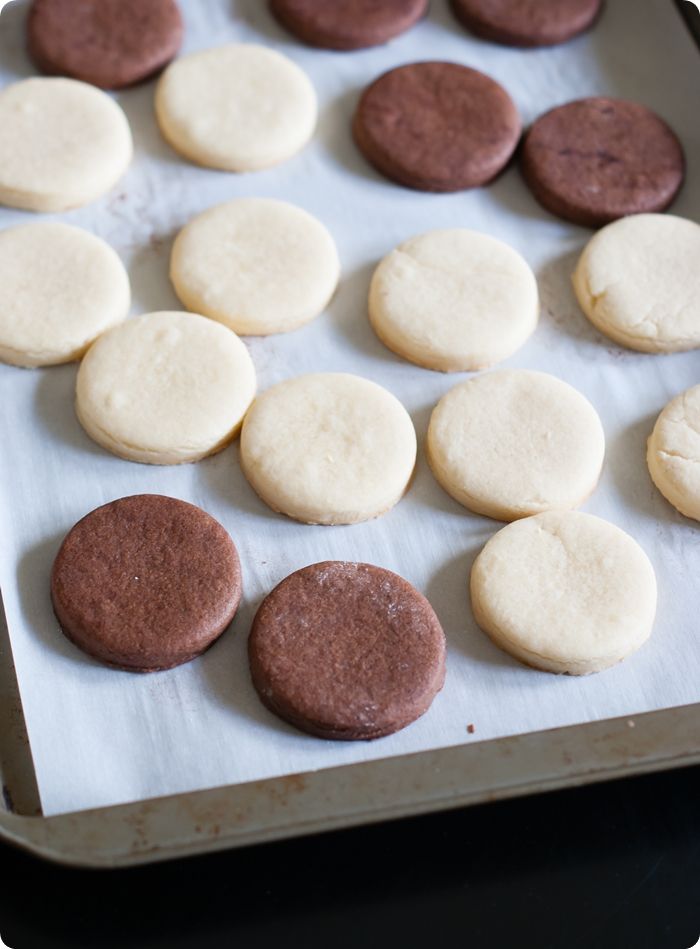
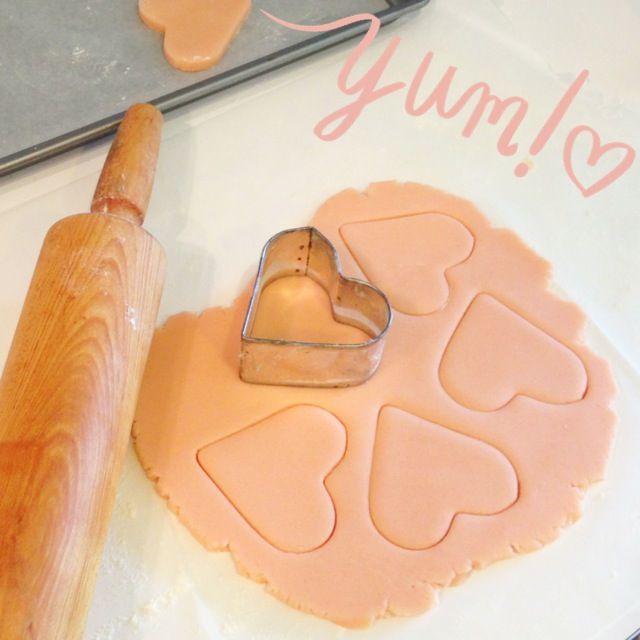
You'll want twice as many vanilla cookies as chocolate.  I rolled mine out to 1/4" thickness.

rolled fondant for cheeseburger cookies
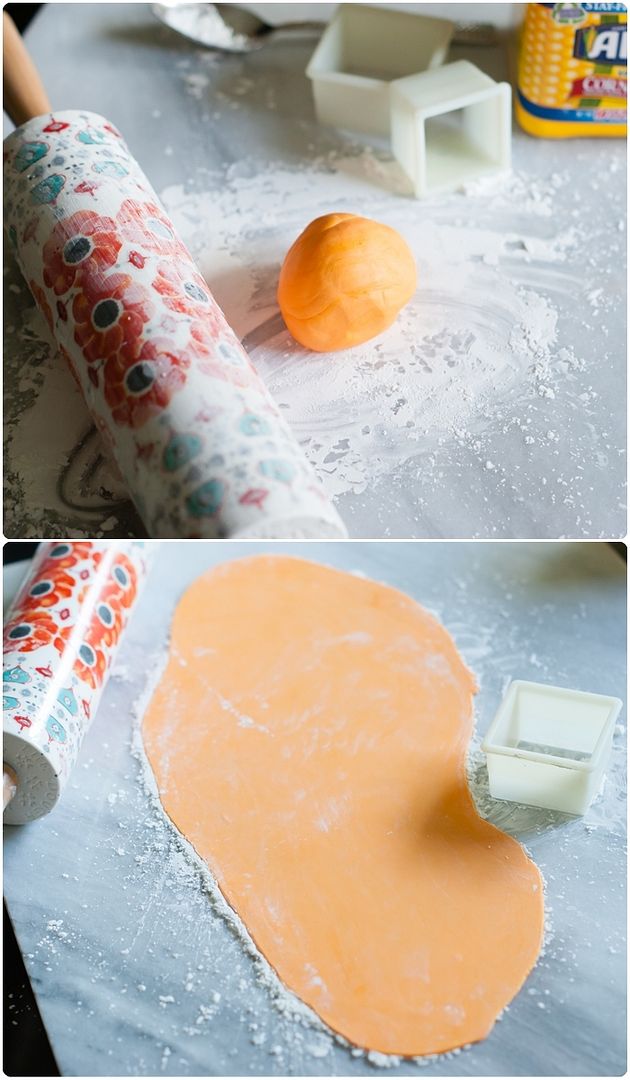
Roll the fondant on a cornstarch-dusted surface to about 1/8" inch, or thinner.  (Be sure to coat the rolling pin and cookie cutters, too.)

"american cheese slice" fondant for cheeseburger cookies
Cut squares out of the fondant to make cheese slices for the burgers.

cheeseburger cookies howhow to make stacked cheeseburger cookies ... so fun for a picnic or cookout dessert!  to photo hamburgercollage3.jpg
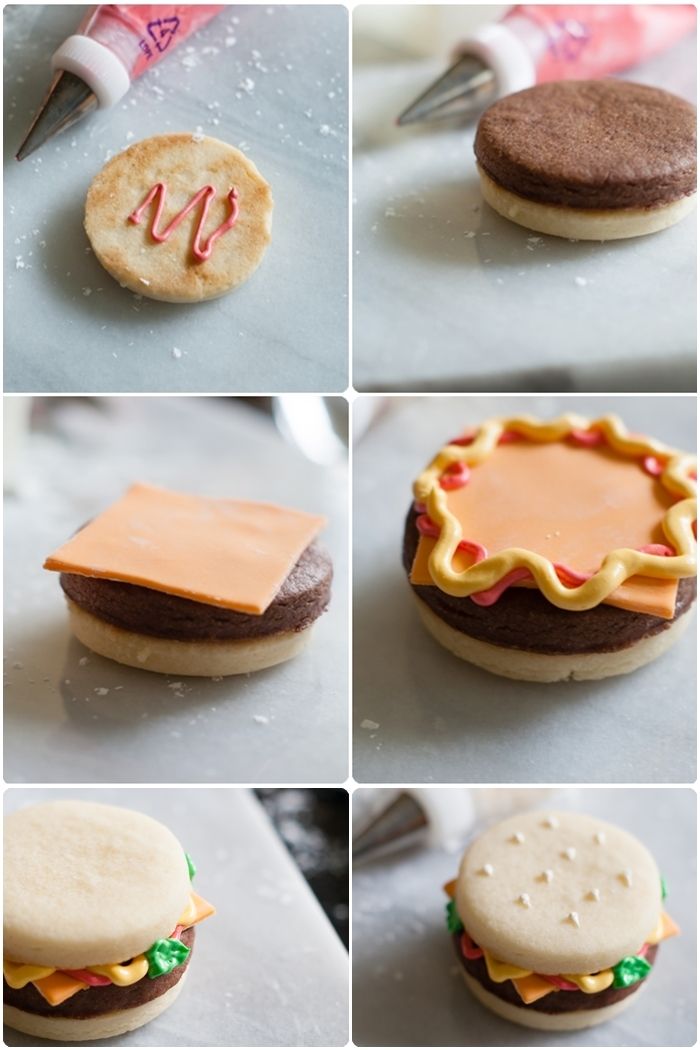
Place one vanilla cookie with the bottom facing up.  Squeeze on some royal icing in the center.  It doesn't matter what color, it's just to hold the "meat" in place. ;)

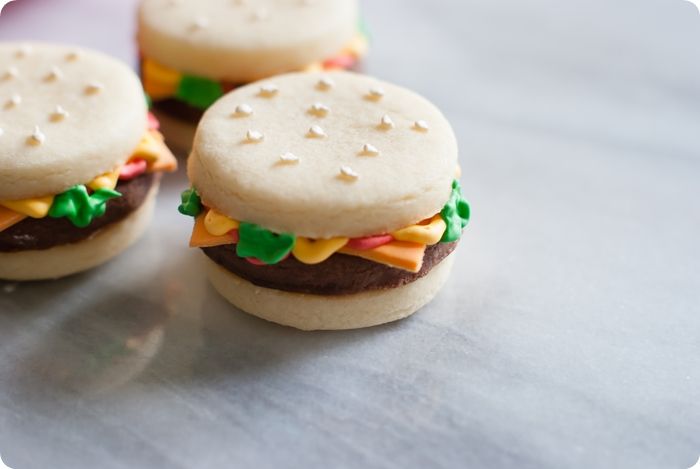
Place a chocolate cookie on top.  Add a bit of royal icing, then place on the cheese slice.

Pipe red and yellow icing around the edges of the cookies on top of the cheese.  I used a #2 tip for the ketchup and #3 for mustard.  More mustard, more better.

Lightly place another vanilla cookie on top.  Add lettuce around the edge of the cookie in green icing using a leaf tip.

how to make stacked cheeseburger cookies ... so fun for a picnic or cookout dessert!
Use a #1 tip to add sesame seeds with the ivory icing.  (Alternatively, add real sesame seeds to half of the vanilla cookies before baking.)

Let the icing set for at least 30 minutes before handling the cookies.

how to make stacked cheeseburger cookies ... so fun for a picnic or cookout dessert!
The only thing missing is the pickle. 

Labels: , , ,

Wednesday, July 24, 2013

Let it Snow(cone)!

Let it Snow(cone)! ::: snowcone cookies ::: bake at 350 blog
Um, it's hot outside.  You may have noticed.

I made these little snowcone cookies, but after running errands today (are parking lots the hottest places on earth?)...I'm thinking, maybe I made them too small.  As in, a BATHTUB full of snowcone sounds perfect right about now.

Let it Snow(cone)! ::: snowcone cookies ::: bake at 350 blog
Click on over to Parade where I'm sharing the tutorial.  The top of the cookie involves NO outlining, so there's no break between the colors.  I'll show you how.  They're so simple; you know how I love simple.  Don't tell, but I'll take a cookie over a real snowcone any day.  Shhh...

Come share your favorite snowcone flavor and get the full tutorial here. :)


Land Of Nod: Design for Kids and People That Used to be Kids

Labels: ,

Monday, July 15, 2013

Lighting up the night...

Do you have fireflies at your house?  We don't...and I miss them.

My favorite part of our summers in Alabama were right at dusk.  The bunnies ventured out and hopped across the yard while fireflies twinkled overhead.  Magical.

firefly and mason jar cookies ::: bake at 350

I grew up in this part of Texas, and I know we had fireflies.  What do you think it will take to bring them back?  Engraved invitations?  A signed pledge to never put them in a jar?  How about cookies?  Well, maybe they won't entice the fireflies, but they'll make me feel better.

firefly and mason jar cookies ::: bake at 350
All it takes to make these fireflies sparkle is a little disco dust.  This Hologram Gold disco dust is absolutely perfect.  Find it at your local bakery supply, Amazon or Copper Gifts.

firefly and mason jar cookies ::: bake at 350
Oh, and can we just pretend that fireflies look like this?  Literal translation of creatures in cookie form is not one of my gifts.   

To make firefly cookies, you'll need:
firefly and mason jar cookies ::: bake at 350
Use #2 tips to outline the cookies, sectioning off areas to be filled in different colors.

firefly and mason jar cookies ::: bake at 350
Thin the white, grey and blue icings with water, a bit at a time, stirring with a silicone spatula, until it is the consistency of a thick syrup.  You'll want to drop a "ribbon" of icing back into the bowl and have it disappear in a count of "one thousand one, one thousand two." Four is too thick, one is too thin.  Count of 2-3 is good.  Cover with a damp dishcloth and let sit for several minutes.

Stir gently with a silicone spatula to pop and large air bubbles that have formed.  Pour into squeeze bottles as needed.

firefly and mason jar cookies ::: bake at 350
Flood the outlines with the thinned icing.  Use a toothpick to guide to edges and pop large air bubbles.

Let the cookies dry for at least one hour.

Thin the yellow icing with water, but instead of using the "ribbon method" above, make it a bit thicker.  Run a knife through the icing, and when at the correct consistency, the line formed by the knife will disappear in 12-15 seconds.  Cover with a damp dishcloth and let sit for several minutes.

Stir gently with a silicone spatula to pop and large air bubbles that have formed.  Pour into an icing bag fitted with a #4 tip.

Pipe dots of the thinned yellow icing onto the jar.  Lightly swirl a toothpick in the center to dislodge any air bubbles.

Fill in the outline on the fireflies.

firefly and mason jar cookies ::: bake at 350
Add details to the cookies...
Use a #2 tips to add wing and body details to the fireflies.  Use a #1 tip to pipe the eye, mouth and antennae.

Use a #2 tip to add detail to the jar lid.

Let the cookies dry uncovered 6-8 hours or overnight.

firefly and mason jar cookies ::: bake at 350
The cookies are perfectly cute without disco dust.  If you don't have it, or don't want to use it...no problem.

BUT, if you want some serious sparkle on those little buggers...

Once the icing is completely dry, add the disco dust.  Mix together equal parts meringue powder and water.  Brush the mixture onto the yellow areas.  Sprinkle on the disco dust and shake of the excess over a basket-style coffee filter.  (Use as a funnel to pour the excess back into the container.)

Disco dust will stick even to dry areas, so use a dry paintbrush to brush it away.
firefly and mason jar cookies ::: bake at 350
{This is not the best picture of the process, but it helps to capture the brilliant sparkle of disco dust.}

firefly and mason jar cookies ::: bake at 350
Do you have fireflies in your yard?  Can you box some up and send them this way?!?


Labels: , ,

Monday, June 24, 2013

I heart watermelon...not really.

I admit it.  I don't like watermelon.
{Are we still friends?}
watermelon cut-out cookies  ::: bake at 350 blog
What if I told you that I like watermelon-FLAVORED food?  Are we friends again?

I made you some watermelon-flavored cut-out cookies...they're so yummy and the prettiest pink color. 
watermelon cut-out cookies  ::: bake at 350 blog
They're decorated up really simply, so you can whip up a batch quickly and bring them along on a summer picnic without much fuss.

I'm blogging about them over at Parade.  Come on over, grab the recipe, the tutorial...and a little more watermelon-dislike confession.  Ah, I feel so much better now.


Online Cake Decorating Class

Labels:

Thursday, May 31, 2012

Here Comes the Sun (flower)...

 
Sunflowers always make me smile.  I love that they are big and showy without being pretentious.  I love the contrast of dark and bright.  I love that they shout "SUMMER" but without making me think of putting on a bathing suit.

So, what better cookies to help ring in summer than sunflowers?!?  You might want to know where the cutter came from.  I don't know.  If I remember correctly, this is a cutter my neighbor gave me when we lived in Alabama. It was hers and she thought I might be able to put it to good use.
{She probably didn't think it would take 7 years.}
If you still have a few more days of school left, these make really sweet teacher gifts...at least, I hope they do because it's what kiddo's teachers are getting. ;)

First things first, sometimes it's hard to pipe a good circle.  (Actually, it's always hard for me.)
So, before these cookies baked, I lightly pressed a circle cutter into the dough to help with outlining.

Oh, and a deep brown color is sometimes hard to achieve without vast amounts of coloring.  I added just as *smidge* of black coloring to my brown...but just a smidge, though.  It can go from brown to black very quickly. 

To make the sunflower cookies, you'll need:

Use a #2 tip to outline the center of the sunflowers with brown icing.

Use a #2 tip to outline the petals in yellow.  Don't worry about doing each on individually now, you'll pipe over them later.  Plus, small filled spaces can sometimes collapse and crack. (Reserve some of this piping consistency yellow icing.)

Thin the brown and yellow icings with water, a bit at a time, stirring with a silicone spatula, until it is the consistency of a thick syrup.  You'll want to drop a "ribbon" of icing back into the bowl and have it disappear in a count of "one thousand one, one thousand two." Four is too thick, one is too thin.  Count of 2-3 is good.  Cover with a damp dishcloth and let sit for several minutes.

Stir gently with a silicone spatula to pop and large air bubbles that have formed.  Pour into squeeze bottles as needed.

Flood the centers with brown icing.  Use a toothpick to guide to edges and pop large air bubbles.

Flood the rest with yellow icing.  Use a toothpick to guide to edges and pop large air bubbles.

Let the cookies dry for at least one hour.

Use a small star tip to pipe green detailing around the center of the cookie.  Use a pulsing motion going around the cookie to create the "ruffle."

Use a #2 tip to add details to the flower petals.

Let the cookies dry uncovered 6-8 hours or overnight.

The next day, mix together equal amounts meringue powder and water.  Brush on the center of the cookies and shake on the chocolate sprinkles.  Shake off the excess.

{My original thought was to use chocolate covered sunflower seeds for the centers.  Do you know how hard it is to find BROWN chocolate covered sunflower seeds?  Well, it's hard.  Therefore, Chocolate Vermicelli. I kind of love it, too.} 
{They're like thin, delicate jimmies...and they taste really good and chocolatey.}


I hope your summer is filled with sunflowers...the real AND the cookie versions!


Labels: , ,

Saturday, September 10, 2011

So Long, Summer.

Dear Summer,  
this is what you're supposed to be about, right?
{darling camper found via Jen's pinterest board & from this blog}

Tooling around the country with a cute little vintage camper?  Visiting national parks, roasting hot dogs, making s'mores?

You are NOT supposed to be about massive flooding, wildfires, and drought.
 
So long, summer.  This is the end of the road; we're breaking up.  I'll miss your delicious tomatoes and juicy, sweet peaches.  But still, we're through.  It's not me, it's you.

My new love Fall will be along any day.  And guess what?  We're going camping.
 

Well, at least we're making camping cookies.

To make the vintage-y camper cookies, you'll need:

  • camper-shaped cookies (I used a template)
  • royal icing tinted with AmeriColor Super Black, Turquoise mixed with Leaf Green, Bright White, and Super Red
  • disposable icing bags
  • couplers and tips: #2, #1 
  • squeeze bottles
  • toothpicks
 
First, with a #2 tip, pipe a wheel on the camper.
{Yes, the cookies are speckled...a recipe I'll share with you *someday.*  <<< that's called a teaser.}

Outline the campers in black, using a #2 tip.

Since we're working with black, give it a little extra time to dry.  I outlined the cookies, folded laundry and ran to the grocery store before filling.

Thin the white and green icings with water, a little at a time, until it is the consistency of thick syrup.  Cover with a damp dishtowel and let sit several minutes.

Stir gently with a rubber spatula to pop any large air bubbles that have formed. Transfer to squeeze bottles.

Fill in the camper with the thinned icings.  Use a toothpick to guide into corners, edges and pop any air bubbles.

Let the cookies sit for at least 1 hour. Again, since we're working with black, I'll give it a little more time.  Go for a walk, play a board game, watch Real Housewives...give the flood at least an hour to set.

Use a #1 tip to pipe the window in black.

Use a #2 tip to add details in red.

 
 {Thanks to Jen for the camper inspiration!}

See ya next year, Summer.

Labels: ,