Thursday, July 10, 2014

Pineapple Cookies, three ways : Color Challenge...yellow

It's Color Challenge time, you guys!!! 
This time, the inspiration color was a sunny yellow for summer.
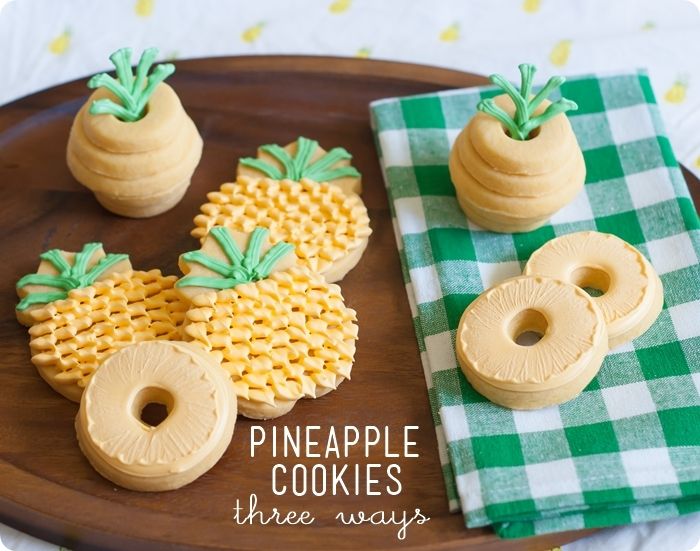
pineapple cookies, 3 ways ::: tutorial for making each from @bakeat350
I really had "sunshine cookies" on the brain, but then it hit me...pineapples!!!  Not just one, or two, but THREE version of pineapple cookies.  Yes, I've gone pineapple crazy. 


(And, maybe it has a little something to do with getting to work with Kelly again.) ;) 
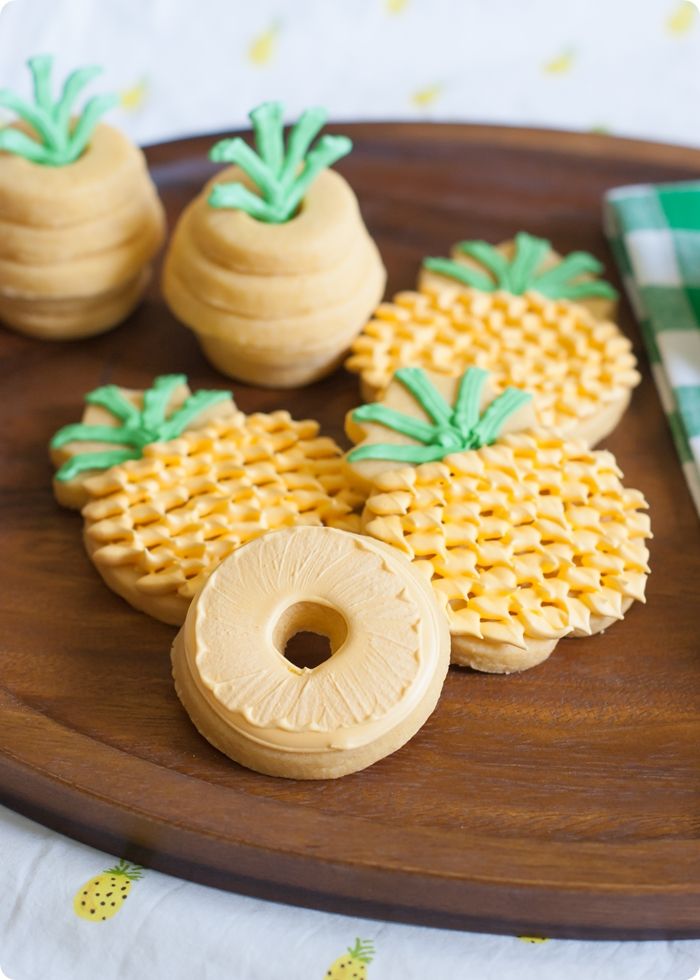
pineapple cookies, 3 ways ::: tutorial for making each from @bakeat350
The funny thing about making these happy, sunny little cookies this week is that they really matched the mood around here.  You know, sunshine and roses and all that good stuff.  My boys introduced me to Monty Python.  Well, actually, just the song "Always Look on the Bright Side of Life."  I've been singing (and whistling) it all week long. 

I realize the song is a parody, but it still does make me happy.  Even today, when I was getting nervous for America's future when the girl at the yogurt shop couldn't make change...my total was $9.07; I gave her $10.10...I started whistling the song in my head.  I'M SERIOUS!  This may change my entire outlook on life. 

Alright. Back to our sunny, yellow, little pineapples.  Let me walk you through them...

For all of the cookies, you'll start with a basic cut-out cookie dough.  I tinted the dough yellow.  Either add some yellow food coloring (I like this one) in with the egg and extracts, or knead it in once it's made.
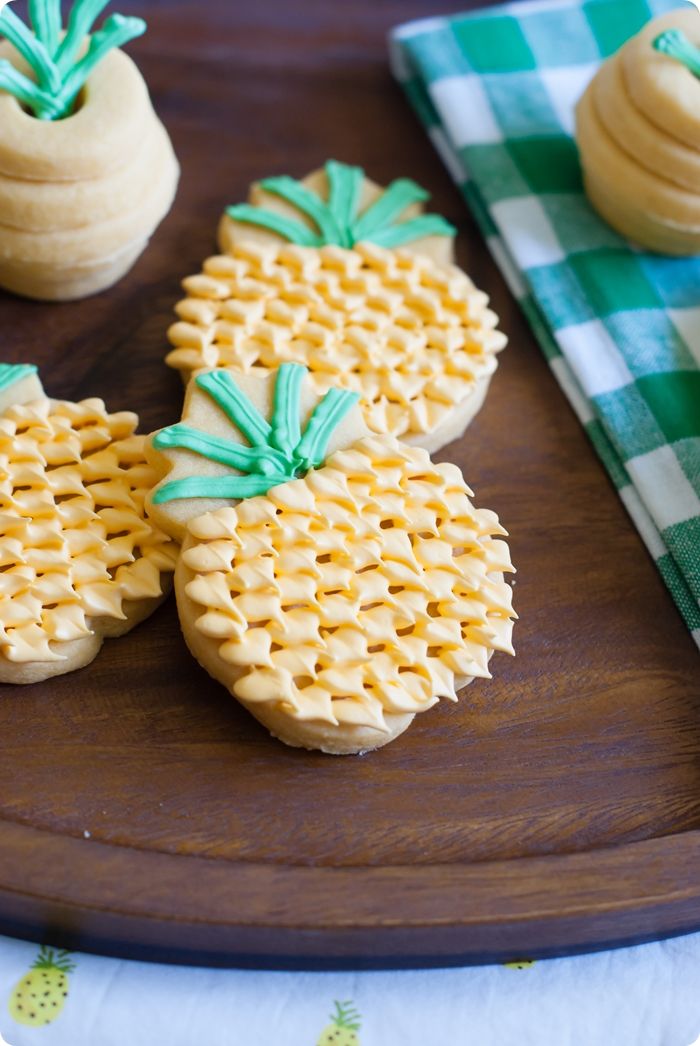
pineapple cookies, 3 ways ::: tutorial for making each from @bakeat350
For the spiky royal icing pineapples, you'll need royal icing! (Bet you guessed that.)  Make up 1/2 of this recipe.  Divide it and tint with AmeriColor Leaf Green and Egg Yellow.
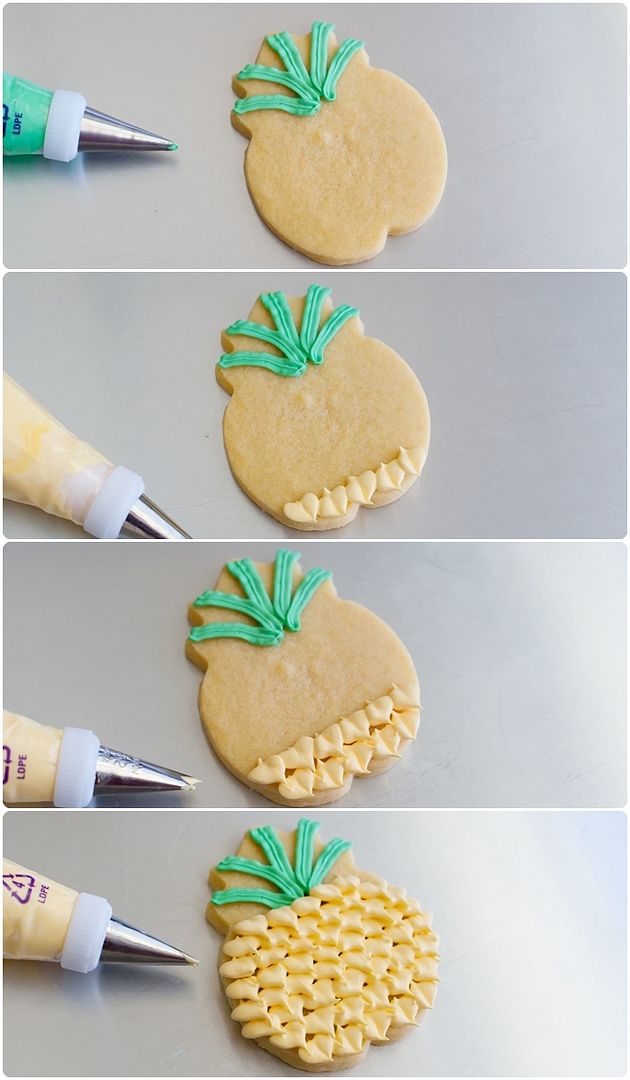
pineapple cookies, 3 ways ::: tutorial for making each from @bakeat350
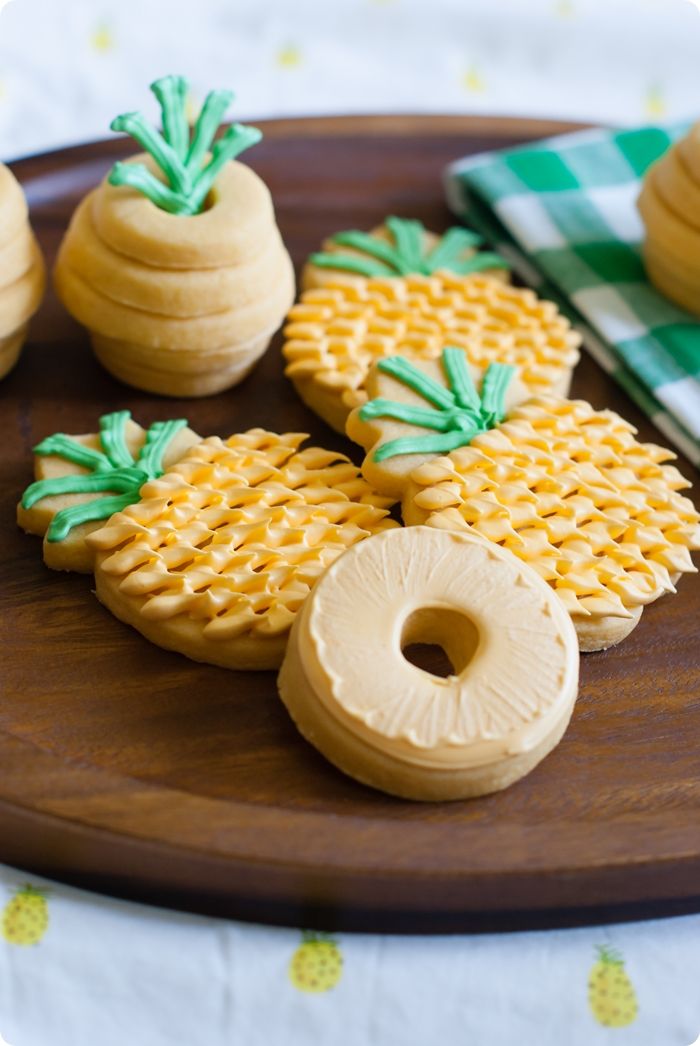
Use a leaf tip to pipe leaves onto the pineapples in green.  Use another leaf tip to pipe the little "spikes" across the cookies, starting on the bottom.
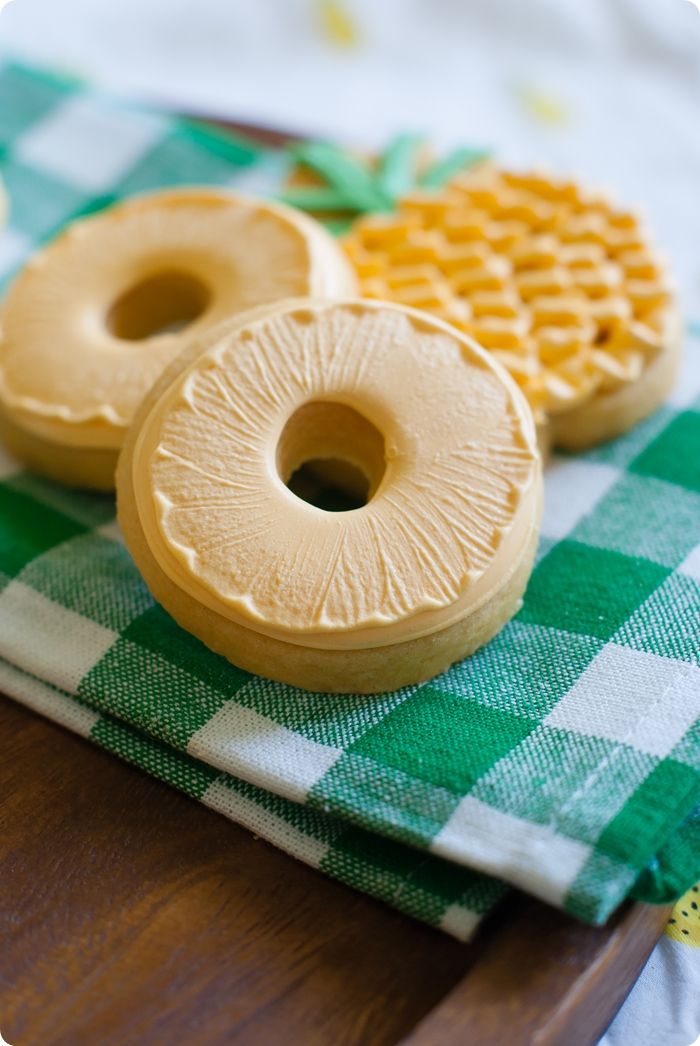
pineapple cookies, 3 ways ::: tutorial for making each from @bakeat350
For the rings, you'll also need royal icing, just in yellow.

Bake the circle cookies, cutting out a center circle.  Once cooled, outline the cookie with the tinted royal icing, using a #2 tip.

To thin icing, stir in water a little at a time, until it is the consistency of a thick syrup.  When you drop a ribbon of icing back into the bowl, it should disappear back into the icing in a count of one-thousand-one, one-thousand-two.  One-thousand-three is ok, four is too thick.
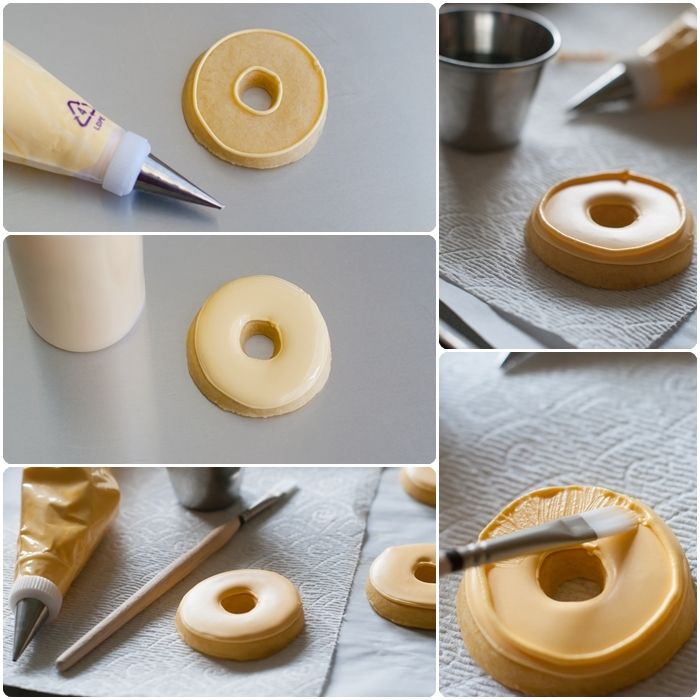
 photo pineapples3waysringtutorialcollage.jpg
Cover the icing with a damp dishtowel for a few minutes to let large air bubbles rise to the surface.  Stir gently, then transfer to a squeeze bottle.  Fill in the outline with the thinned icing, using a toothpick to guide to the edges and pop any large air bubbles that may form.
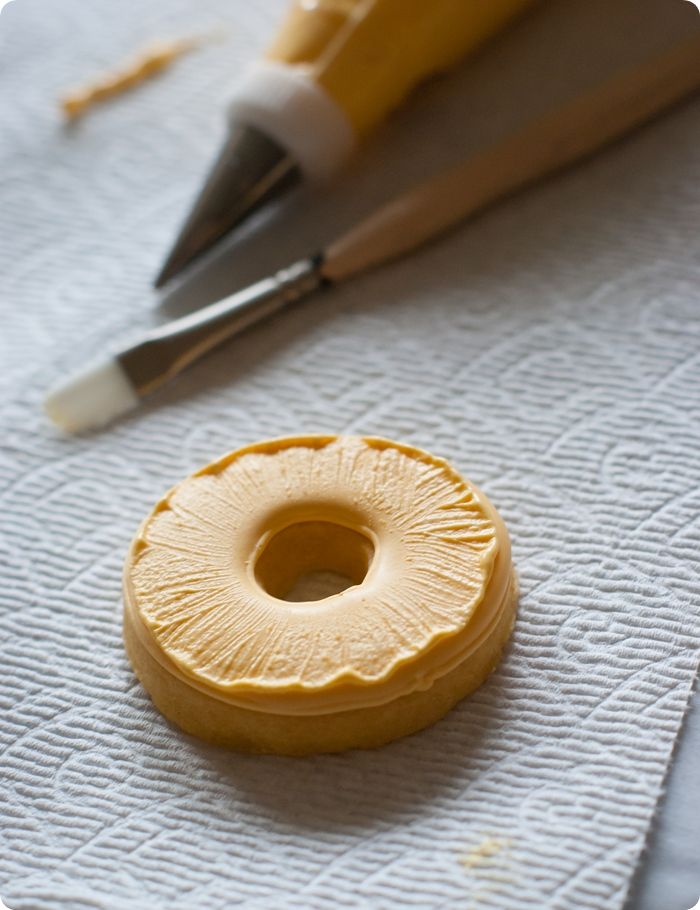
pineapple cookies ring finished photo pineapples3waystutorial16of24.jpg
Let the cookies dry for 6-8 hours, or overnight.  Once dry, pipe a circle inside the edge of the circle.  Dip a flat (food only) paintbrush in water and blot well on a paper towel.  Drag the icing with the paintbrush towards the center of the cookie.  Repeat all the way around, wiping and re-dipping the paintbrush as necessary.
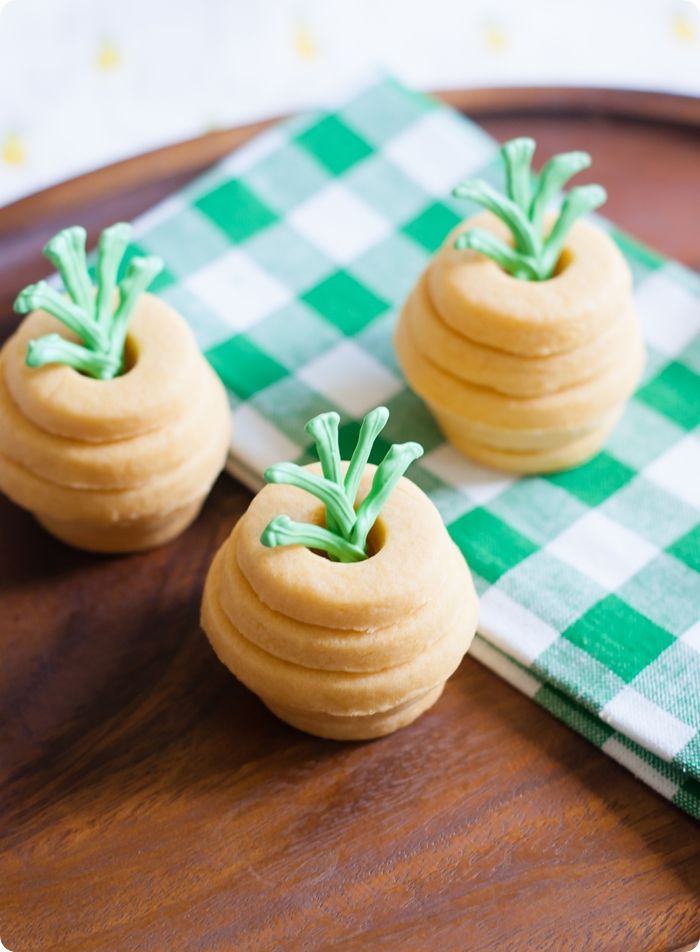
pineapple cookies, 3 ways ::: tutorial for making each from @bakeat350
For the stacked pineapples, first make the leaves.  Use green royal icing and a leaf tip to pipe leaves onto a sheet of waxed paper.  Let dry completely (several hours or a few days before).  Peel the leaves gently off of the paper.

pineapple cookies stack 1 photo pineapples3waysstackedtutorialcollage1.jpg
Bake circle-shaped cookies in 3 sizes: 2 small, 2 medium, and 1 large.  Cut out a center circle on each. (For small cookies, the end of an icing tip works well here.)
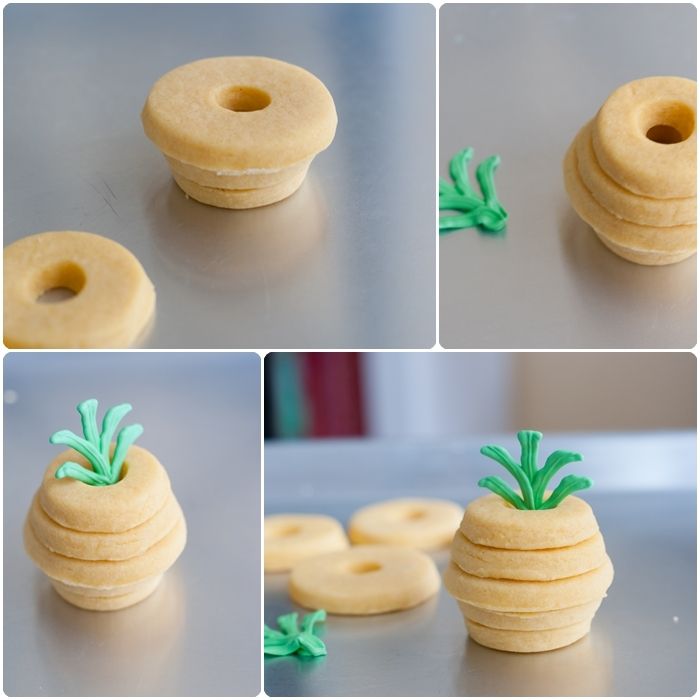
pineapple cookies stack 2 photo pineapples3waysstackedtutorialcollage2.jpg
Stack the cookies: small, medium, large, medium, small.  Add the leaves in the center.  If you'd like, add a bit of royal icing in between the layers.  I skipped this part to make them easier to share.
pineapple cookies, 3 ways ::: tutorial for making each from @bakeat350

Now, go see what these other lovely ladies are doing with the color yellow!  
Yay, yellow!!!  Click the pictures below!
Image Map

Labels: ,

Tuesday, March 25, 2014

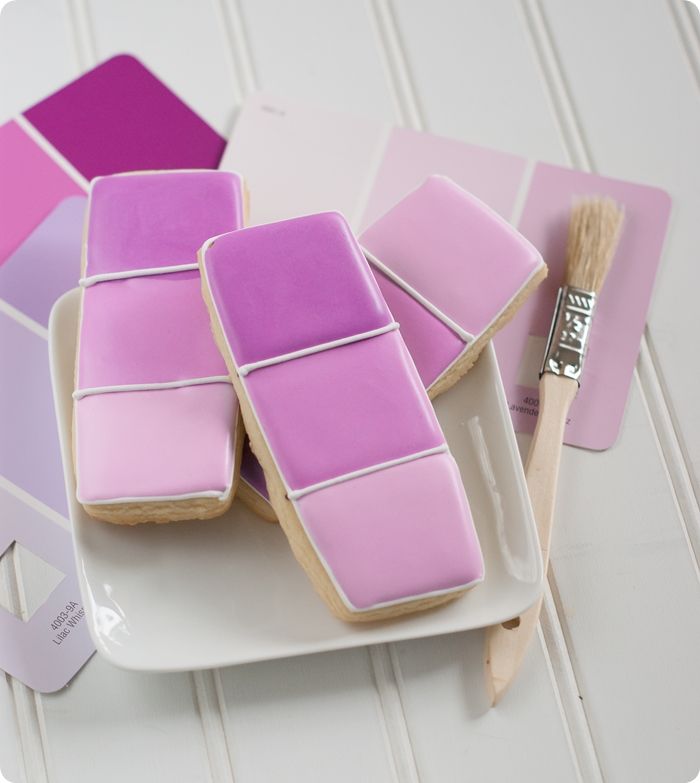
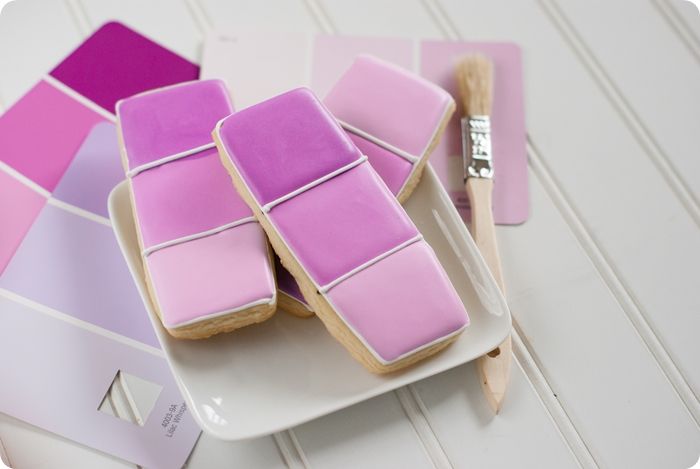
Pantone 2014, Radiant Orchid Paint Chip Cookies: Color Challenge!


When Radiant Orchid was announced as the Color of the Year for 2014, I wasn't sure what to think.  
radiant orchid paint chip cookies ... pantone of the year 2014
I LOVE color.  LOVE.  (I have a bright yellow piano in my family room. Like I said, I love color.)  I just wasn't sure "Radiant Orchid" had a place in my life.

That is, I wasn't sure until I started looking at all of the tones of Radiant Orchid.  It's really beautiful.  Maybe it doesn't fit in my house, but a handbag?  A pair of shoes?  An eyeshadow?  Cookies?   
Yes.  I'm sold!

radiant orchid paint chip cookies ... pantone of the year 2014
When Mandi suggested our next Color Challenge be "Lilac" or "Radiant Orchid" for spring, I knew exactly what I wanted to make.  I've made paint chip cookies before, and always had in the back of my mind that I wanted to make them again.  Before I knew it, six years had gone by and I'd never gotten around to it.  TIME FLIES, doesn't it?!?  *sigh*

radiant orchid paint chip cookies colors photo paintchipradiantorchidmaking-2.jpg
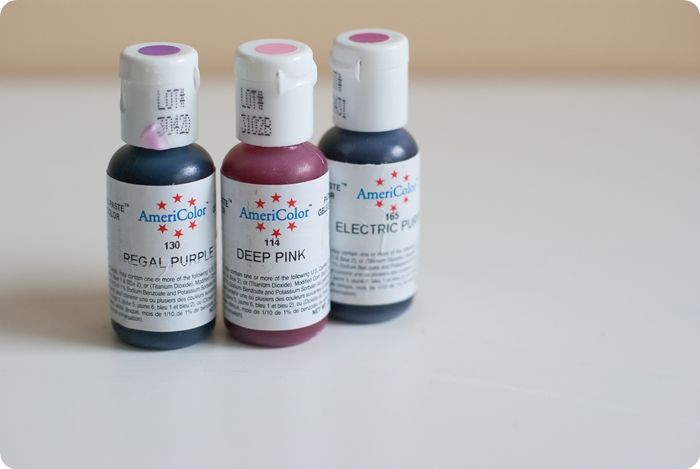
OK...to make Radiant Orchid royal icing, you'll need a few AmeriColor food colorings
I used equal parts (I eyeballed it, no measuring) Deep Pink, Electric Purple, and Regal Purple.

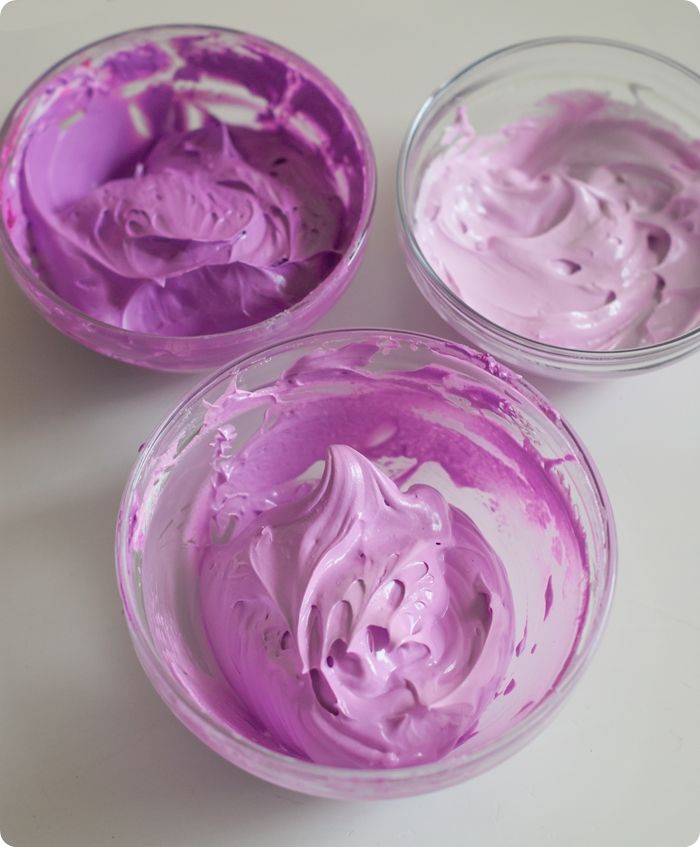
radiant orchid paint chip cookies icing photo paintchipradiantorchidmaking.jpg
I started with the middle shade, then scooped some of it into one bowl and stirred in more plain icing to lighten it.  I scooped some more into another bowl, then added more food coloring for the deeper shade.

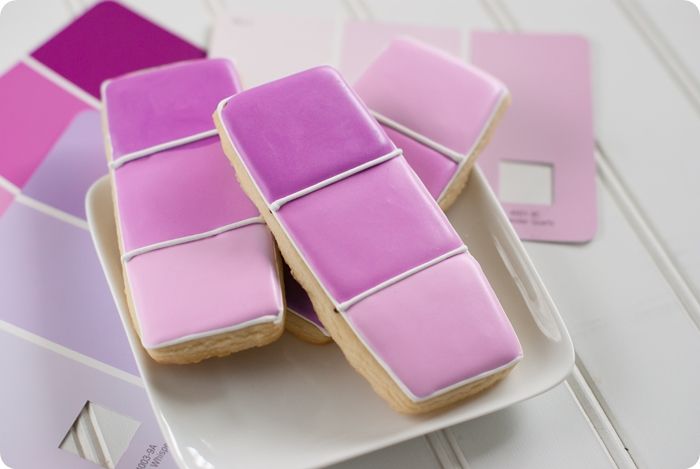
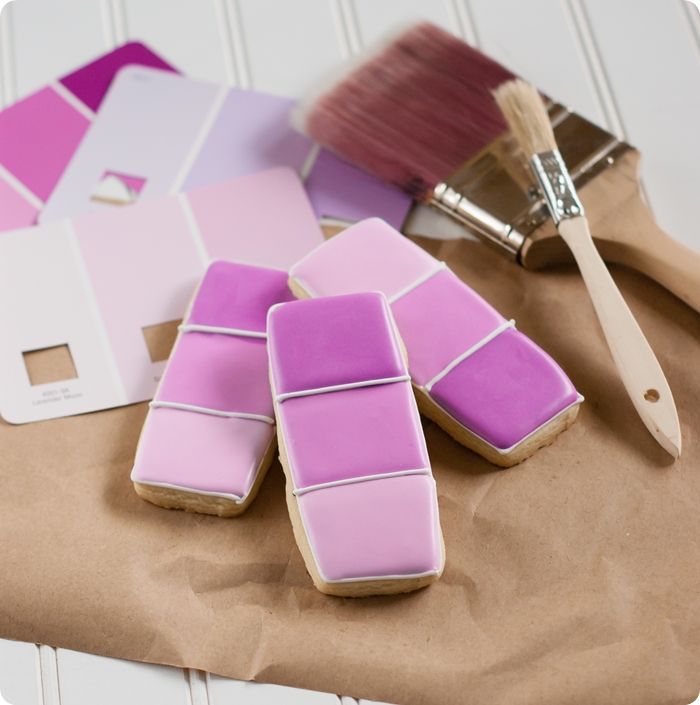
The cookies are easy.  I used my crayon cookie cutter for the long rectangle, and lopped off the pointy end.  Before I divided the cookies into sections with icing, I used a food coloring pen to mark on the cookie where I wanted to the lines to go.
radiant orchid paint chip cookies photo paintchipradiantorchid.jpg
If you look closely at that front cookie, you can see a little of that food coloring pen mark peeking out from the icing.  Shhh....don't tell.

radiant orchid paint chip cookies paper photo paintchipradiantorchid2of6.jpg

Alright, be sure to check out all of the fabulous ladies and their homages to Radiant Orchid (or Lilac).  I think it'll grow on you, too!

Image Map


Labels: ,

Monday, December 16, 2013

Gold-Adorned Christmas Wreath Cookies: Color Challenge

Hey guys!  Remember the first color challenge...the color was bright pink?  Well, this time, the color is GOLD!!!
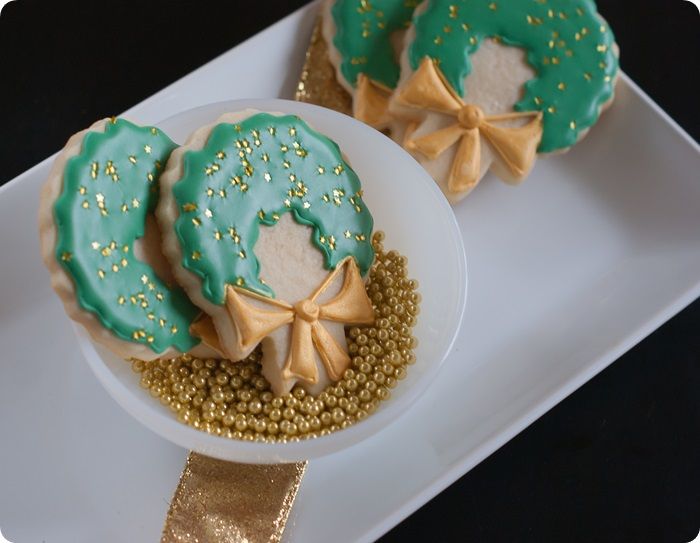
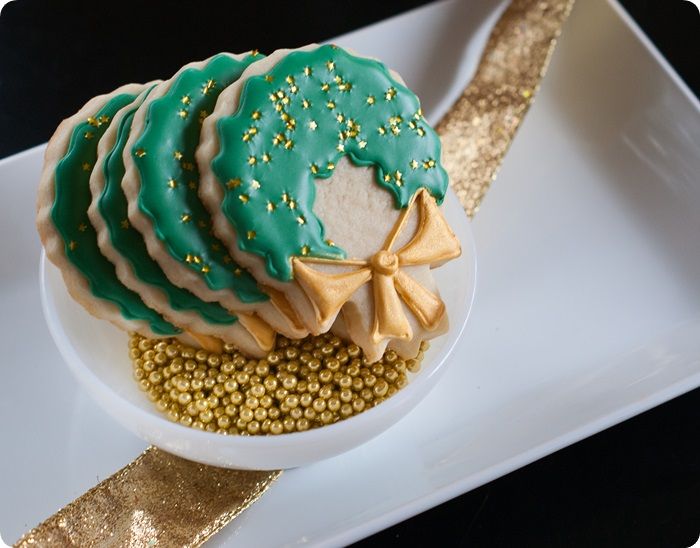
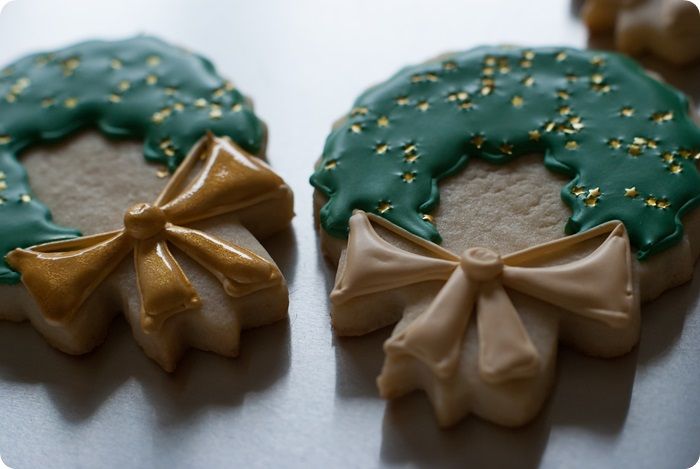
gold-adorned christmas wreath cookies
Gold screams "fancy;" it does (!), but I wanted to incorporate gold into cookies in a super simple way.  I know I say this all the time, but I love a simple cookie.  It leaves more time for eating.

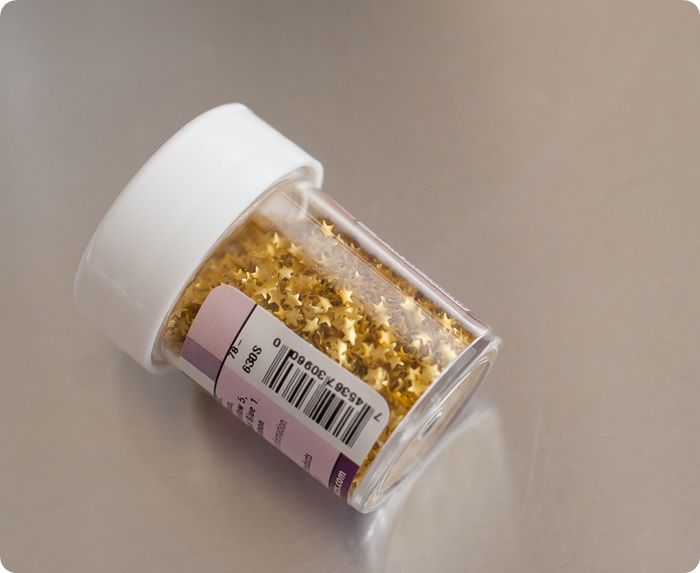
These gold-adorned wreath cookies incorporate gold in two ways: 1. edible gold star glitter (!!!), and 2. a gold luster dust bow.
gold-adorned christmas wreath cookies
To make them, you'll need:

 photo wreathswithgoldtutorial1of3.jpg
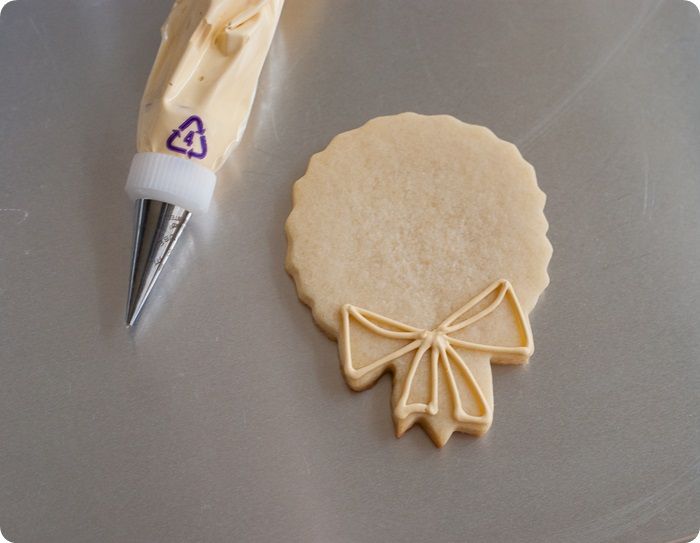
With a #2 tip, outline the wreath bow in gold icing.

 photo wreathswithgoldtutorial2of3.jpg
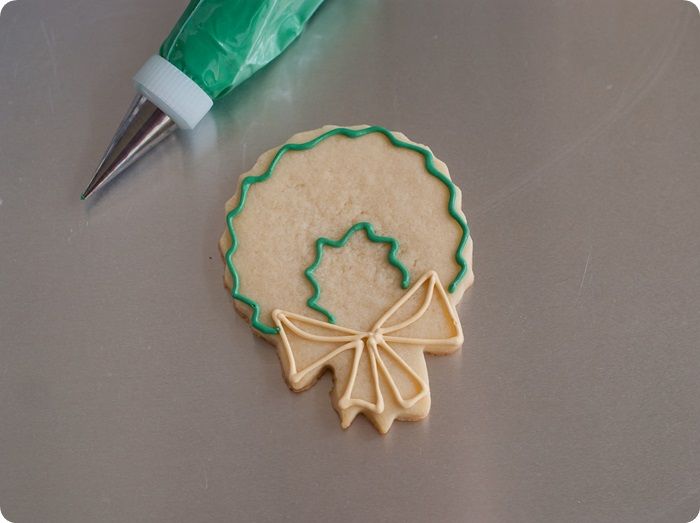
With another #2 tip, outline the wreath in green icing.

Thin the green & gold icings (reserve a bit of gold for later) with water, a bit at a time, stirring with a silicone spatula, until it is the consistency of a thick syrup.  You'll want to drop a "ribbon" of icing back into the bowl and have it disappear in a count of "one thousand one, one thousand two." Four is too thick, one is too thin.  Count of 2-3 is good.  Cover with a damp dishcloth and let sit for several minutes.

Stir gently with a rubber spatula to pop any large air bubbles that have formed. Transfer to squeeze bottles.

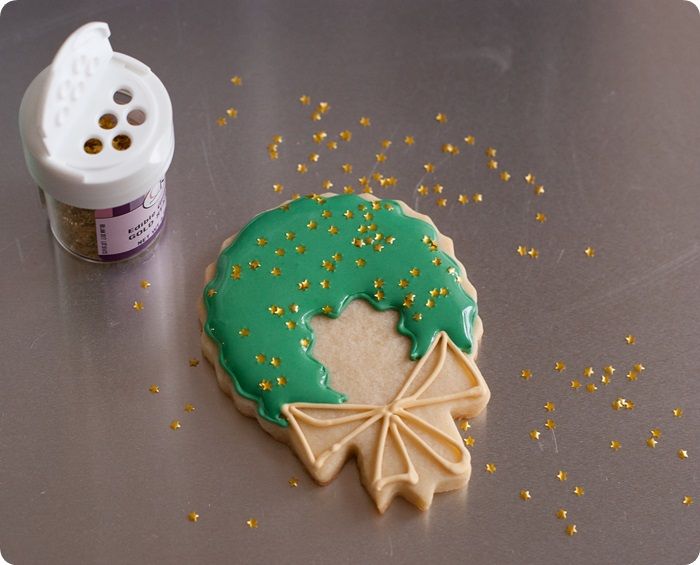
Fill in the wreath with the thinned green icing.  Use a toothpick to guide into corners and pop large air bubbles.
 photo wreathswithgoldtutorial3of3.jpg
Add the star sprinkles.

Fill in the bow with the thinned gold icing.  Let dry at least one hour.

Let dry at least one hour.

With a #2 tip add a center to the bows.

Let the cookies dry uncovered 6-8 hours or overnight.

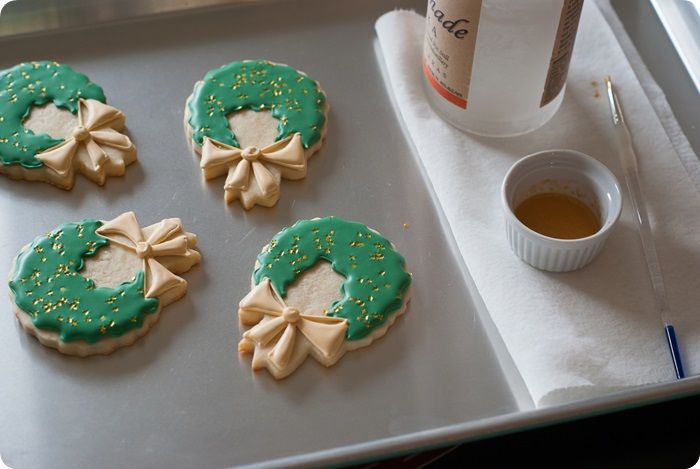
Get out your luster dust supplies:  Luster dust, small ramekin, small paintbrush and vodka (a good excuse to always have vodka in the house).
gold wreaths luster dust photo wreathswithgold1of5.jpg
Mix up your luster dust with a few drops of the vodka and brush it on. (The alcohol will evaporate, leaving just the gold sheen.)  Add a few drops of vodka to the ramekin as you're working if it starts to get clumpy on you.  A little goes a long way, so don't worry about using all of the container in one shot.

gold wreaths difference photo wreathswithgold2of5.jpg
You can see here the difference between the plain iced bow (right) and the luster dust bow (left).

edible gold star glitter for cookies
I hope you'll add some gold to your holiday cookies this year!

Now, go check out the other GOLD color challenge blogs.  These ladies are SO talented!!!  
Image Map
color challenge gold photo WinterColorChallenge700.jpg

Labels: ,

Wednesday, September 18, 2013

Color Challenge: Bright Pink for Fall

Welcome to the first installment of the Color Challenge!!! 

Color Challenge ::: 7 bloggers, one color, endless creativity!

Spearheaded by the uber-fabulous, uber-cool Mandi, of Vintage Revivals, seven bloggers from different niches (fashion, beauty, home, organizing, DIY, parenting...you get the idea) are incorporating a certain color into their "medium."

Today's challenge color: BRIGHT PINK!!! 
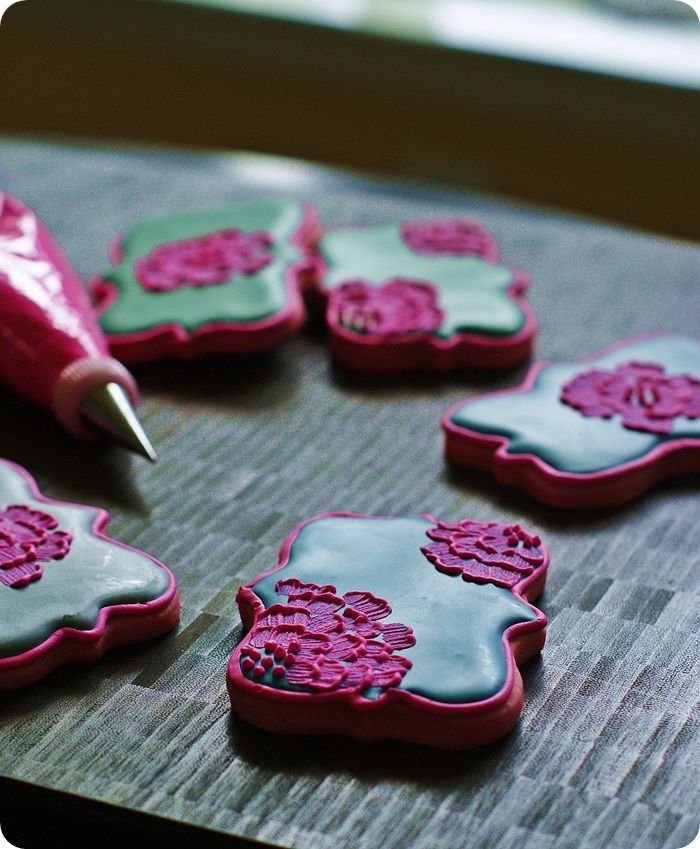
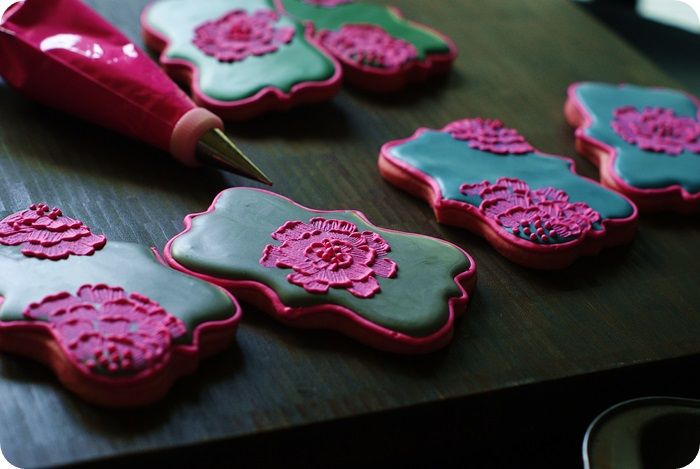
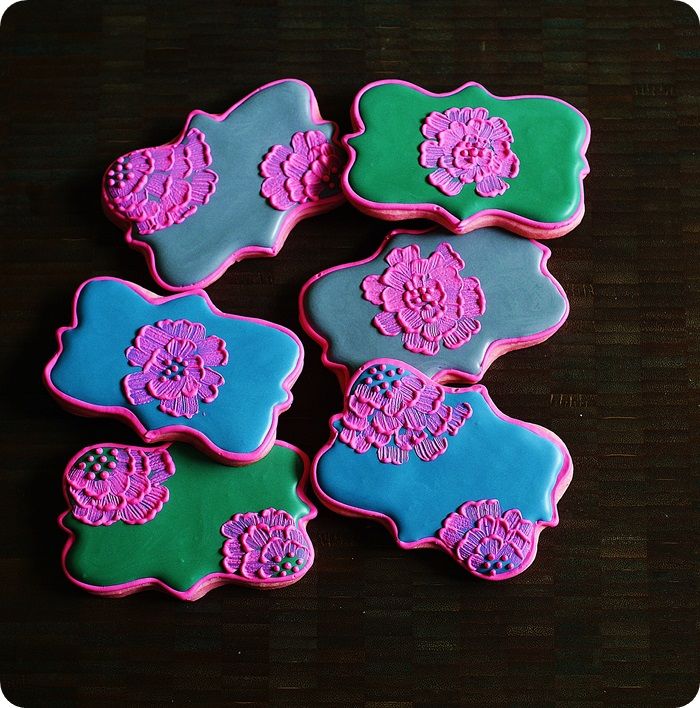
color challenge: bright pink cookies for fall :: bake at 350 blog
My mind immediately went to summery and bright cookies, but since we're heading into fall, I wanted to bring in those deep, rich tones that really make pink POP!

color challenge: bright pink cookies for fall :: bake at 350 blog
The cookie design itself is simple; I know, it looks fancy.  The technique is called brush embroidery.  I waited years before trying it because I can't sew and the word "embroidery" scared me.  Trust me, this is a perfect cookie for beginners!  (Sewing skills not required.)

color challenge: bright pink cookies for fall :: bake at 350 blog
You could make the design on any shape cookie...square, round, hearts. I chose this awesome plaque cookie cutter from Copper Gifts.

Adding a little black food coloring to the green and navy icing adds a bit of depth and darkness. Add it a bit at a time to avoid turning the icing totally black.  I use a toothpick to dip into the food coloring and then into the icing.

To tint the cookie dough, add in pink gel paste food coloring along with the eggs in the cookie recipe.  Once the flour is added, if the dough needs more color, knead it in by hand.  Don't worry, the pink will wash off of your hands.

To make these Bright Pink brush embroidery cookies, you'll need:
color challenge: bright pink cookies for fall :: bake at 350 blog
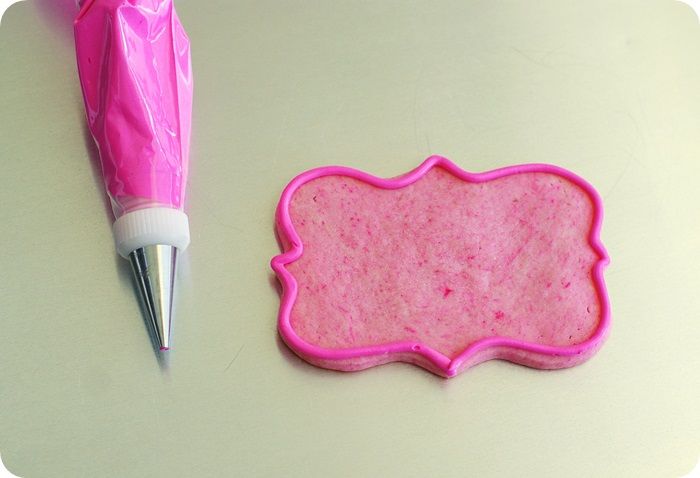
Outline the cookies in pink using a #4 plain tip.  Since we're filling with dark colors, let the outline sit for 30 minutes to an hour before filling to prevent bleeding.

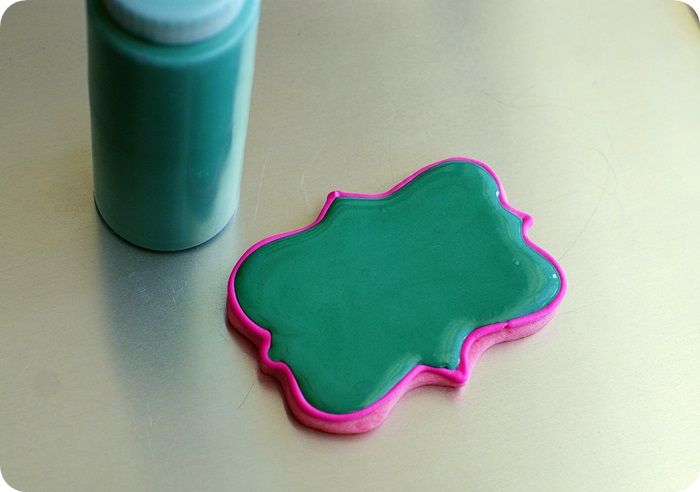
Thin the remaining icings with water, a bit at a time, stirring with a silicone spatula, until it is the consistency of a thick syrup.  You'll want to drop a "ribbon" of icing back into the bowl and have it disappear in a count of "one thousand one, one thousand two." Four is too thick, one is too thin.  Count of 2-3 is good.  Cover with a damp dishcloth and let sit for several minutes.

Stir gently with a silicone spatula to pop and large air bubbles that have formed.  Pour into squeeze bottles.

color challenge: bright pink cookies for fall :: bake at 350 blog
Fill in the outlines with the thinned icing. Use a toothpick to guide to edges and pop large air bubbles.

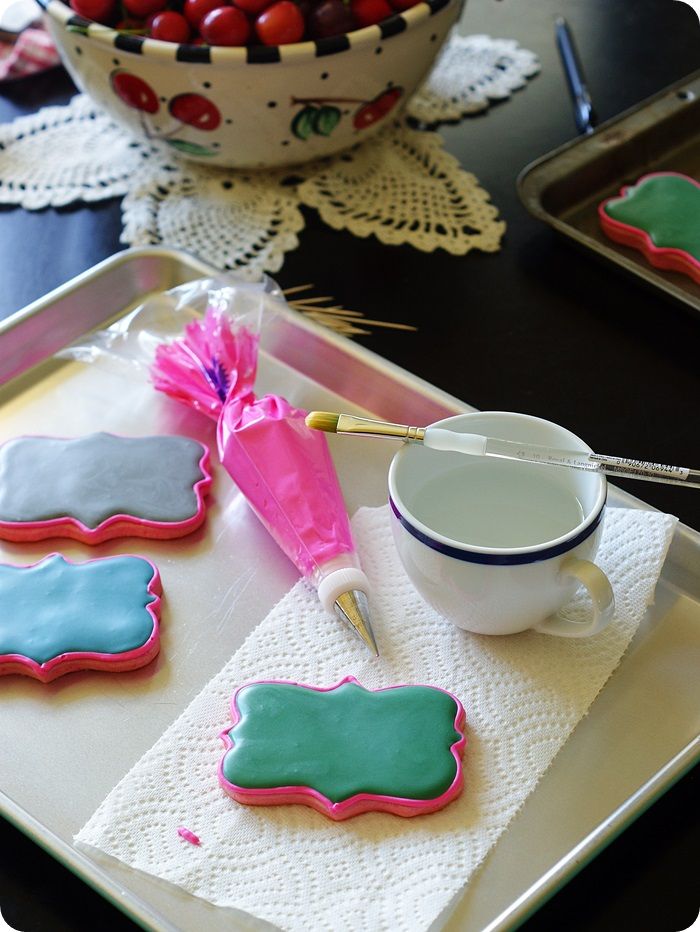
Let the cookies dry uncovered 6-8 hours, or overnight.
color challenge: bright pink cookies for fall :: bake at 350 blog

color challenge: bright pink cookies for fall :: bake at 350 blog
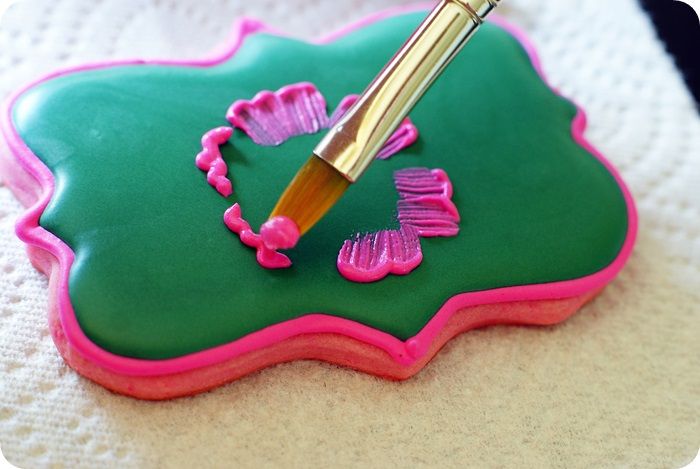
Once the icing is completely dry, use a #2 tip to pipe squiggly lines as an outer layer of petals in pink.

Dampen the brush with water, then blot very well on a paper towel.  Place the brush right into the icing and pull towards the center.

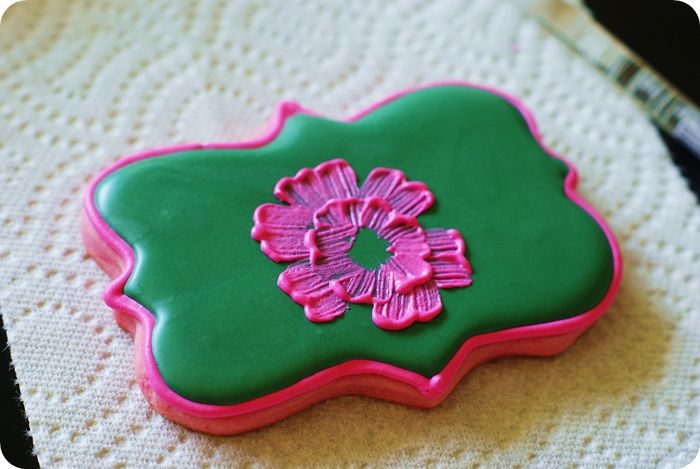
Make another layer,
bright pink cookies for fall, tutorial :: bake at 350 blog

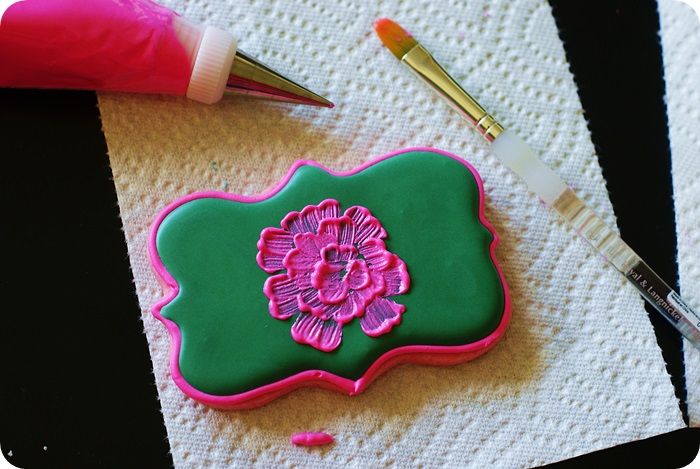
and then another...
bright pink cookies for fall, tutorial ::: bake at 350 blog

In the center, pipe some dots for the flower center using a #1 tip.

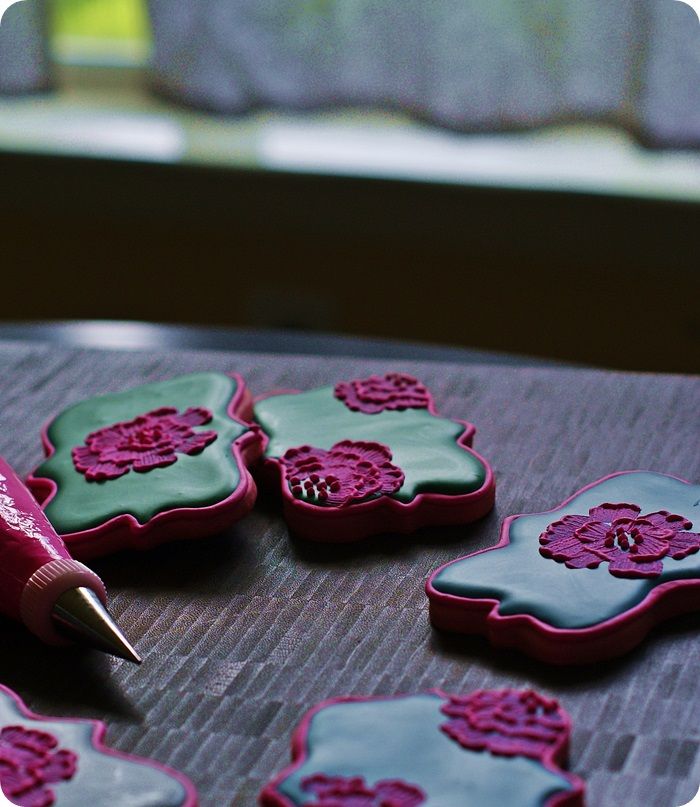
Make some flowers in the center of the cookies, and some off the sides...I like both. 

color challenge: bright pink cookies for fall ::: bake at 350 blog
What do you think about bright pink for fall? 

Image Map
Now.  Go check out the other lovely ladies and their Bright Pink posts!  Seriously.  Go! ;)


Labels: , , , ,