Color Challenge: Bright Pink for Fall
Welcome to the first installment of the Color Challenge!!!
.jpg)
Spearheaded by the uber-fabulous, uber-cool Mandi, of Vintage Revivals, seven bloggers from different niches (fashion, beauty, home, organizing, DIY, parenting...you get the idea) are incorporating a certain color into their "medium."
Today's challenge color: BRIGHT PINK!!!
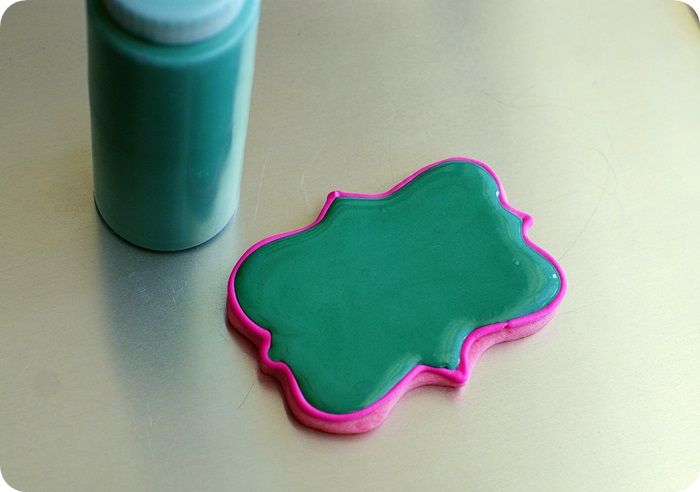
Adding a little black food coloring to the green and navy icing adds a bit of depth and darkness. Add it a bit at a time to avoid turning the icing totally black. I use a toothpick to dip into the food coloring and then into the icing.
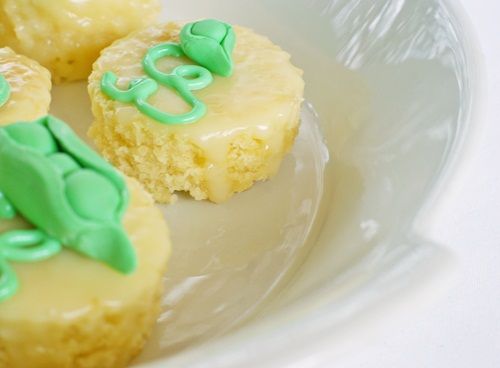
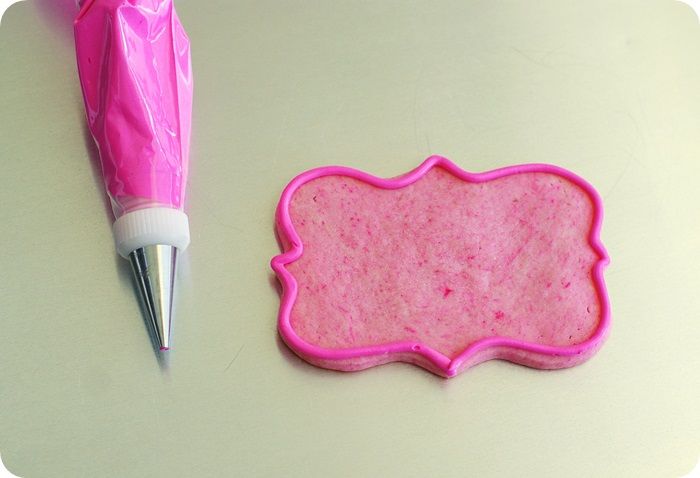
To tint the cookie dough, add in pink gel paste food coloring along with the eggs in the cookie recipe. Once the flour is added, if the dough needs more color, knead it in by hand. Don't worry, the pink will wash off of your hands.
To make these Bright Pink brush embroidery cookies, you'll need:
- sugar cookies, tinted pink
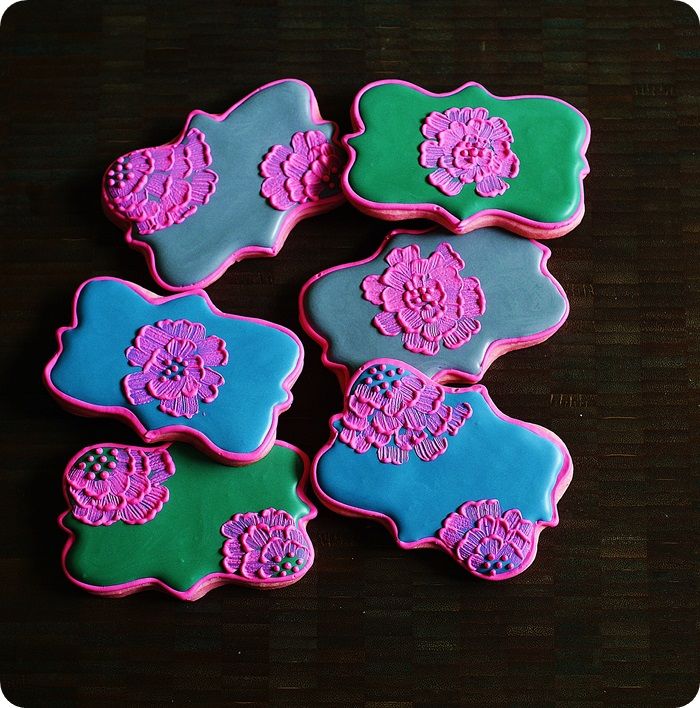
- royal icing tinted with AmeriColor Deep Pink + Electric Pink for the pink, Super Black for the grey, Forest Green + Super Black for the green, and Navy Blue + Super Black for the Navy
- disposable icing bags
- coupler and tips (#4, #2, #1)
- squeeze bottles
- clean, flat paintbrush
- cup of water
- paper towels
Thin the remaining icings with water, a bit at a time, stirring with a silicone spatula, until it is the consistency of a thick syrup. You'll want to drop a "ribbon" of icing back into the bowl and have it disappear in a count of "one thousand one, one thousand two." Four is too thick, one is too thin. Count of 2-3 is good. Cover with a damp dishcloth and let sit for several minutes.
Stir gently with a silicone spatula to pop and large air bubbles that have formed. Pour into squeeze bottles.
Let the cookies dry uncovered 6-8 hours, or overnight.
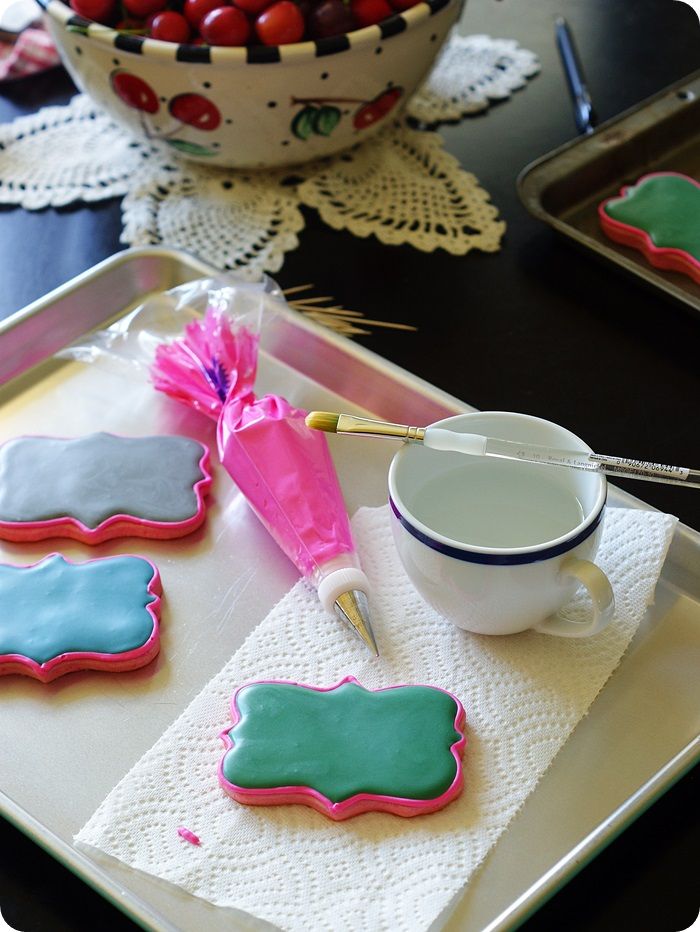

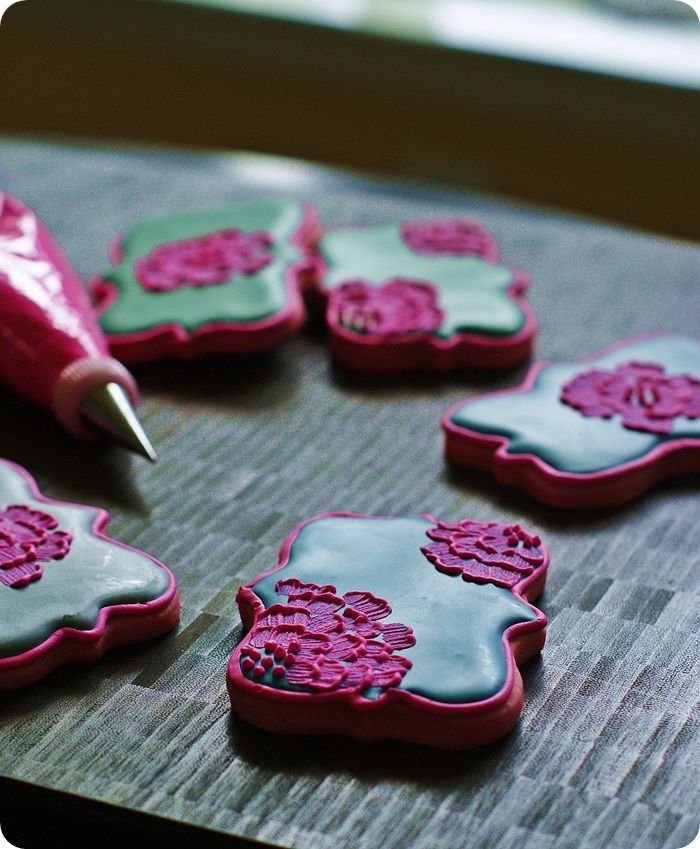
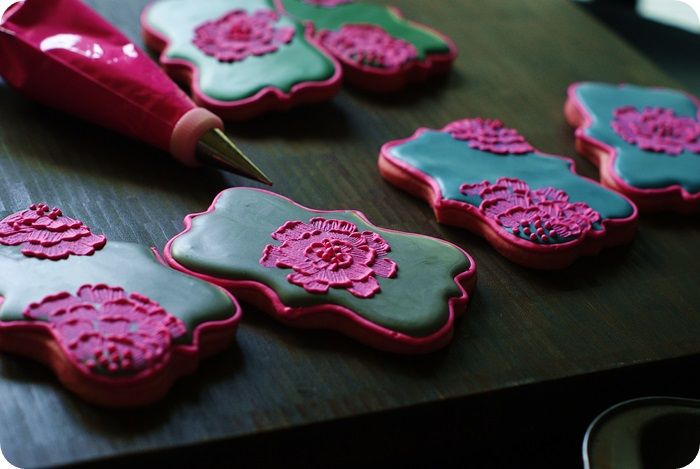
Dampen the brush with water, then blot very well on a paper towel. Place the brush right into the icing and pull towards the center.
Make another layer,
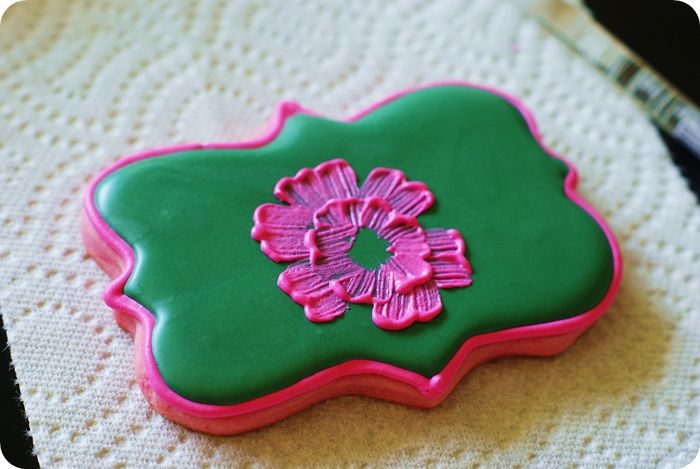
and then another...
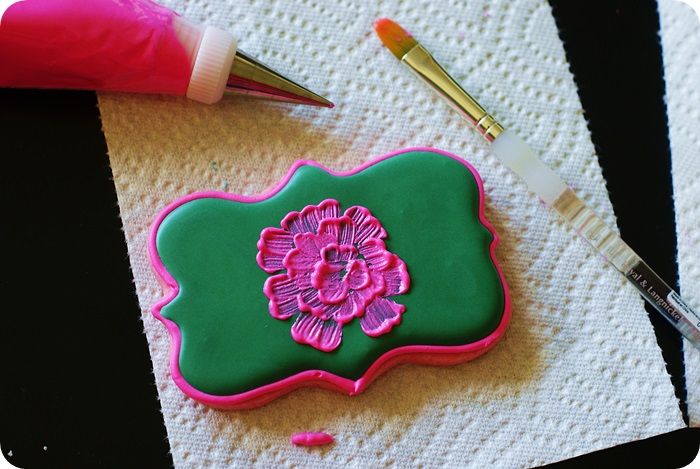
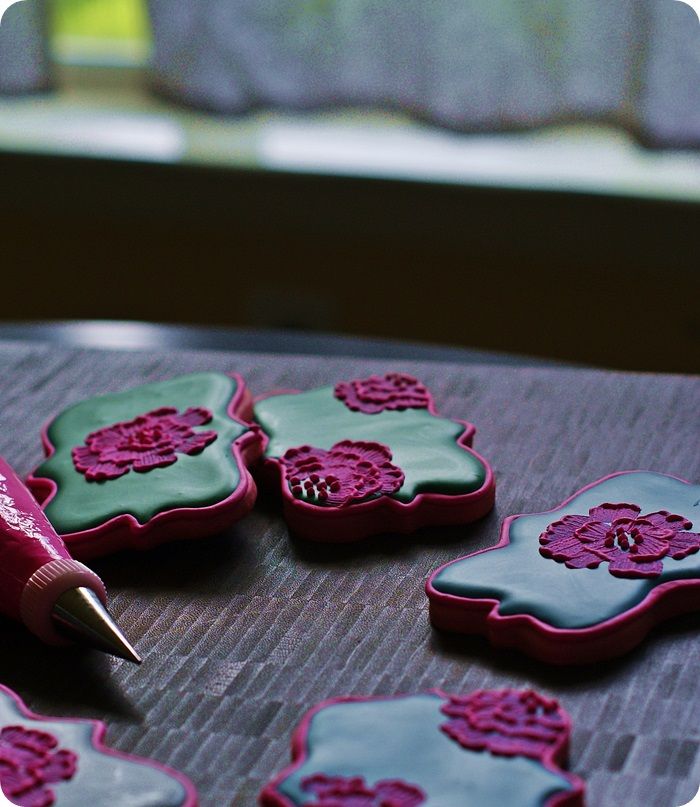
In the center, pipe some dots for the flower center using a #1 tip.
Make some flowers in the center of the cookies, and some off the sides...I like both.
What do you think about bright pink for fall?

Now. Go check out the other lovely ladies and their Bright Pink posts! Seriously. Go! ;)

Labels: blogs, color challenge, flowers, girly, misc
posted by Unknown @ 3:00 AM
0 Comments
![]()