Sunday, June 8, 2014

Dessert for Dudes: Love Me Tender(loin)

love me tender(loin) decorated cookies
If you're asking yourself, Where's the Beef...don't worry.  It's not in these cookies. 

love me tender(loin) decorated cookies
These chocolate cut-out cookies are just decorated to look like a side of beef.  They'd make a sweet gift for your dude, the perfect ending to a steak dinner, or a festive dessert for a BBQ.  (In Texas, we have BEEF BBQ...you North Carolinians, check here.)

I bought the cookie cutter on etsy, but you could always use any cow-shaped cookie cutter and just freehand the lines.  Call it "abstract beef."

love me tender(loin) decorated cookies
As for the cookie recipe, I wish I could give you the exact one I used for these today, but I'll have to wait until October 7th (eep!). 
In the meantime, use any chocolate cut-out cookie recipe, like this one.


To make Love Me Tenderloin Cookies, you'll need:

love me tender(loin) decorated cookies ... simple decorating tutorial and link to cookie cutter
Cut out and bake the cookies, taking care not to press the sectioned cutter so forcefully into the dough that it cuts it into separate pieces.

love me tender(loin) decorated cookies ... simple decorating tutorial and link to cookie cutter
Use a #2 tip to outline the cookie and sections with white icing.

love me tender(loin) decorated cookies ... simple decorating tutorial and link to cookie cutter
Place a dot of icing approximately where a tenderloin would be. (I studied more illustrations of cuts of beef that I ever thought I would and this is the best place I could come up with.)

love me tender(loin) decorated cookies ... simple decorating tutorial and link to cookie cutter
Place a heart sprinkle onto the dot of icing.

Let set about 1 hour before packaging.
love me tender(loin) decorated cookies
Mmm....beefy. 

Labels: ,

Friday, February 14, 2014

Wanna Neck?

Happy Valentine's Day!!!
"wanna neck" giraffe valentine cookies ♥
Have you ever looked at vintage valentines?  Oh my gosh...they are THE best!  Of course, the illustrations are darling, but they have the best puns!

"wanna neck" giraffe valentine cookies ♥
So, this is my version of a punny valentine: Wanna Neck?

giraffe valentine neck photo giraffevalentine11of14.jpg
My child assures me that "no one" knows what "necking" means.  Which just confirms my suspicion that kids these days don't watch nearly enough Happy Days reruns.

When Mr. E, king of the puns, came home from work, I had finished the giraffes, but the hearts didn't have wording on them, yet.  I was SURE he would be able to guess the pun.

Guess, I told him...guess the valentine pun!  Want to know what he said?

"Giraffe-ter my heart?"
Giraffe-ter my heart. Really.

We could not stop laughing.

Our family is weird.  But, you knew that from these cookies already.

To make these giraffe valentine cookies, you'll need:


giraffe valentine outline photo giraffevalentine1of14.jpg
Use a #2 tip to outline the giraffe with pink icing.  Add a tail and horn.

Before thinning, reserve some piping consistency red icing for later.  Thin the pink and red icings with water, a bit at a time, stirring with a silicone spatula, until it is the consistency of a thick syrup.  (Reserve some of the white icing for piping details later.) You'll want to drop a "ribbon" of icing back into the bowl and have it disappear in a count of "one thousand one, one thousand two." Four is too thick, one is too thin.  Count of 2-3 is good.  Cover with a damp dishcloth and let sit for several minutes.

Stir gently with a silicone spatula to pop and large air bubbles that have formed.  Pour into squeeze bottles.

giraffe valentine flood photo giraffevalentine2of14.jpg
Working 6-8 cookies at a time, flood the outlines with the thinned pink icing, using a toothpick to guide to the edges and pop large air bubbles. 

making hearts from dots of icing...
Starting with the first cookie filled, drop dots of thinned red icing onto the pink.  Drag a toothpick down the center of each dot to make a heart.
(Wipe the toothpick after each drag for a "clean" heart.  If you look at the hearts, you can see where I forgot to wipe the toothpick on a dot...there's a line down the top.)

Let the cookies dry at least 30 minutes.

giraffe valentine detail photo giraffevalentine7of14.jpg
Use a #1 tip to add a mane, heart on the tail, hooves, detail on the face, and heart on the horn.

Let the cookies dry uncovered 6-8 hours or overnight.

The next day, add the eye with a black food coloring pen.
"wanna neck" giraffe valentine cookies ♥
Happy ♥ Day!  


Labels: ,

Tuesday, November 19, 2013

Peanut Butter Cup Turkey Cookies

These are not your average, everyday turkey cookies. 
{Wait...are there everyday turkey cookies?  Let's think about this.}
 peanut butter cup turkey cookies...triple-shot of peanut butter: cookie, cup & frosting! from @bakeat350
So, what makes them special?

peanut butter cup turkey cookies...triple-shot of peanut butter: cookie, cup & frosting! from @bakeat350
First...there's a big ol' peanut butter cookie as the base.  Then, the peanut butter cup "body" (secured with some melted chocolate).  Oh!  And the feathers?  That's peanut butter buttercream, my friends.

Peanut Butter Cup Turkey Cookies...

You'll scoop the cookies out and flatten them with the bottom of a glass.
 photo PBturkeycookies10of8.jpg

When they bake, they get a little poufy, then flatten out as they cool.
big, beautiful, peanut butter cookies from @bakeat350

Now, things are getting interesting....
pb turkey cookies start photo PBturkeycookies12of8.jpg

I just couldn't resist adding the little mouths on their faces.  Smirk, full smile, heart lips?  I couldn't decide.  All of the above!!!
peanut butter cup turkey cookies...triple-shot of peanut butter: cookie, cup & frosting! from @bakeat350

I'm sharing the recipe and assembly instructions over at Imperial Sugar.

{Gobble, gobble!}
pb turkey cookies side photo PBturkeycookies14of8.jpg

Labels: ,

Sunday, June 30, 2013

Desserts for Dudes: That's Some Pig!

pig cookies ::: bake at 350 blog
Cuts of meat: the only way to make a pink, decorated cookie look manly.

pig cookies ::: bake at 350 blog
When I saw this cookie cutter on etsy, I knew I must have it.  (I bought the cow, too.)


I toyed with the idea of baking up a chocolate-bacon cut-out cookie, but I really wanted these to be pink.  For the pink, you can either tint your cookie dough pink with food coloring, or use a pink dough.  I used some leftover watermelon cookie dough, but I will say, it's a little disconcerting eating a watermelon-flavored pig.
pig cookies ::: bake at 350 blog
The cookie cutter really does all of the decorating work for you.  The imprints are nice and deep and remain throughout baking.

When cutting, though, some of the smaller sections wanted to stick in the cookie cutter.  I nudged them out with a chopstick.  You can see a little of it here...
pig cookies ::: bake at 350 blog
...I think it's ok, though.

To decorate, I used a #3 tip and white royal icing.
pig cookies ::: bake at 350 blog
Bada-bing. Bada-boom. Done.

pig cookies ::: bake at 350 blog
Sooie!  Here piggy, piggy!!!


Labels: , ,

Wednesday, April 24, 2013

Hold Your Horses

Every year, the end of April/beginning of May means one thing around our house: horse cookies.
kentucky derby cookie tutorial | bake at 350
Surrounded by horses for weeks, this is the closest I'll ever get to living like The Pioneer Woman.

My dad helps to host a charity event in Amarillo the day of the Kentucky Derby every year...and every year horse cookies are on the menu.  The problem is that horse cookies don't ship well.  You see, they have thin legs, and necks that stick out.  Not the ideal shape for shipping.

kentucky derby cookie tutorial | bake at 350
After lots of begging, and maybe a few tears on my part, my dad finally gave in to letting me add some horse head cookies into the mix.  I think I like them better than the full horses (maybe it's the eyelashes)...and I know they'll arrive to the party in better shape.

kentucky derby cookie tutorial | bake at 350
To make some Kentucky Derby horse head cookies, you'll need:
kentucky derby cookie tutorial | bake at 350
Outline the horses with a #2 tip and brown icing.  Reserve some of this icing for piping details later.

Thin the brown and white icings with water, a bit at a time, stirring with a silicone spatula, until it is the consistency of a thick syrup.  (Reserve some of the blue icing for piping details later.) You'll want to drop a "ribbon" of icing back into the bowl and have it disappear in a count of "one thousand one, one thousand two." Four is too thick, one is too thin.  Count of 2-3 is good.  Cover with a damp dishcloth and let sit for several minutes.

Stir gently with a silicone spatula to pop and large air bubbles that have formed.  Pour into squeeze bottles as needed.

kentucky derby cookie tutorial | bake at 350
Flood the cookies, filling in the outlines. Use toothpicks to spread the icing and pop any large air bubbles that have formed.  Let the cookies dry at least one hour.

kentucky derby cookie tutorial | bake at 350
Add the details. Use a #2 or 3 tip to add the bridle in electric green (or another color).  Add and eye with brown icing using a #2 tip.

kentucky derby cookie tutorial | bake at 350
Use a #2 tip to pipe the mane and nostril.  Switch the tip to a #1 and add eyelashes.

Let the cookies dry, uncovered, 6-8 hours or overnight.

(For a tutorial on the full horses, click here.  And for some *gorgeous* Derby Party inspiration, check out my friend Courtney's blog, Pizzazzerie!)
kentucky derby cookie tutorial | bake at 350

Hoof it on into your kitchen and make 'em. ;) 


decorating cookies badge photo decoratingcookiesbadge-1.jpg

Labels:

Thursday, April 4, 2013

How-to Texas Cookies : part one

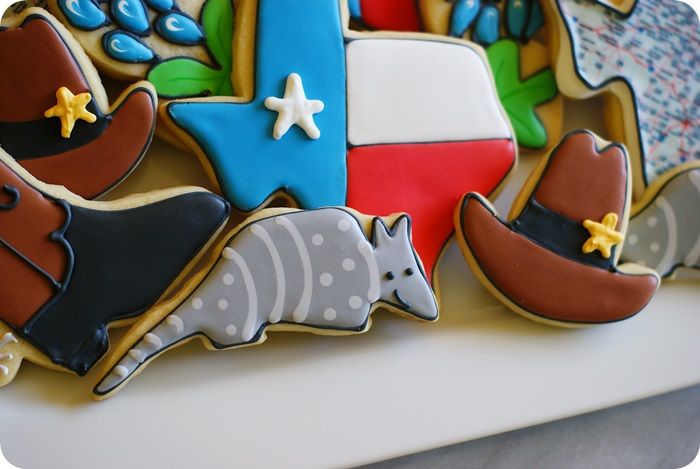
Here's one thing I learned about making Texas-themed cookies: people not from Texas don't necessarily know about bluebonnets.  They do, however, know about armadillos.
 photo Texassetarmadillomiddle.jpg
So, when 
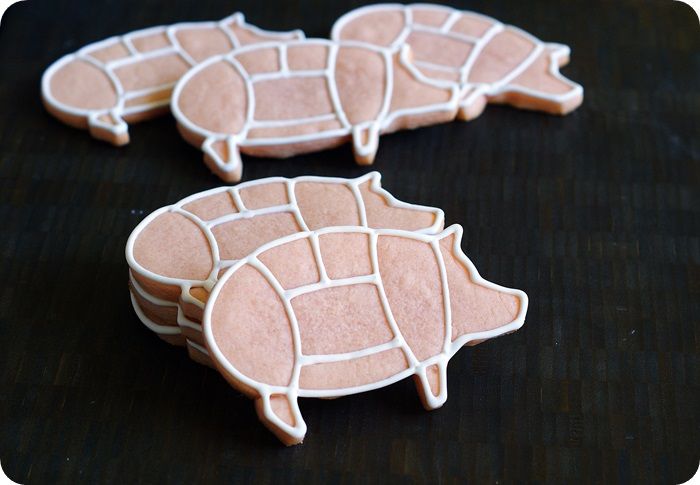
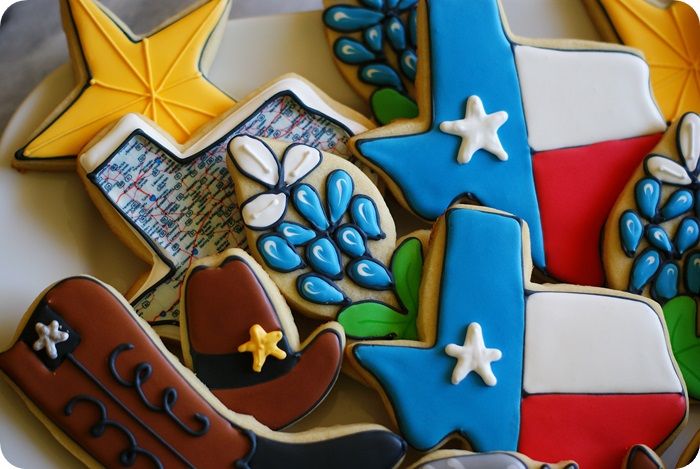
Jim (don't you love how I throw that out there like it happens everyday?) wanted Texas cookies for his party, he kind of gave me carte blanche as far as the designs went.  My mind raced.  Even though there would be several different designs, I wanted them to coordinate somehow, so I went with a black outline.

texas bluebonnets and map photo texasbluebonnetsandmap.jpg
I love a black outline for several reasons. 1.) It really makes colors POP.  2.) I think it brings out the whimsical and fun in cookies. 3.) It's an easy way to coordinate a set of cookies that don't have other colors in common.

Right away, I knew that I wanted to break out my armadillo cookie cutter (I mean, how often do you get an opportunity to make armadillos? Thank you, Terri!), AND I remembered some 
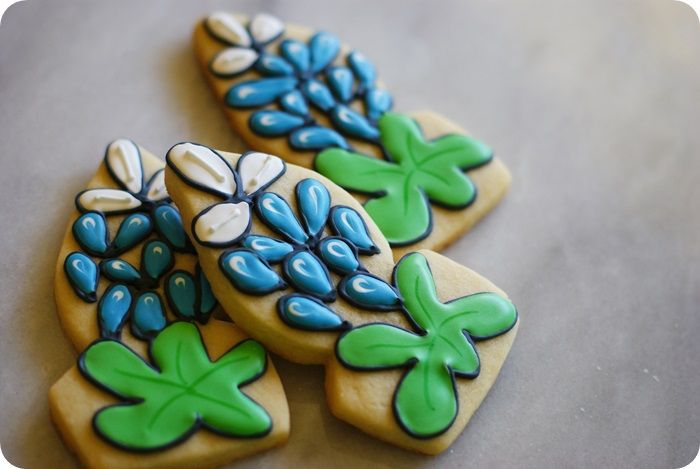
fabulous bluebonnet cookies made by Jennifer, an incredibly talented local cookie decorator.

texas armadillos center photo texasarmadilloscenter.jpg
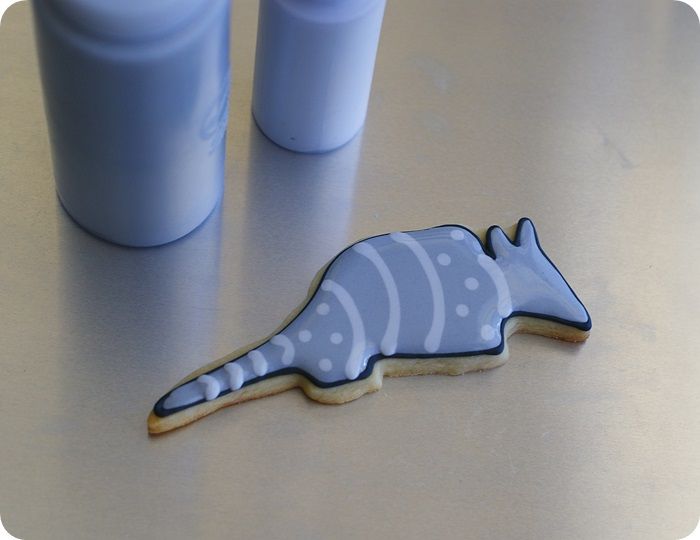
{This little guy may be my favorite cookie EVER. I'm not sure what that says about me.}

texas bluebonnets side photo texasbluebonnetsside.jpg
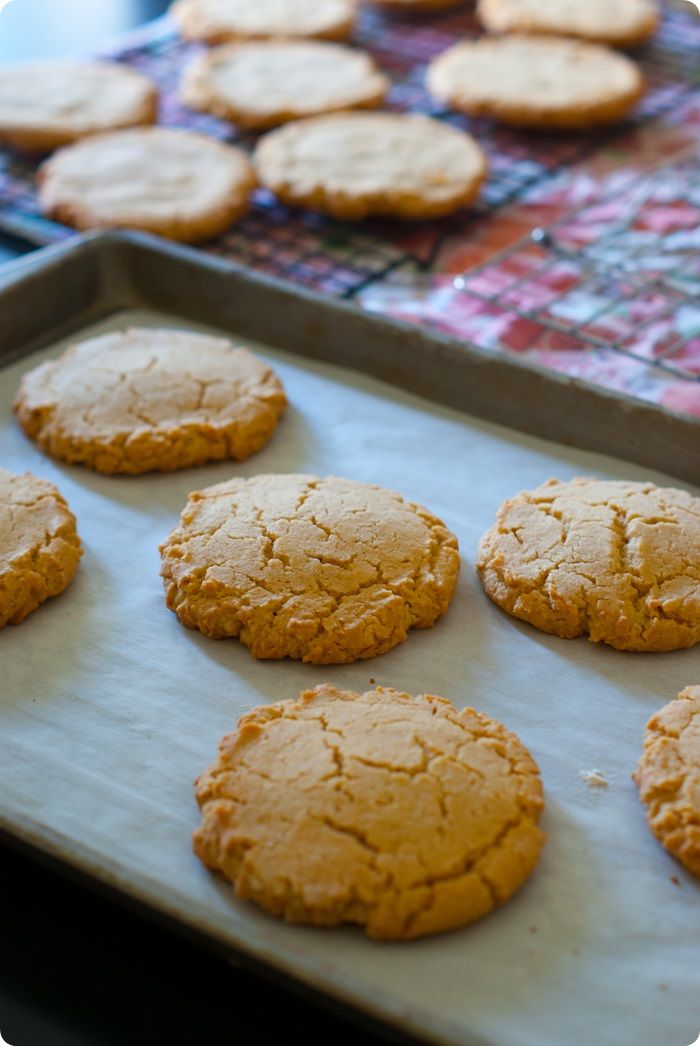
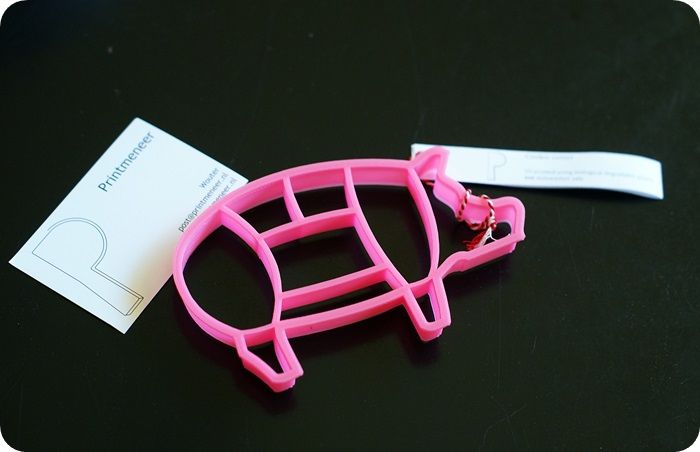
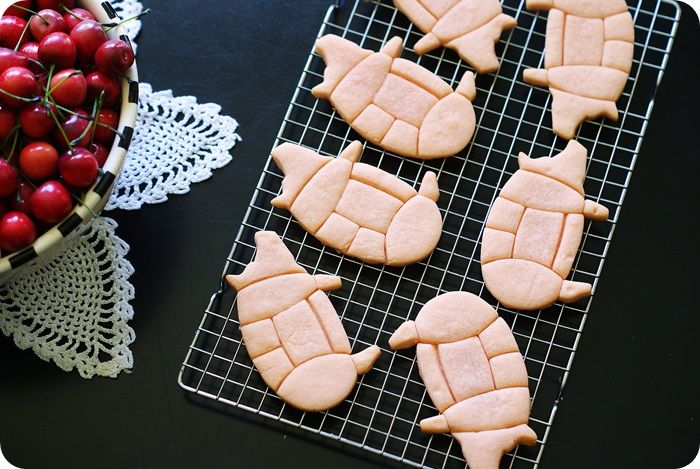
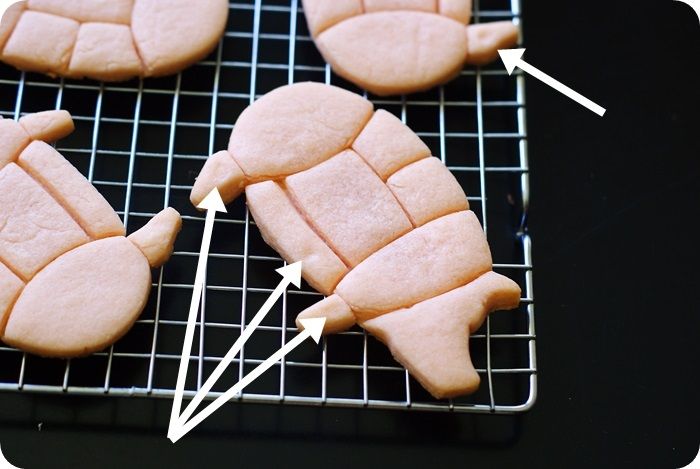
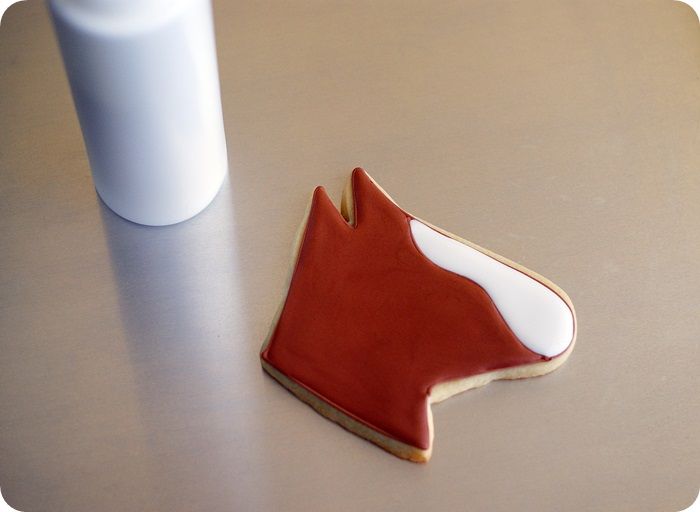
To make armadillo and bluebonnet cookies, you'll need:
  • sugar cookies cut with an armadillo cookie cutter and another cutter with a cone shape, I used the gnome cutter, but a Christmas tree also works
  • royal icing, divided and tinted with AmeriColor Super Black, Bright White, Royal Blue & Leaf Green
  • disposable icing bags
  • coupler and tips: #2, #1
  • squeeze bottles 
  • toothpicks
  • green food coloring pen
texas armadillos and bluebonnets outline photo texasarmadillosandbluebonnetsoutline.jpg
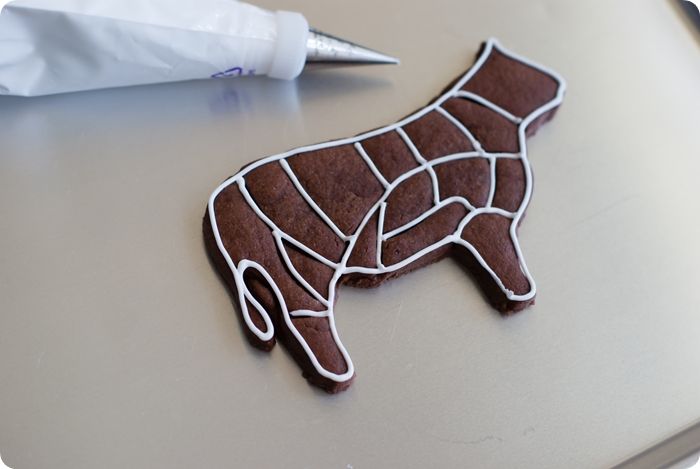
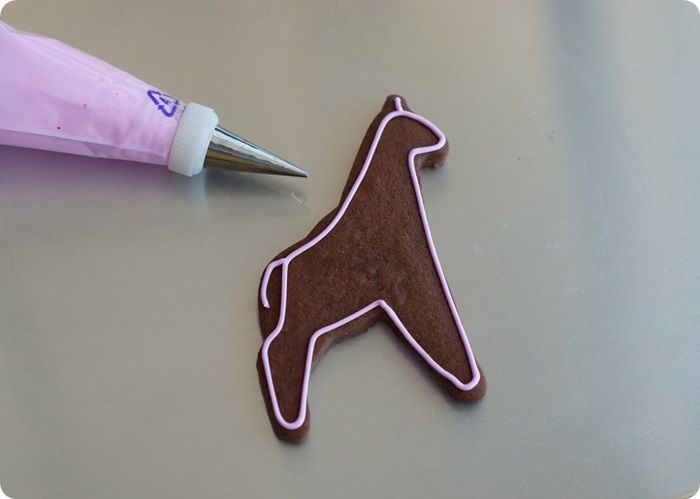
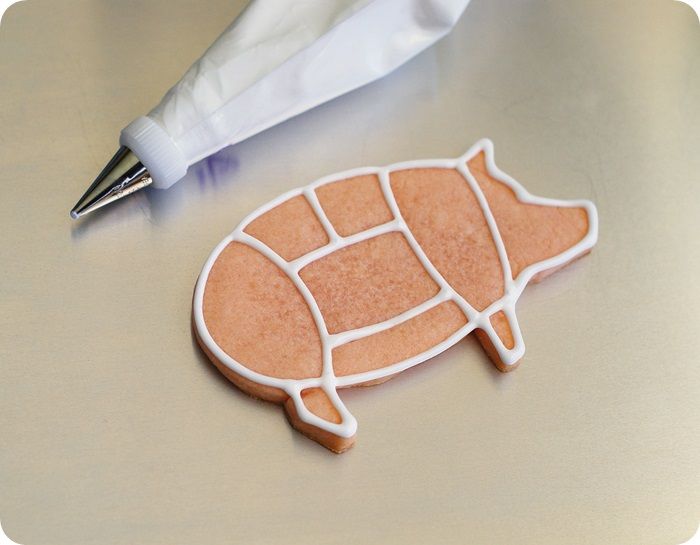
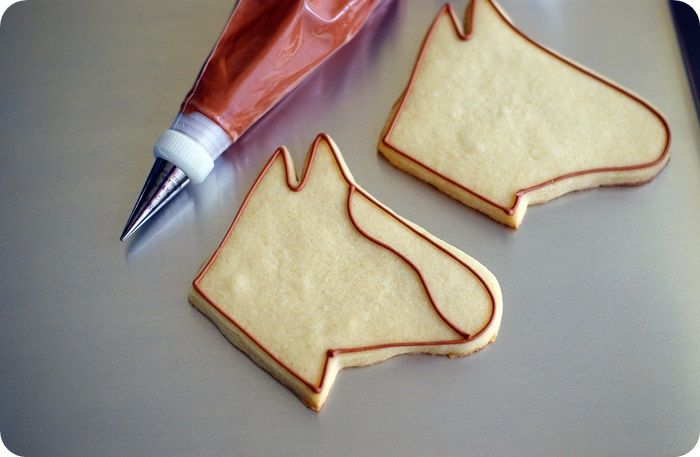
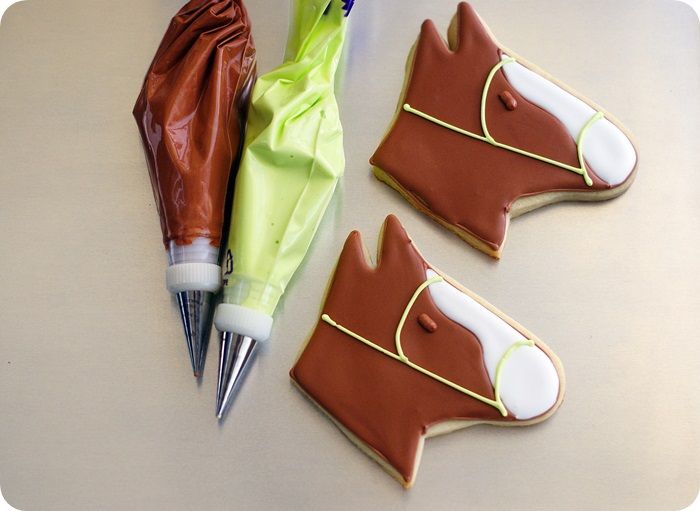
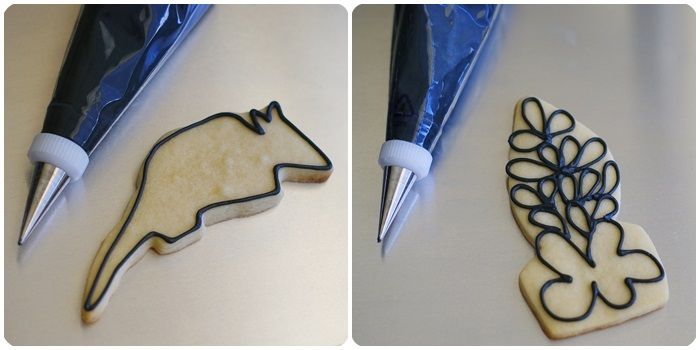
Outline the cookies in black using a #2 tip.  Because we're using black icing, let it dry for an hour before filling.

Make a two shades of grey icing using black food coloring. Thin the all of the icings, except black, with water, a bit at a time, stirring with a silicone spatula, until it is the consistency of a thick syrup.  (Reserve some of the blue icing for piping details later.) You'll want to drop a "ribbon" of icing back into the bowl and have it disappear in a count of "one thousand one, one thousand two." Four is too thick, one is too thin.  Count of 2-3 is good.  Cover with a damp dishcloth and let sit for several minutes.

Stir gently with a silicone spatula to pop and large air bubbles that have formed.  Pour into squeeze bottles as needed.

texas armadillos flood photo texasarmadillosflood.jpg
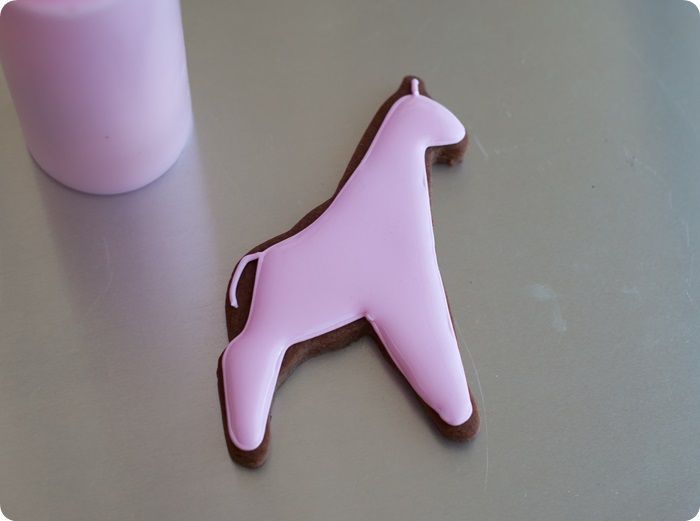
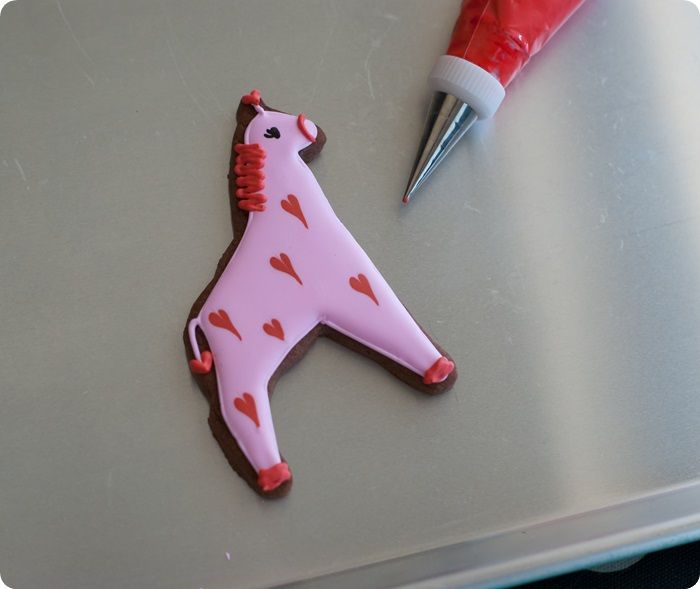
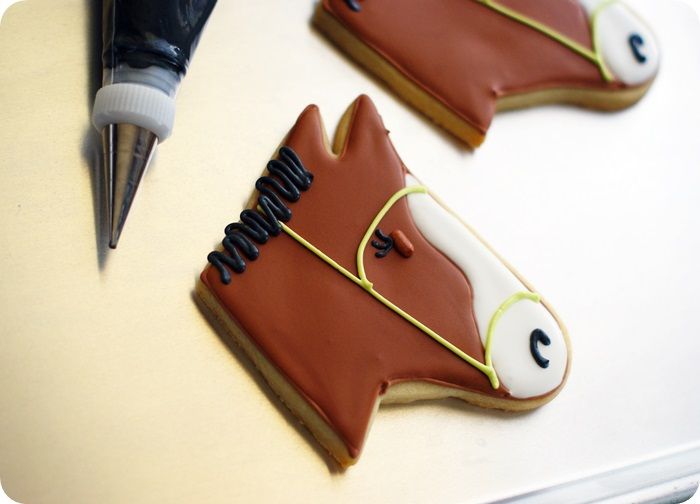
For the armadillos, flood the entire cookie with the darker shade of grey icing, working 6-8 cookies at a time.  Come back to the first cookie flooded and add lines and dots with the thinned lighter shade.  Let the cookies dry at least one hour, then add eyes and a mouth with black icing, using a #1 tip.

texas bluebonnets flood photo texasbluebonnetsdetail.jpg
For the bluebonnets, working 6-8 cookies at a time, fill in the top petals with white and the rest with blue icing.  Starting with the first cookie filled, drop small dots of thinned white icing at the top of each petal.  Place a toothpick in the center of each white dot and pull down.  Do not wipe the toothpick off between pulls...you want a bit of blue icing on the toothpick.

Flood the leaves with green icing.

Let the cookies dry, uncovered, 6-8 hours or overnight.
texas bluebonnets leaf photo texasbluebonnetsleaf.jpg
The next day, use a green food coloring pen to add variegation to the leaves.

texas bluebonnets set photo texasbluebonnetsset.jpg
In the next post, the rest of the Texas cookies.  See y'all then!
{update: Here's part two.}


Labels: , , ,

Monday, February 4, 2013

Polka Dotty Scotties

You didn't think I could post polka dot kitties without posting something for you dog lovers, did you?
To be absolutely honest, I'm a cat person through and through, BUT there are *certain* dogs I love.  Like this oneHave you met Doogan?  This dog really needs to be in commercials, movies, something!  He's even cuter in person...I love him.  Maybe it's the curls?  We curly-tops have to stick together, you know.

He has a sister now, too. :)

I realize Doogan is not a Scottie, but it's the only dog cutter I own.
(Although, I did attempt to immortalize him in cookies once.)


These cookies are SO easy...the perfect treat for any dog lover in your life.

I started with all black with white dots, but I felt the need for some pink as well.  Valentine's Day IS around the corner, after all.


To make the dotty Scottie cookies, you'll need:
Use a #2 tip to outline the cookies in pink or black, or whatever your base icing color may be.

Thin the pink, black, and white icings with water, a bit at a time, stirring with a silicone spatula, until it is the consistency of a thick syrup.  You'll want to drop a "ribbon" of icing back into the bowl and have it disappear in a count of "one thousand one, one thousand two." Four is too thick, one is too thin.  Count of 2-3 is good.  Cover with a damp dishcloth and let sit for several minutes.

Stir gently with a silicone spatula to pop and large air bubbles that have formed.  Pour into squeeze bottles.

Working 6-8 cookies at a time, fill in the outlines with the thinned base icing color, using a toothpick to guide to the edges and to pop large air bubbles.

Starting with the first cookie flooded, drop dots on top of the wet icing with the thinned white icing. (Giving the cookies a few minutes to set before adding the dots helps to prevent bleeding.)

Let the cookies dry 1 hour.

Use #1 tips to add the collar and heart tag detail in yellow, red, and black.

Let the cookies dry, uncovered, 6-8 hours or overnight.

Cat cookies? Check. Dog cookies? Check. 
What next?


Sur La Table 120x600 11.27.07

Labels: ,