Friday, December 13, 2013

Perfect Every Time Cut-Out Cookies

If you're looking for a cut-out sugar cookie recipe for your holiday baking, birthday parties, baby showers, wedding favors, you name it...you've found it.
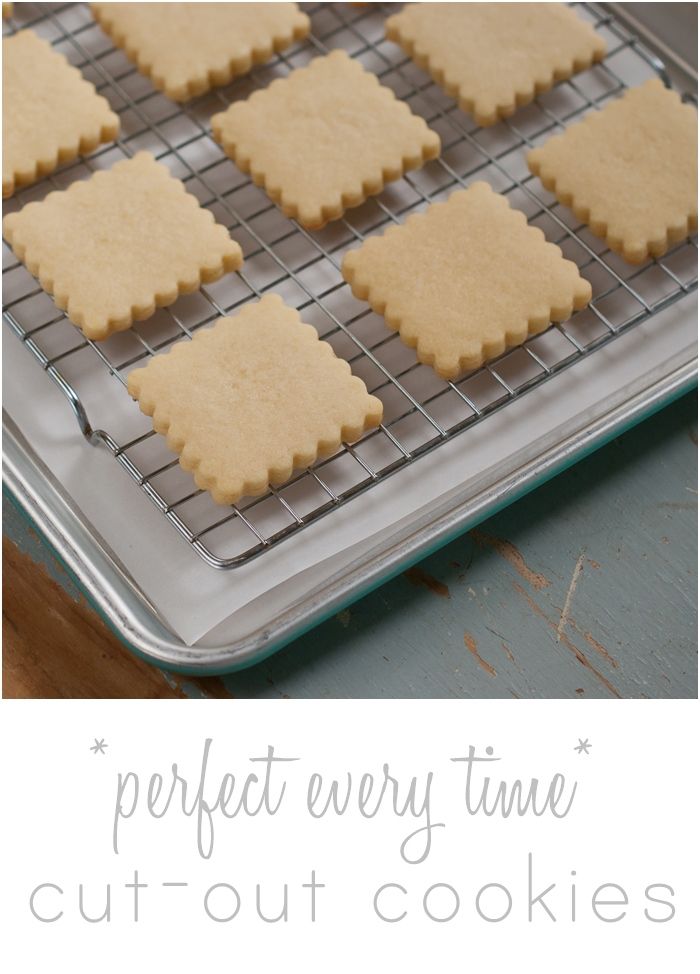
perfect every time cut-out cookies ... no dough-chilling required, can be frozen, perfect for decorating!  from @bakeat350

This is my all-time, go-to, never-fail, made thousands-of-'em sugar cookie recipe for decorating.

  • It requires NO CHILLING!
  • The dough can be frozen!
  • The baked cookies can be frozen!
  • The decorated cookies can be frozen!
  • And more importantly, it's yummy.

More info on freezing cookies here.

Decorating with kids?  Gotcha covered.

Need royal icing.  Got that, too.

Looking for gingerbread?  Here ya go.

print recipe photo printrecipe.jpg

Perfect Every Time Cut-Out Cookies


3 cups unbleached, all-purpose flour
2 teaspoons baking powder
1 c sugar (I use sugar that I've stored vanilla beans in)
2 sticks (salted) butter, cold & cut into chunks
1 egg
3/4 tsp pure vanilla extract
1/2 tsp pure almond extract

Instructions:

Preheat oven to 350.

Combine the flour and baking powder, set aside. Cream the sugar and butter. Add the egg and extracts and mix. Gradually add the flour mixture and beat just until combined, scraping down the bowl, especially the bottom.

The dough will be crumbly, so knead it together with your hands as you scoop it out of the bowl for rolling.

Roll on a floured surface to about 1/4" to 3/8" thick, and cut into shapes. Place on parchment lined baking sheets (I recommend freezing the cut out shapes on the baking sheet for 5 minutes before baking) and bake for 10-12 minutes. Let sit a few minutes on the sheet, then transfer to a cooling rack.

Go forth and BAKE, my friends.  

Labels: ,

Wednesday, May 22, 2013

Cookie Decorating Troubleshooting

{My original post on troubleshooting was published waaaay back in 2010. After asking on Facebook last week about what cookie decorating issues you're experiencing, I thought it was time for a reprise. I've also updated it a bit.}

cookie decorating troubleshooting from bake at 350

Every single one of these things has happened to me, too.  Here are my fixes: 

My royal icing is staying "tacky" even after several hours and overnight...any ideas?

My experience is that this is due to flood icing that is thinned too much. When flooding cookies, if the icing runs quickly to fill the entire cookie with having to be spread with a toothpick, it's too thin. Pour your icing back into the bowl, sift in some powdered sugar and let sit again for several minutes.

Why is my royal icing pitted looking and still wet?

Same answer as above...it's happened to me before, too. I'm crying with you.

Help! My cookies dried overnight and now they have dark splotches all over them!

Yeah...you know how humidity is so lovely for your hair? It's just the same with cookies. Close the windows, run the A/C...do whatever you can to make your cookie drying area humidity-free. The good news is, the splotches will normally spread across the entire cookie to darken the icing to a consistent color.

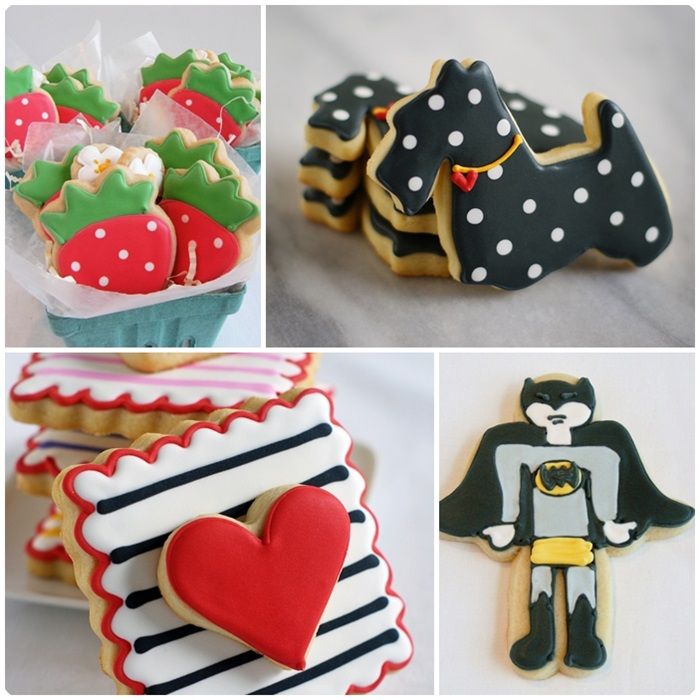
See that horse cookie in the collage above? This is also known as "the day I almost divorced my husband." I kid, I kid! BUT, he did open the windows in the room where the cookies were drying, right after the sprinklers had run outside. Take my advice...have a heart-to-heart with hubby about humidity.

Why do my cookies have white splotches on them?

When stirring in water to flood the cookies, be sure to fully incorporate the water. Those white splotches are water. Also, if you are using a squeeze bottle, make sure it is completely dry before adding your flood icing. If a drop of water is in your bottle, it will come out on your cookie. If you notice a drop of water, grab a paper towel, blot it out and re-coat the area with icing. It will smooth out.

Why is my royal icing full of bubbles?

Two hints here...ONE: Stir in the water for flooding gently with a rubber spatula, not a mixer.  TWO: once the water is incorporated, cover with a damp dish towel and let sit several minutes. Most of the bubbles will rise to the surface. Stir gently again and you're good to go. Any other stray bubbles can be popped with a toothpick or a pin.

Do not ever, EVER add water to a squeeze bottle of icing and shake. EVER. 

I've tried royal frosting once and it hurt my hands so bad I swore never to do it again.

Try filling your icing bags only 1/2 full. I know it sounds strange, but it makes such a difference!

Why does my red or black icing taste terrible?

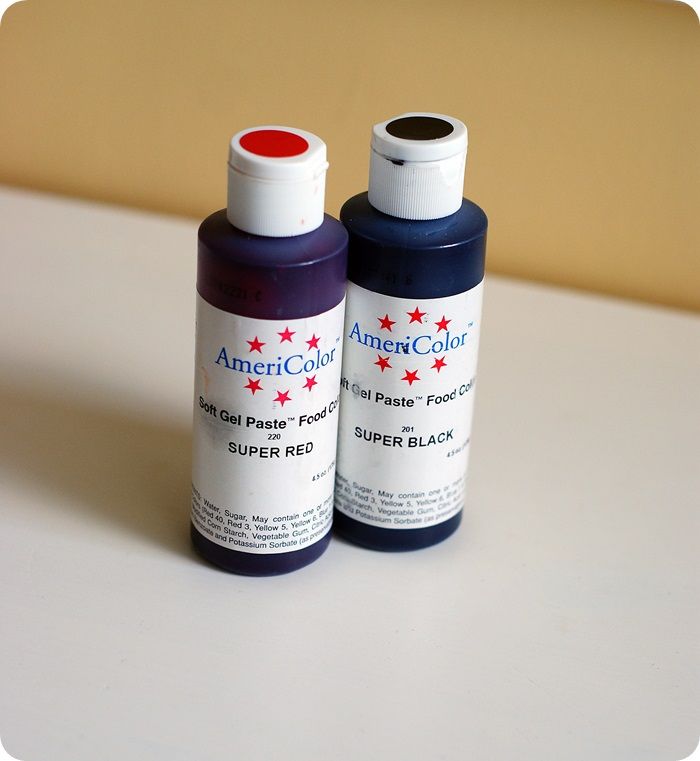
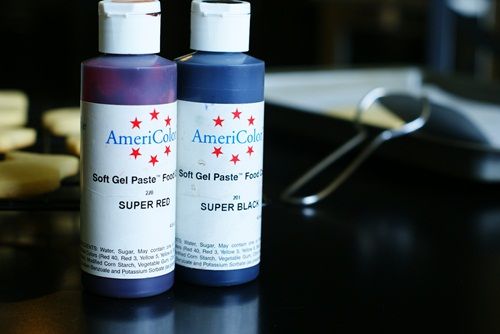
My guess is that you are using the food coloring brand sold in craft/grocery stores. While this company does a lot of things right....red and black food coloring are not those things. I strongly recommend AmeriColor Super Red and Super Black. You can find them here, in my Amazon shop, or in many online baking supply stores.

Why does my piped icing...you know...the outline...or maybe just some piping done on gingerbread men...well...why does it dry up and just fall off in little bits.

I think this is from overbeating. It's happened to me, too. Try to beat it until it's glossy and just coming to a stiff peak. Also, use the paddle attachment of your mixer. (Check the Royal Icing 102 post for more info.)

I can not write names or outline without the icing breaking.

This just takes practice...lots and lots of practice. Try getting used to your icing bag and printing on a plate or sheet of wax paper before going to your cookies. It's possible that your royal icing may be a little overbeaten. Check out the Royal Icing 102 post, too.

Why are my colors bleeding?

Well, that happens to me, too, sometimes. First, try to use AmeriColor food colorings. I had this problem a lot more when I used "the other guy's" food coloring. Second, when using a wet-on-wet technique for something like flat dots, let the base color sit for a few minutes before adding the dots. And sometimes, especially with the flat dots, it just happens. What helps me deal with it is to know that it WILL BE EATEN and there will be no evidence. People will just remember "cute cookie."

My icing consistency is never right.

Try reading this post on royal icing....both piping and flooding consistency are covered. 

Why doesn't my royal icing dry shiny?

I know it IS disappointing because it looks SO shiny when it is wet. Two tips: ONE. Try drying the cookies while an oscillating fan blows over them. TWO. Food dehydrator.  More on this coming soon! They'll never look as shiny as they do wet, but those two techniques will help.

Help! The small filled areas on my cookies are drying with craters!

Ugh.  Yes...it's happened to me, too.  Try not to overfill small areas; just flood until the area is covered. Also, even though it looks like you don't need to, run a toothpick through the wet icing. This seems to dislodge air bubbles.

Why are my cookies spreading while baking?

I always freeze my cut-out shapes for 5-10 minutes before baking to prevent spreading.

Why is my icing separating?

Piping consistency royal icing can be made ahead of time and stored in the fridge. You may see a little liquid in the bottom of the bowl, just stir it together. Flood icing, on the other hand, needs to be used the day you make it or is will separate and become unusable. If you'll be decorating for many hours using the same icing bottles, stir occasionally, very gently, using a chopstick or knife to swirl the icing in the bottle.

My piping icing is spreading and won't hold the pattern from a star tip.

More than likely, your icing has loosened up over time...either from being made ahead of time, or from sitting out for several hours.  Squeeze all of the icing back into a bowl and add sifted powdered sugar. Stir until stiff again.  The icing can even be re-beaten.  Test the consistency by pushing a little icing through the tip onto a plate to see if it is still spreading.  If so, just keep adding more powdered sugar.


Please be sure to check out the previous two F.A.Q. installments...
  1. F.A.Q.'s
  2. Royal Icing 102, or 201, or whatever comes after 101

decorating cookies badge photo decoratingcookiesbadge-1.jpg

Labels: ,

Wednesday, May 15, 2013

How to Make Red and Black Icing (without losing your mind)

Psst....if you're having trouble making red or black icing, I have what you need right here.  The good stuff.

best food coloring for red and black icing + tips
AmeriColor Super Red & Super Black gel paste food colorings.  
Yep, that's it.

No adding cherry juice to red icing.  No mixing of every color in your arsenal to make black.  No stirring 2 containers of red food coloring into icing and still winding up with pink.  (When I first started decorating cookies, I tried it all.)

tips for making red and black icing
All you need is AmeriColor Super.  What I love about these colors is that you don't need the entire bottle to make a true red and true black.  Both colors will darken over time and while drying, so try tinting your icing *just about* to the color you want, then stop.  You can even tint your icing a few days ahead and store it in the fridge until you need it.

Oh, did I mention these have no yucky aftertaste like some other colors?  

You can find it many places online: Bake It Pretty, Layer Cake Shop, Sweet Baking Supply, Copper Gifts and, of course, Amazon.  If you have a bakery supply store in your town, I bet they'll have it, too.  I almost forgot...Hobby Lobby!!!

works for me wednesday at we are that family
Making red & black icing the easy way...works for me!


Labels: ,

Wednesday, May 1, 2013

My #1 Tip for Rolling Cookie Dough

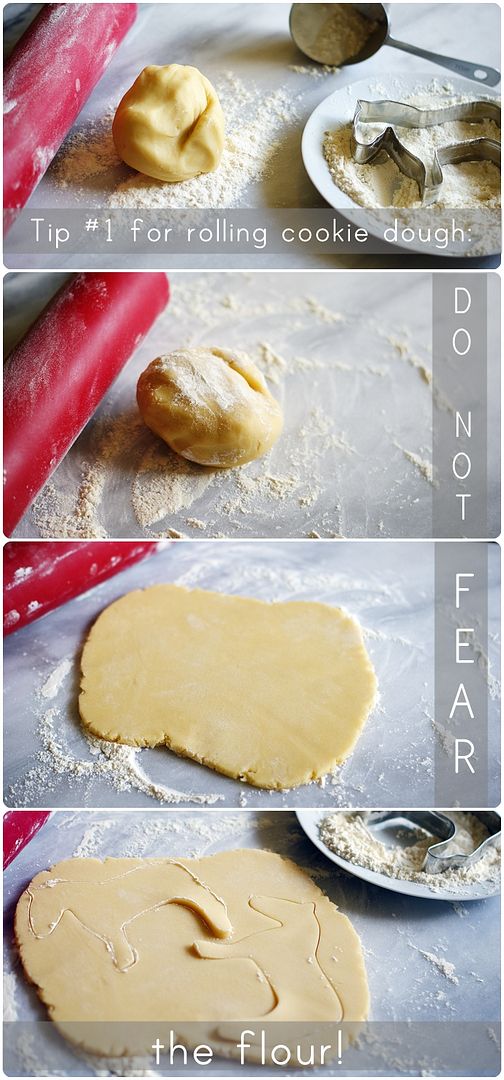
DO NOT FEAR THE FLOUR!!!
#1 tip for rolling cookie dough from bake at 350
Yep.  That's all there is to it. 

Flour your rolling surface, rolling pin, cookie cutters.  Heck, before I start rolling, I even dust my cookie dough with a little flour.  If your dough starts sticking to your rolling surface, throw on a little more flour.

I PROMISE this will not make your cookies dry.  I've made thousands and thousands of cut-out cookies this way using this cookie recipe.  If I'm using a chocolate cut-out recipe like the Chocolate-Hazelnut cookies in the book, I use a combination of flour and cocoa powder.

So, don't worry about rolling between layers of wax paper, or rolling in sticky powdered sugar.  Flour away!

Works for me!


tiered cake decorating class at craftsy.com

Labels: ,

Tuesday, May 1, 2012

Yes, you CAN freeze decorated cookies...Works for Me Wednesday

 
We've talked about it before, but for some reason over this last two weeks, I've had SO many questions about freezing cookies, I thought it was time to have "the talk" again.

YES!  You can freeze cookies decorated with royal icing! 


YES!  You can freeze baked cookies that are not decorated!


YES!  You can freeze the dough before baking!


Yes!  Yes!  Yes!!! 
{And kiddo thinks all I can say is, "no."}

If you happen to follow along on Instagram, you might have noticed that over the last several weeks, I've been making a kajillion horse cookies.  They're Kentucky Derby horses, and they're for a charity event.
{You can read more about it and get the cookie tutorial here.}

Since I don't have room to decorate a kajillion cookies all at one time....we sometimes need to use our kitchen and dining room tables for homework, folding laundry, and you know, eating...I've learned to take on projects like this little-by-little.

These instructions are for cookies decorated with royal icing, if you're freezing unbaked cookies, just don't decorate them first.  I guess you knew that.


ONE. 
Let the cookies dry completely overnight.


TWO. Either individually bag and tie the cookies, or place them in freezer bags.


THREE. Stack the bags in a freezer-safe container.  Not only will this give them an added layer of protection, it will keep them from getting crushed by an unwieldy box of corn dogs.


FOUR. Freeze.

FIVE.
When ready to use, thaw in the container and bags at ROOM TEMPERATURE for several hours.  Never thaw in the refrigerator.  Condensation can ruin the icing.

How long can you freeze them? 
This goes for iced cookies, plain cookies and dough....I think they're best used within 3-6 months.  I have, however, tested cookies after being in my freezer for a year.  Still good. :)

{This only applies to sugar cookies decorated with royal icing, not glazes or buttercream.}

OK...I need to get these babies back in the freezer...


Freezing cookies....it works for me!

Labels: ,

Tuesday, January 17, 2012

Starting a Cookie Cutter Collection...Works for Me Wednesday

So, you want to start baking and decorating cookies?  Well, there's no reason why you need to fill your guest room closet with over 300 cookie cutters.  {Ahem.}

Here are a few to get you started on your collection...

Circle, Square and Rectangle.  These babies are obvious multi-taskers.  Squares can be a little tricky to find.  I asked for them at my local bakery supply, and the man there told me to get a ruler and hand-cut them.  After I stopped laughing, I left the store, hopped online and found one. 

Scallops.  Oh, how I love a scalloped edge.  Scallops = instant cute, instant pretty.  You don't need every shape with a scalloped edge, but I'd at least get one.


Hearts.  This is about a third of my heart cookie cutter collection.  I love hearts....how can you not?  Hearts are always appropriate.


Daisy and Candy Corn.  Daisies are such cute and easy cookies.  They're adorable in their own, but I love to throw them in with another shape to make an assortment. (And don't think the shape is just limited to flowers.) Candy Corn...I know, that sounds weird, but the shape is perfect for making things other than candy corns.  How about a box of popcorn, or a face?

Present, Ornament and Tiered Cake.  All three of these are multi-taskers.  Presents: birthdays, Christmas...you name it.  Ornaments:  every Christmas seems to bring some new design for the good ol' ornament cutter.  Like this or this or this.  Tiered Cake?  Weddings, bridal showers, birthdays...this is one of my favorite cutters of all.

Now, where to GET cookie cutters?  Honestly, some of these have been in my collection for YEARS, and I've long forgotten where I picked them up.  Thank goodness for Google!  Try searching for the specific cookie cutter shape...even put it in quotes, such as "scalloped circle cookie cutter."

Here are a few websites I would check as well:
Do you have a favorite cookie cutter? 

Labels: ,

Tuesday, January 10, 2012

Heavy Metal...Works for Me Wednesday

Cookie sheets...I have a million of them.
{Well, more like 25.}
I use them all. Some for everyday cooking, some for "trays" for cookie decorating, and only a select few for cookie baking.

Let's talk cookie sheets...
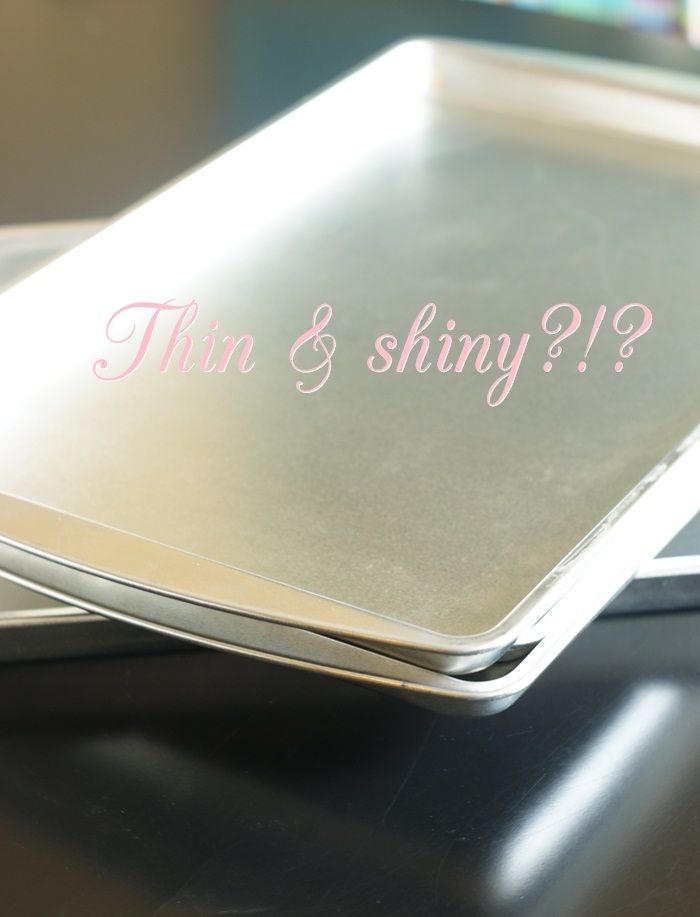
Thin and shiny. No, I'm not talking RHOBH here.  You know these sheets...they're not very sturdy and and super shiny.  You could bend them easily.

These cookie sheets are ones I use purely for decorating and "transportation."  Once my cookies have cooled, I place them on cookie sheets, rather than a countertop or table for decorating.  Usually these sheets are covering my dining room table and I carry them back and forth to the kitchen where I decorate.  They're too flimsy and too thin for baking.


Dark and heavy.  I have no idea where I got or why I have this cookie sheet.  It's very dark...almost black...and very heavy.  Again, it is only used as a tray of sorts for holding cookies for decorating.  A cookie sheet this dark will leave your cookies burnt on the bottom.

Commercial sheet pans.  I love the feel of these sheets.  They're sturdy and substantial.  Look at the pictures....obviously, I do put these to use.  But not for baking cut-out cookies.  These sheets are so thick and insulated that cut-out cookies don't brown at all on the bottoms.  I find that cookies tend to break more when I bake on these sheets.  They're just too tender for moving, packaging, or stacking.

Matte and sturdy.  Ah, just right.  {I feel like Goldilocks.}  You might find these sheets labeled as non-stick...but you'll be using parchment, so that doesn't matter.  Right?!?  These cookie sheets are a matte grey color, not super shiny...and not too thin. You could not bend one in half (or at least, I couldn't).

These cookie sheets are the ones I use for baking cut-out cookies.  They are thick enough to prevent the bottoms of the cookies from getting over-browned, but they still get a nice, light golden color.  Perfect for a cookie which will be moved, iced, packaged, or stacked. 

And these?!?  Well, I have two cookie sheets that are my show ponies.  These are for photos only.  If you ever see one of these nice, spot-free cookie sheets on the blog, you'll know the truth...that all of the spotted, ugly ones are doing the real work. ;)

Cookie sheets....they work for me! :)


Labels: ,

Tuesday, July 12, 2011

The "Supers" . . . Works for Me Wednesday

I've touched on this before on the blog and just in case you dozed off in the middle of one of my lectures, I think it bears repeating...

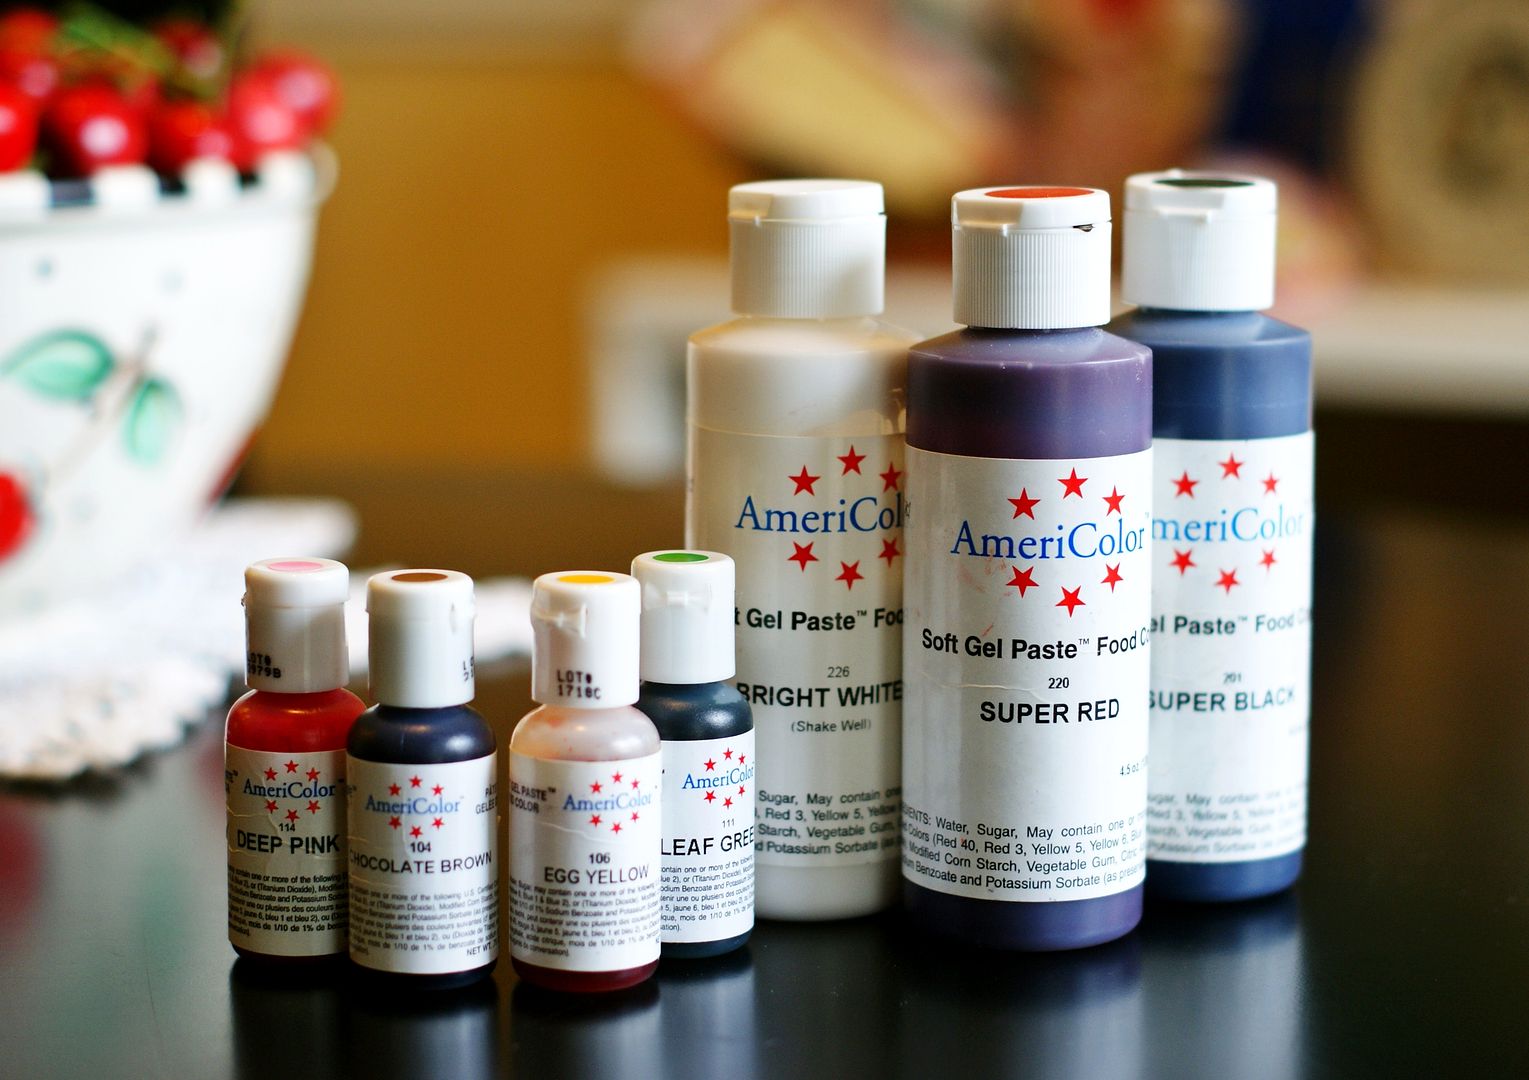
If you are making black or red icing, PLEASE treat yourself to some AmeriColor Super Black and Super Red gel paste food colorings. 


If you've tried another brand, you've probably noticed that you had to use the entire bottle to get a true, deep color.

And then, you probably noticed a not-so-pleasant taste?


AmeriColor "Supers" are the way to go.  Just a bit gives nice, saturated colors...and the taste?  What taste?  All I taste is icing.  (That's a good thing.)


Where to buy it?  Well, here are just a few options:
AmeriColor Super Red and Super Black...they work for me!  They'll work for you, too.  Trust me, I'm a doctor, um, baker.

Labels: ,

Tuesday, May 17, 2011

Cookie Decorating Essentials . . . Works for Me Wednesday

Although I've blogged about all of these things separately, I've never put them all in one post. Duh.

So, thank you to those of you who have emailed to ask for a list of essentials for new cookie decorators.

Here it is, all in one place...click on the links for the original post and more info.

Just the Basics, Ma'am
{cookie decorating essentials}


1. disposable icing bags
{photo credit: amazon}


2. icing tips: #1 & #3 tips (2 each), #2 tips (3) 


3. couplers: 5


4. squeeze bottles: 8 ounce (3), 16 ounce (2)


5. toothpicks: lots!


6. twist ties
{photo credit: Layer Cake Shop


7. AmeriColor Gel/Paste food colorings: 
here are my favorites...and don't forget white!


8. meringue powder

That should be enough to get you started! Of course, once you start, you'll want MORE! ;) Don't say I didn't warn you.

Need recipes?  Here ya go:
My go-to sugar cookie for decorating
Royal icing...recipe and FAQs
{printable versions of both recipes}

Alright....who's making cookies this week?

Labels:

Tuesday, January 18, 2011

Meringue Powder . . . Works for Me Wednesday

Using meringue powder is not the only way to make royal icing, but it's what I use to make mine.

When I first started decorating cookies, I used raw egg whites in my royal icing, but I started getting nervous.  Not nervous for me, but for other people who might eat the cookies.  About 9 years ago, I discovered meringue powder and I haven't looked back.

Does the brand of meringue powder matter?  Yes.  These are 2 of my favorites:

  • Williams-Sonoma brand (made by CK)
  • Ateco, available at bakery supply shops or Amazon
I also like:
  • AmeriColor
  • CK
There is another brand that is more widely accessible.  I won't mention the brand here because I think they do a lot of things really well, but I don't love their meringue powder.  Actually, I used it for years before even realizing there WERE other brands.  Once I bought one of the brands above from a bakery supply shop, I immediately tasted a difference and saw a better consistency with my icing.

{That said, if you are experiencing a cookie decorating emergency, you have my blessing to use the other stuff.} ;)

Gail of One Tough Cookie uses powdered egg whites with fantastic results.  She even has a vlog post about it if you want to learn more.

What do YOU use to make royal icing?

{Psst....here is the royal icing recipe I use if you're ready to make some of your own.}

Labels: ,