Wednesday, April 16, 2014

Bunny Silhouette Cookies ... and a special guest!

Hey guys! You're in for a treat because my friend Lupita is sharing a cookie tutorial with us today!  You've met Lupita before...I just love her cookies!  She has been posting the prettiest Easter cookies on her blog lately, and I kind of begged her to share one here. ;) 

I know you'll want to see all of her Easter creations...like these speckled eggs where she baked the cookies AND the icing!!!  These little lambs, sweet bunnies...and oh my gosh...these Faberge Egg cookies!

{Lupita's blog is written mainly in Spanish.  Follow the picture tutorials, or do what I do (no thanks to 4 years of high school Spanish), use Google Translate.  Just pop the URL into the translate box and Google will translate the ENTIRE post for you.  So cool!}

Alright...here's Lupita!  Y'all give her a warm welcome!


We are just few days away from Easter, I hope you are already preparing to celebrate this big feast. 
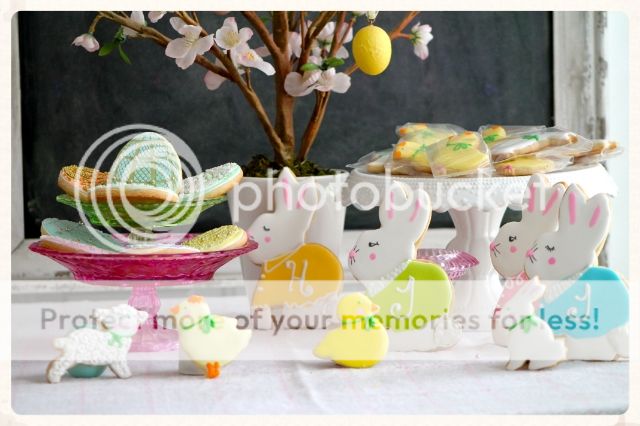

Easter cookie table centerpiece


I love to decorate my table with cookies as you may imagine and I am always looking for practical ideas or ways to multitask my cookies, and I will share with you how to make a silhouette cookie that if you personalize it it can be a place card for your Easter table. 


Easter cookie table


It is really easy to make and it will add a cute touch to your table. 

You will need...

*  Your favorite cookie dough (click here for my favorite)
*  Square cookie cutter
*  Rabbit cookie cutter
*  Royal icing medium and flooding consistency
*  2 Pastry bag, couplers and decorating tip #2
*  Americolor food gel in Turquoise and Black
*  Edible black marker


PROCEDURE:

1) Bake a square cookie and let it cool, prepare a pastry bag with medium consistency white royal icing and tip # 2.


2) Trace the bunny in the center of your cookie using your marker,  outline the border of the rabbit  and the border of the square with white royal icing. 
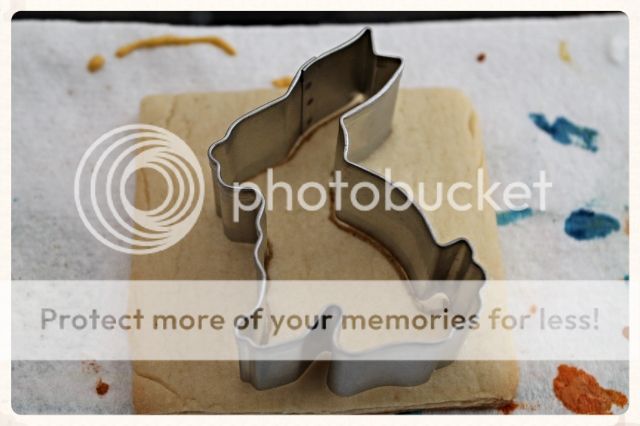


3)  Prepare flooding icing in light turquoise to fill up  the square and black for the bunny.


4)  Flood the square with turquoise royal icing and let it dry for 6-8 hrs.


5)  When the turquoise icing is dry, flood the bunny with black icing and let it dry completely. 


6)  Prepare some firm medium consistency royal icing in  black and fill up a pastry bag and with tip # 2 make some little dots all around the cookie. 


7)  You can write down the name of each guest on the cookie or just add a little detail that represent each of your guest,for example, you can add some pearls to the Mother Bunny, or some glasses to the Granpa Bunny, or a bow to the Sister Bunny.


What I like the most of decorating cookies is that you have endless posibilites to make your own creations. 

Happy Easter Everyone!!


post signature

Labels: ,

Sunday, April 13, 2014

From boy crushes to cookie crushes...

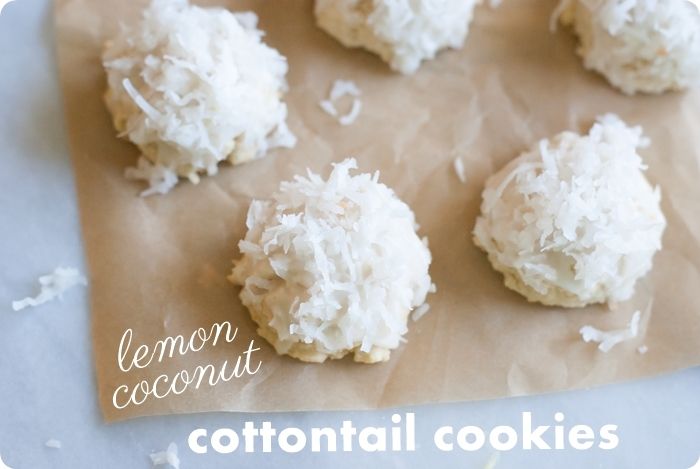
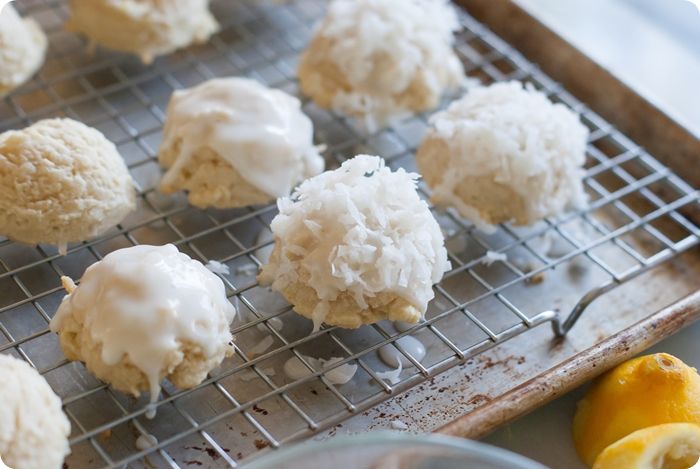
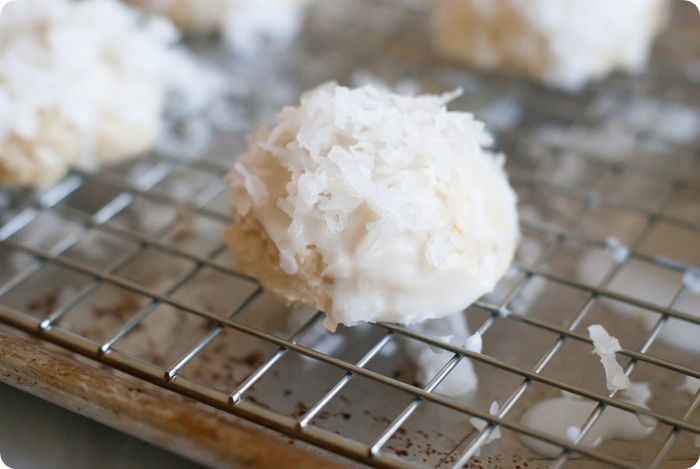
lemon coconut cottontail cookies
I was the girl who *always* had a "crush" on a boy.  ALWAYS.  I think it started about 5th grade and went all the way through college.  I'm not sure why I had these crushes...none of them ever paid me any attention. 

Can I tell you an embarrassing story about one of my crushes...and you promise you won't tell?  Ok, good.  In 7th grade, my crush, Andy, asked another girl in band to "go with" him.  ("Go with"...that's what we called it in the olden days.)

Anyway...I was so, so heartbroken. 
lemon coconut cottontail cookies
(Now,  at this point in the story, please keep in mind that these were the olden days like I mentioned earlier with no caller ID.)
I came home from school that day, called his house, and when he answered the phone...

...when he answered the phone...

...I set the needle down on my Grease album (vinyl: olden days), and played Hopelessly Devoted to You to him over the phone.  And, then hung up.

Yep.  I did.

lemon coconut cottontail cookies
Happily for everyone involved, crushes on boys have morphed into crushes on cookies.  It's kind of like school all over again...a new crush every week or so...but without the heartache.

lemon coconut cottontail cookies

My crush this week is this recipe for Lemon Coconut Cottontail Cookies.  They're TOTALLY crush-worthy.  And, they love when you belt out Hopelessly Devoted to You...they don't even find it creepy whatsoever.


lemon coconut cottontail cookies
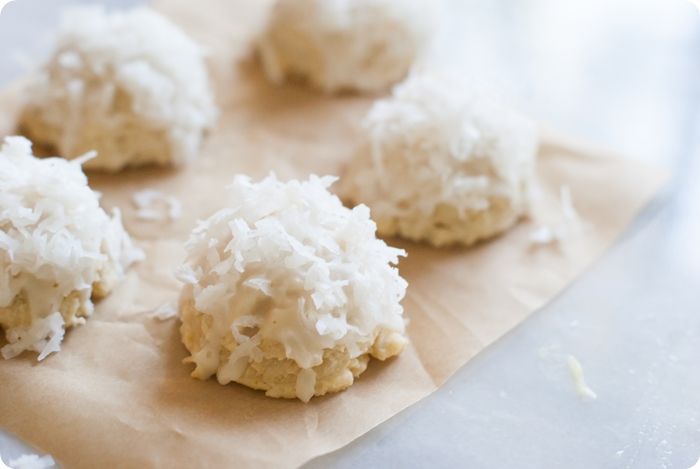
Seriously, these little sweeties are *perfect* for your Easter dessert table.  Soft, citrus-y, and oh-so-pretty. 

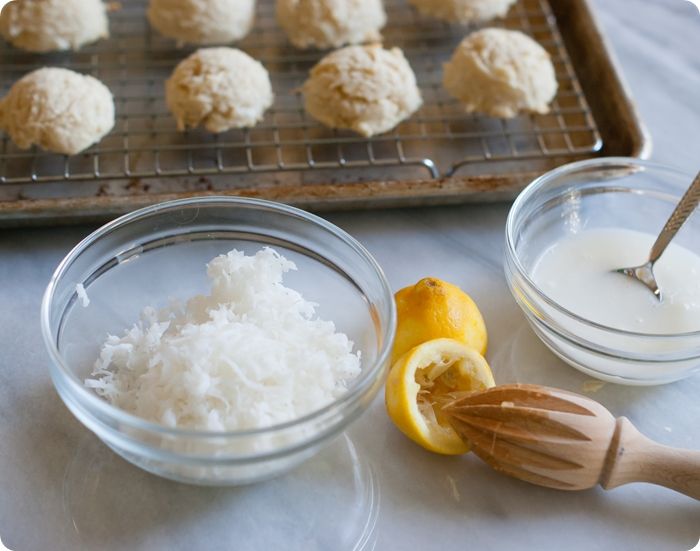
Promise me you'll eat one warm...then bathe the rest in the lemon glaze and cover with sweetened coconut.

lemon coconut cottontail cookies
I'm sharing this recipe over at Imperial Sugar.

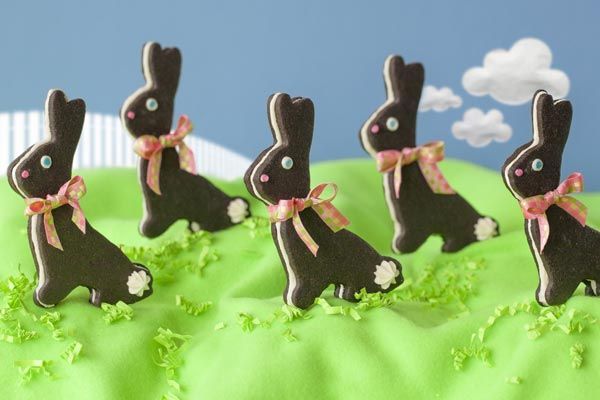
chocolate bunny sandwich cookies with marshmallow buttercream
Guys!  Also, let me tell you about these Chocolate Sandwich Bunny Cookies with Marshmallow Buttercream that are also over at Imperial Sugar.  You may have seen these in their Easter ads recently.  I was thrilled to be able to create the recipe and then they were photographed for the ad by talented Heidi of FoodieCrushClick here for the recipe...there's also a how-to video! (Yikes!)

*And, please tell me I'm not the only one with an embarrassing "crush" story...or two.*


Labels: ,

Thursday, March 28, 2013

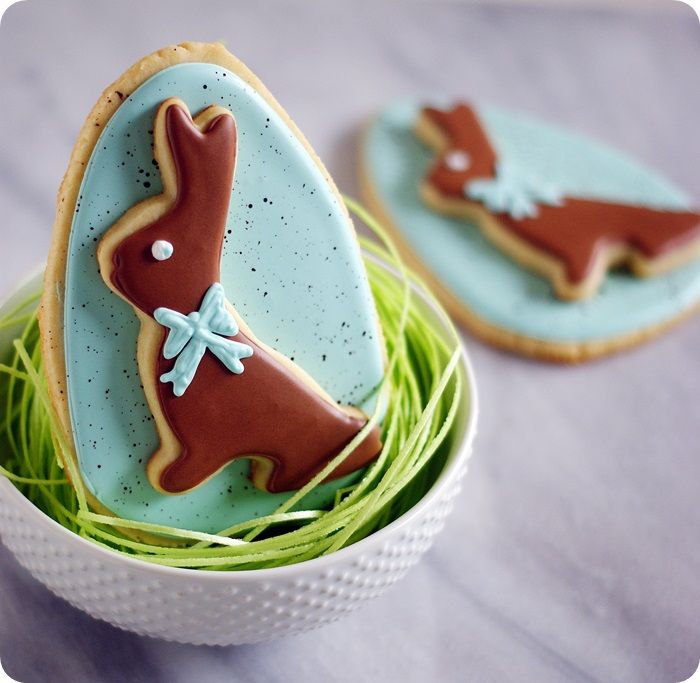
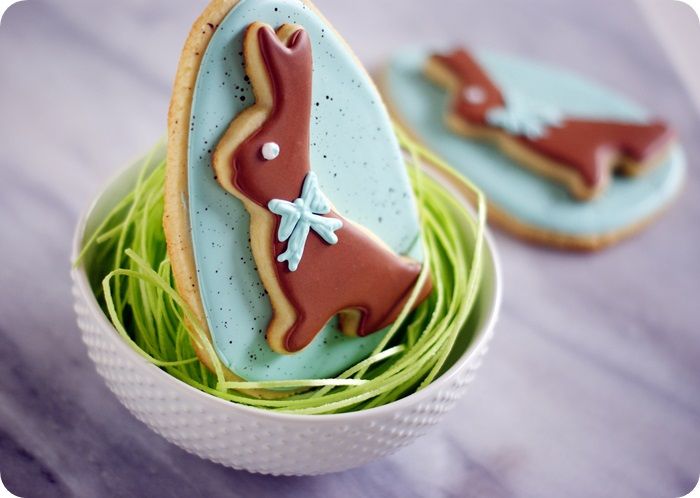
Double-decker Bunnies, take two

Two cookies always beat one, yes? 
double decker choc bunnies 1 photo doubledeckerchocbunnies1.jpg
Last year, I made little double-decker bunnies and thought this year needed some double-decker action as well.  (That sounds weird.)

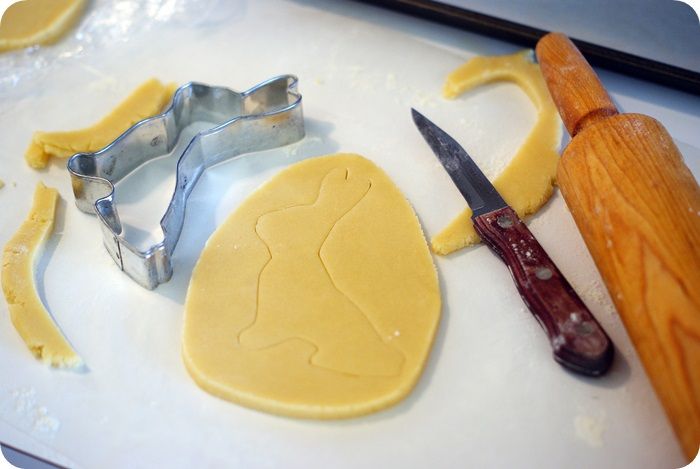
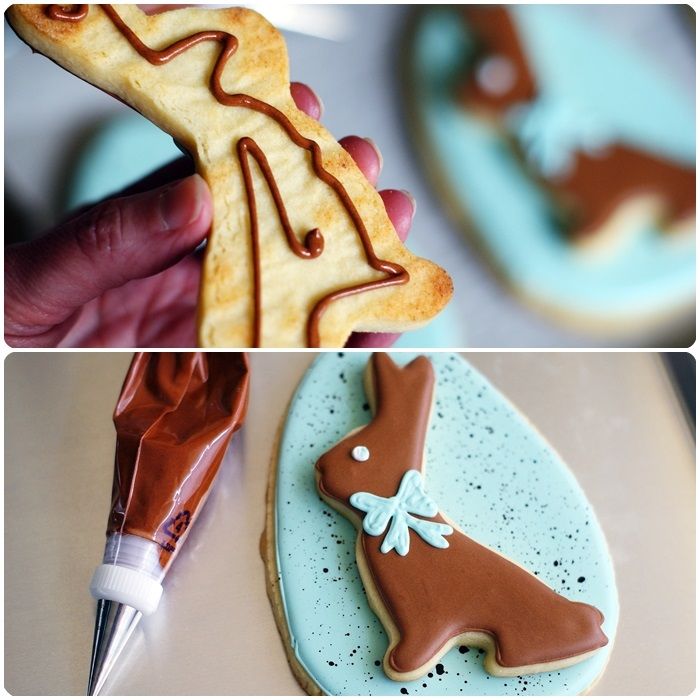
Anyway...I love the shape of this bunny cookie cutter.  It's just perfect for a "chocolate" bunny.  I do have three egg cookie cutters (everyone needs three, right?), but none larger than the bunny cutter.  So, using the bunny cutter as a guide, I just cut large eggs with a paring knife:
double decker choc bunnies cut photo doubledeckerchocbunniescut.jpg
These babies are big...the egg cookie is 6 & a half inches.  Easter is for celebrating.

{Oh, PS. That edible Easter grass?  Cute, but not exactly delicious.}

double decker choc bunnies 2 photo doubledeckerchocbunnies2.jpg
To make these double-decker bunny cookies, you'll need:

  • sugar cookies cut with a bunny cookie cutter and hand-cut with a paring knife
  • royal icing, divided and tinted with AmeriColor Sky Blue mixed with Ivory & Chocolate Brown, Bright White
  • disposable icing bags
  • coupler and tips: #2, #1
  • squeeze bottles 
  • toothpicks
  • small ramekin
  • small, clean paintbrush
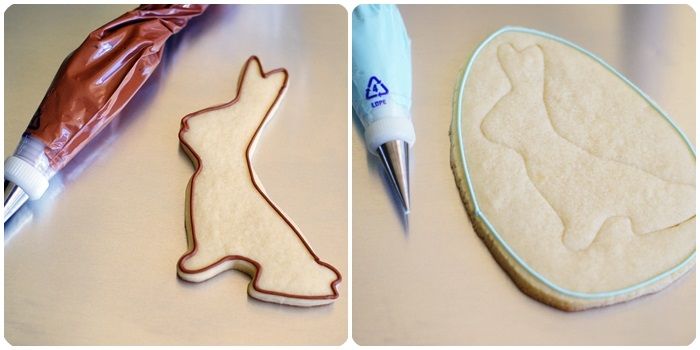
double decker choc bunnies outline photo doubledeckerchocbunniesoutline.jpg
Use #2 tips to outline both the bunny and the egg.

Thin the blue and brown icings with water, a bit at a time, stirring with a silicone spatula, until it is the consistency of a thick syrup.  (Reserve some of the blue icing for piping details later.) You'll want to drop a "ribbon" of icing back into the bowl and have it disappear in a count of "one thousand one, one thousand two." Four is too thick, one is too thin.  Count of 2-3 is good.  Cover with a damp dishcloth and let sit for several minutes.

Stir gently with a silicone spatula to pop and large air bubbles that have formed.  Pour into squeeze bottles as needed. 

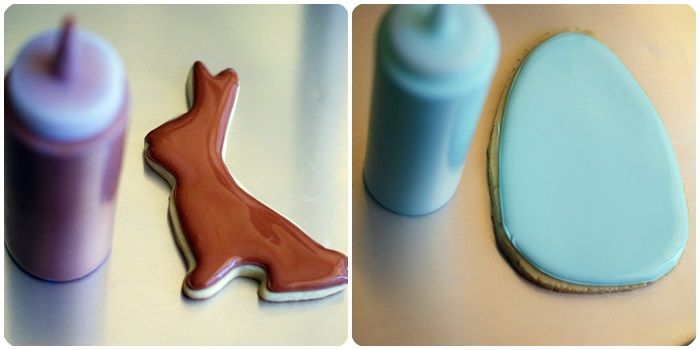
double decker choc bunnies flood photo doubledeckerchocbunniesflood.jpg
Fill in the outlines with the thinned icing, using a toothpick to guide to the edges and to pop large air bubbles.

Let the cookies dry at least one hour.

Add the details to the bunny cookie, using a #2 tip for the bow and #1 tip for the eye.

Let the cookies dry uncovered, 6-8 hours, or overnight.

The next day, add the "speckles" to the eggs.  Mix equal(ish) parts water and chocolate brown food coloring.  Dip a clean paintbrush into the mixture and flick over the cookies with a GLOVED finger.
(For more details and pictures of the speckling process, click over to this post.)

This will dry in about 15-30 minutes.

double decker choc bunnies attach photo doubledeckerchocbunniesattach.jpg
Apply piping consistency icing to the back of the bunny cookies...just a bit will do, we don't want oozing.  Gently press in place on the egg cookie.  Let dry for 30 minutes or more to set.

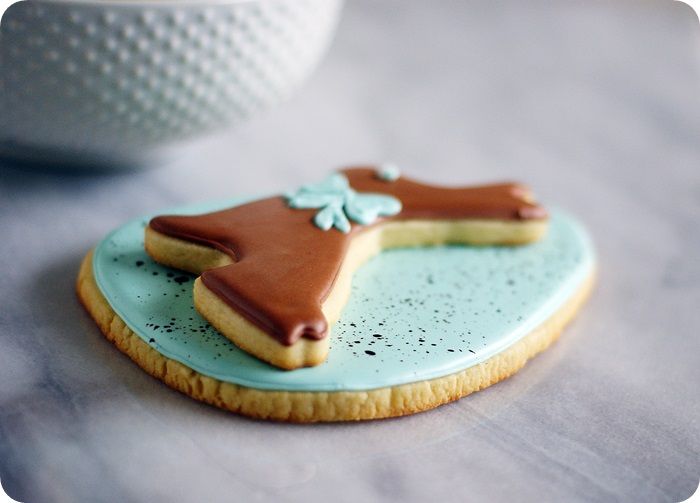
double decker choc bunnies side photo doubledeckerchocbunniesside.jpg
Double-decker, 6-inch tall, speckled eggs & bunnies.  Just one placed in a treat bag and tied with a pretty ribbon makes the perfect Easter gift!

Happy Easter, bunnies! 


Labels: ,

Monday, March 25, 2013

Carrot Cake Cookies

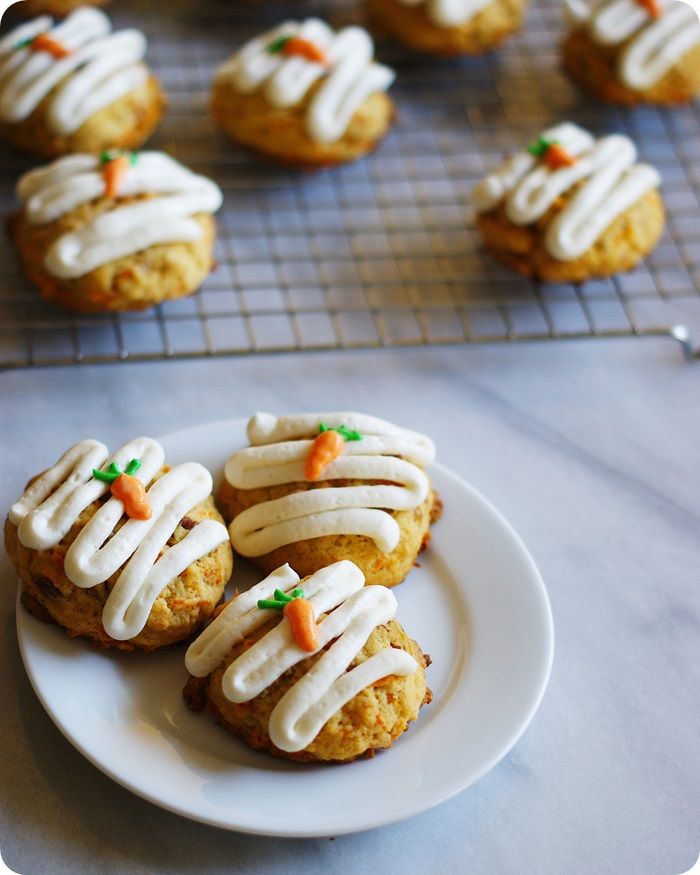
carrot cake cookies plate rack photo carrotcakecookiesplatewithrack.jpg
I won't even go into the "these-cookies-are-good-for-you-because-they-contain-carrots" lecture.
You know that already.

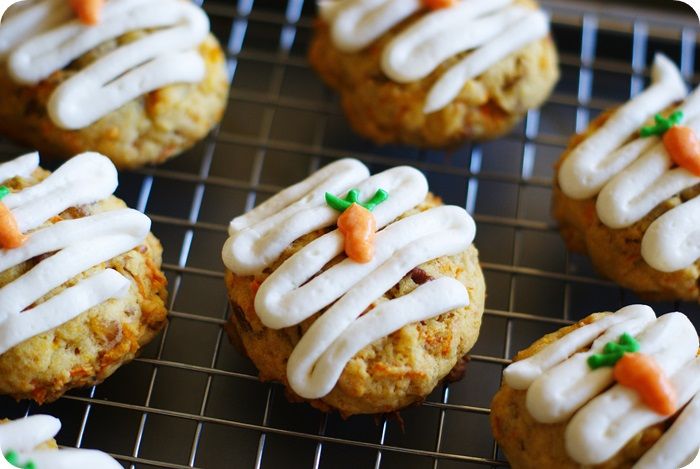
carrot cake cookies close photo carrotcakecookiesrackwithcarrots.jpg
I love, love, love carrot cake.  I'm a chocolate girl through and through, but I think carrot cake wins almost every time.  The carrots ensure its moistness, that little bit of spice makes it intriguing, and cream cheese frosting?  You really can't beat cream cheese frosting.

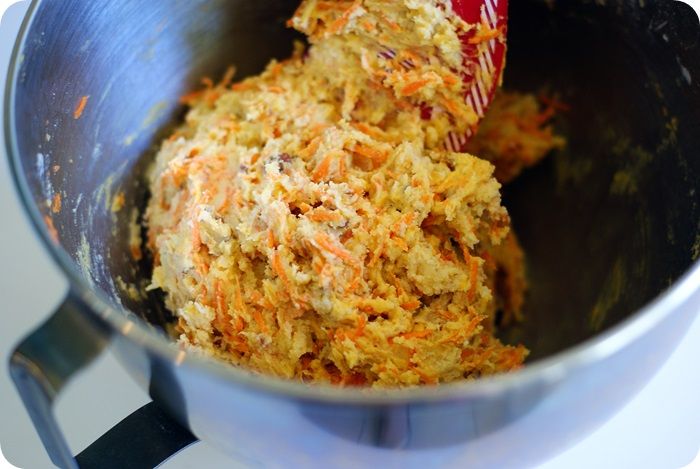
It all starts with this dough...
carrot cake cookies dough photo carrotcakecookiesdough.jpg
....which I could have easily eaten with a spoon without baking one single cookie.

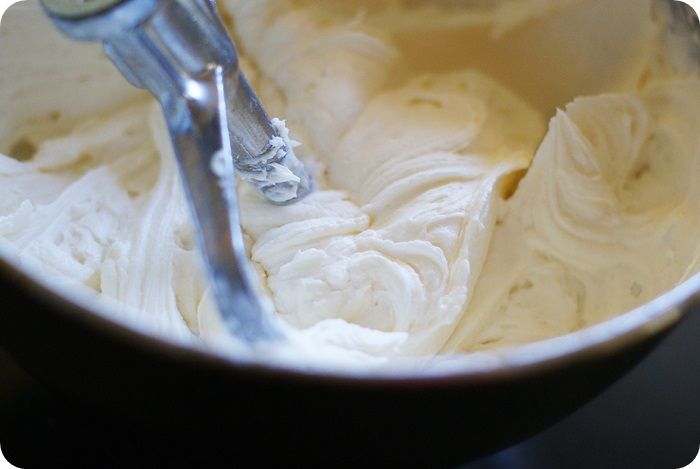
And, then you add the cream cheese frosting...
carrot cake cookies frosting photo carrotcakecookiesfrosting.jpg
....hello, gorgeous.

carrot cake cookies squiggle bag photo carrotcakecookiessquigglebag.jpg
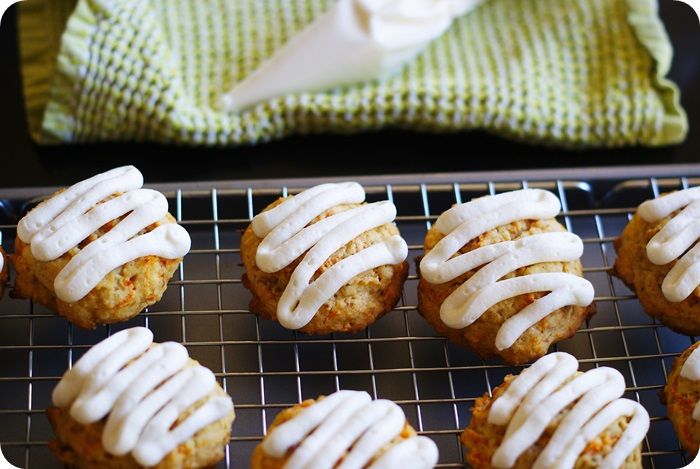
Pipe on generous squiggles of frosting.  Heck, dunk the entire cookie in frosting...I won't tell.

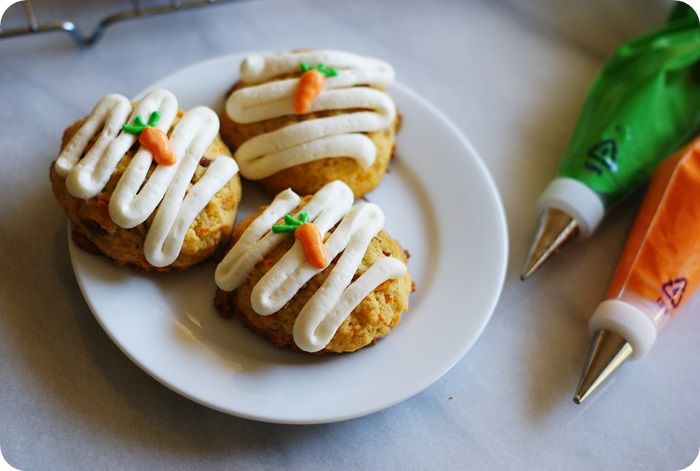
You've got a little carrot cake in cookie form.  Big mounds of carrot and ginger-laden cookies, flecked with toasted pecans and topped with an orange-flavored cream cheese frosting.

carrot cake cookies plate pastry bags photo carrotcakecookiesplatepastrybags.jpg
They come together really quickly and will be such a welcome addition to your Easter desserts.

I'm sharing the recipe over at Imperial Sugar.  Come get your daily dose of veggies...
...and cookies.


Sur La Table 120x600 11.27.07

Labels: ,

Saturday, April 7, 2012

Peeps Show S'mores Bars

Confession: Until yesterday, I had never eaten a Peep.

We grew up in an all-chocolate-and-jelly-bean Easter basket family.  {I love Easter.}

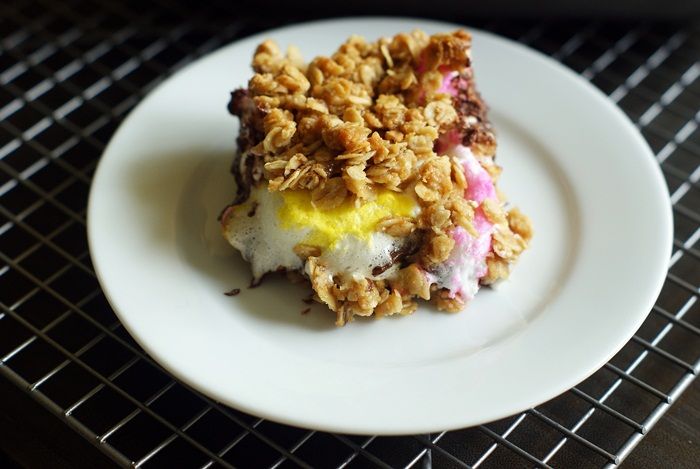
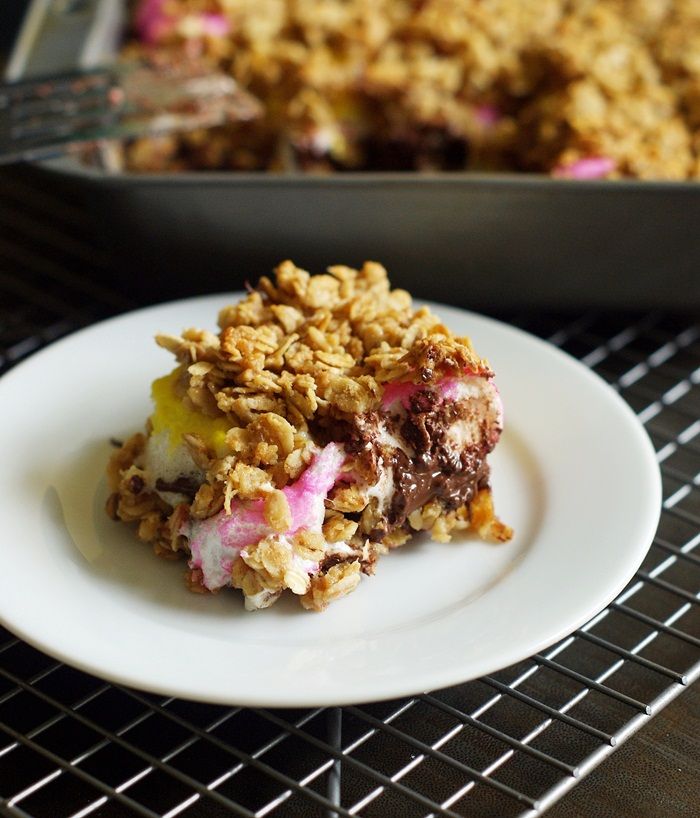
So, fast-forward to yesterday...I made Peeps Show S'mores Bars.  Peeps, combined with semisweet chocolate and a graham-crackery, oaty crust, baked until melty and gooey and messy?
ALL.KINDS.OF.AWESOME.

I love Peeps now, but honestly after taking a bite of one plain, I ONLY want my Peeps baked into these bars.

Scroll on down for the recipe, but here's what you're going to do...

First, Steal all of the Peeps out of your children's Easter baskets.
{I kid; I kid. RUN to the store Monday and stock up on them at half-price.}

OK, you'll make a crust/topping concoction with butter, oats, brown sugar and a few other ingredients...

{It comes together really fast.  You won't even need your mixer...just a saucepan...

...and a spoon.} 

...about half goes in a pan for the crust...

Here are the ingredients for the filling:
{Hello, Peeps.}

...you'll top the crust with chocolate chips...

...and some Peeps...

...and top with the rest of the topping/crust mixture...
...bake.

You'll let it rest for a bit, then you'll dig in. 
It's gooey and delicious...it may not be elegant, but it WILL make your eyes roll back in your head.  You might even moan a little.


Peeps Show S'mores Bars

ingredients:
6 TBSP salted butter
1/4 cup packed light brown sugar
6 TBSP dark corn syrup
2 & 1/4 cups rolled oats (not instant, not steel cut)
1/2 cup all-purpose flour
1/2 teaspoon kosher salt
1 cup graham cracker crumbs
1 & 1/4 cup semisweet chocolate chips
15 Peeps

Instructions:
Preheat oven to 350.  Grease an 8x8 pan.  Set aside.

In a medium saucepan, heat the butter, brown sugar and corn syrup over medium heat, until the butter is melted and sugar has dissolved.  Remove from heat and stir in the oats, flour, salt and graham cracker crumbs.

Press a little more than half of this mixture into the bottom of the prepared pan.  Place on a wire rack and let cool completely.

Sprinkle the chocolate chips evenly over the cooled crust.  Top with the Peeps, making 3 rows of 5 Peeps.

Cover with the remaining topping/crust mixture.

Bake for 20 minutes; the Peeps will looks slightly misshapen under the topping.

Place on a wire cooling rack and let cool for 20 minutes.  Serve warm.
{adapted from S'mores Granola Bars, King Arthur Flour Baker's Companion}

{These bars are good at room temperature, too...but are a-MAZ-ing warm.}

What are you waiting for?!?  Go get some Peeps!

Labels: ,

Wednesday, April 4, 2012

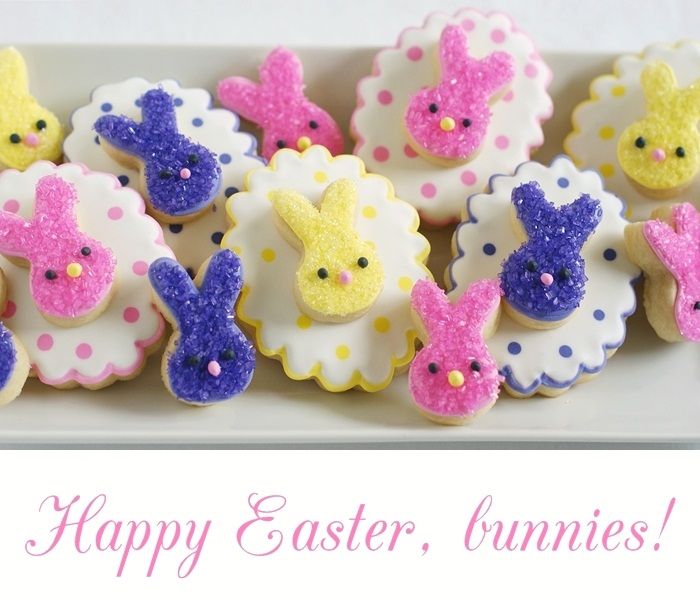
Happy Easter, bunnies!

aaaand, the obsession with double-decker cookies continues....
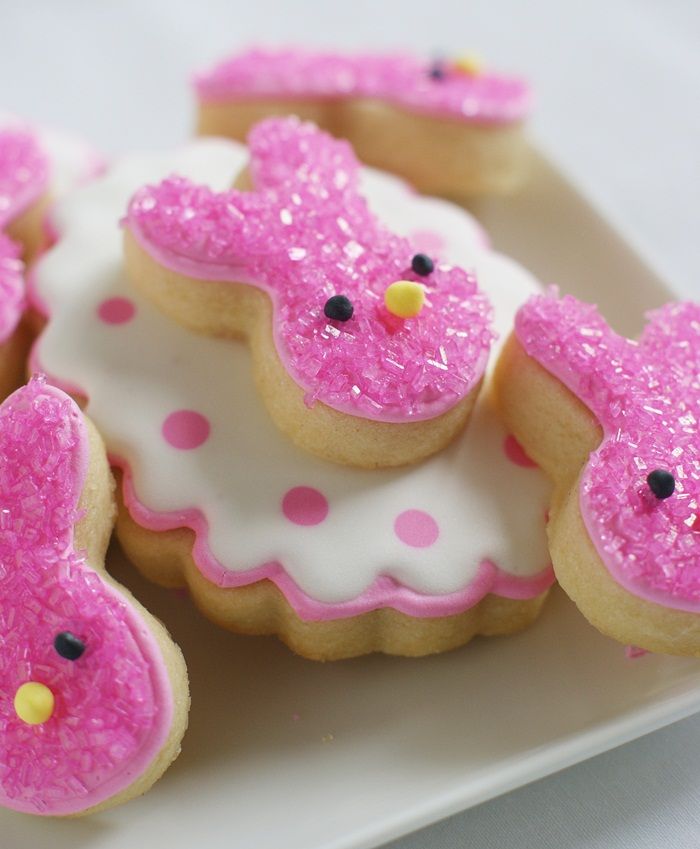
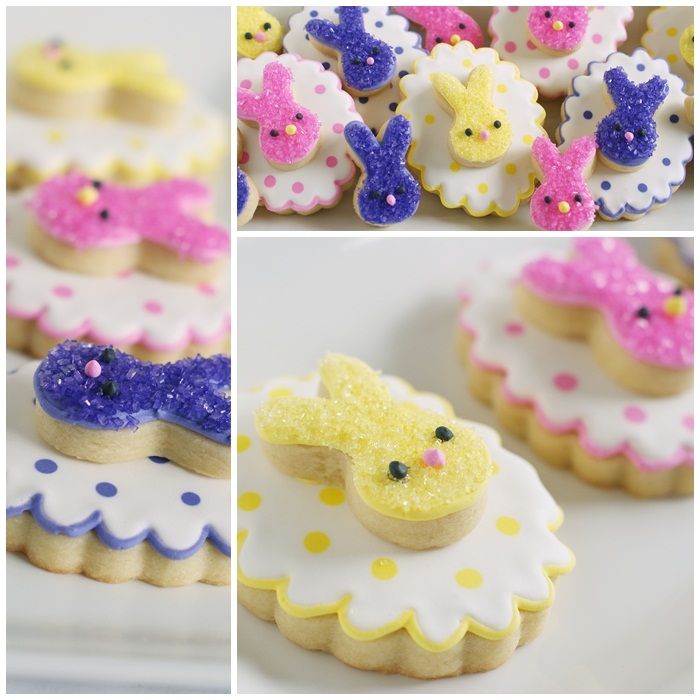
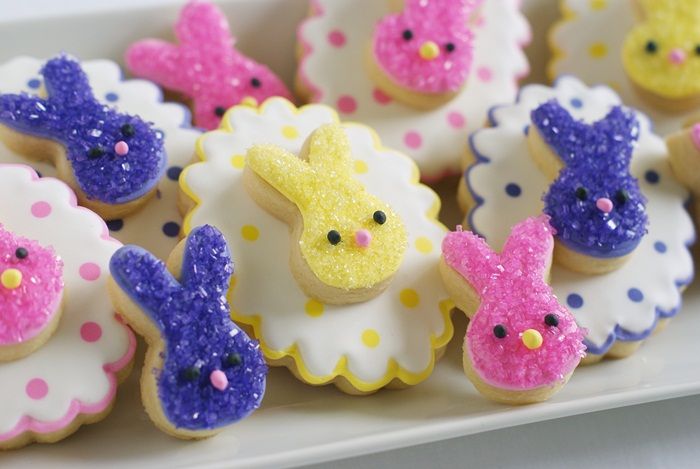
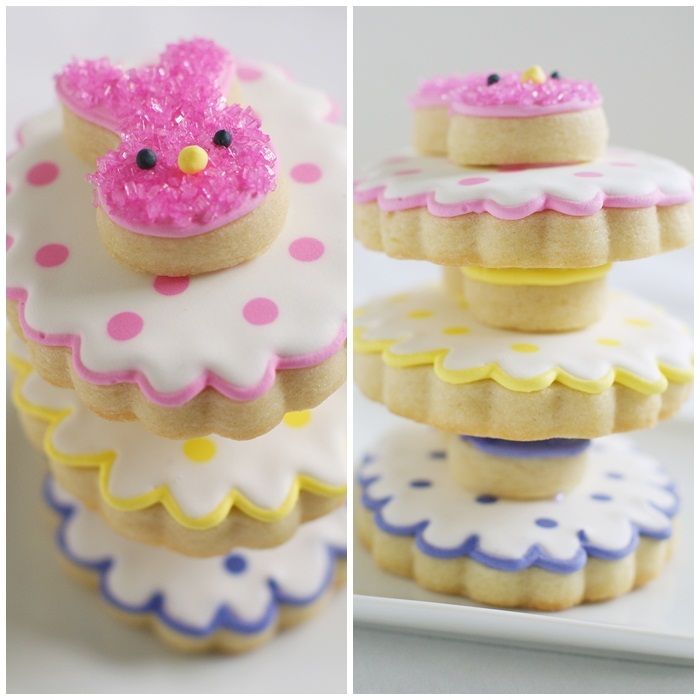
How do you say Happy Easter?  Dots, bunnies, sparkling sugar?

Yep.  That should do it.

You've heard of the "double-decker" cookie, right?  Two cookies, but only the guilt of eating one.  It's part of my new diet plan.

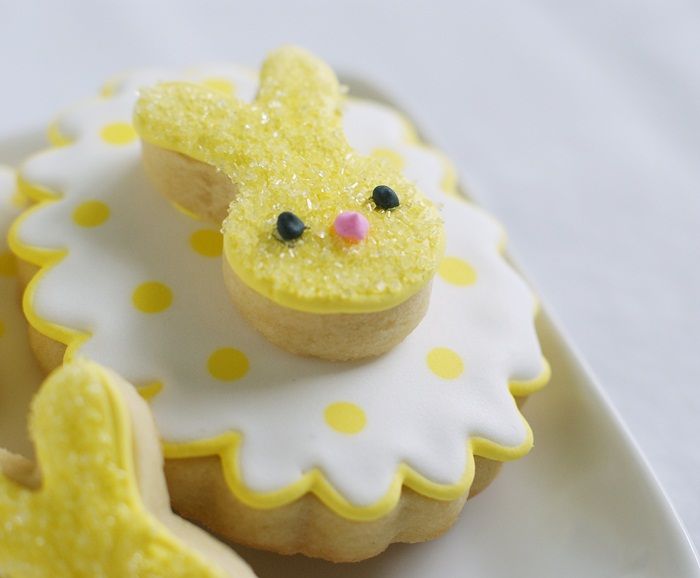
{You know, I thought the pink would be my favorite, but I actually ended up loving the yellow.}

Let me show you how to make them...
 
For the double-decker bunny cookies, you'll need:
  • sugar cookies (pick any flavor cut-out here) in scalloped ovals and tiny bunny faces
  • royal icing, divided and tinted with AmeriColor Lemon Yellow, Electric Pink, Regal Purple, Bright White, and Super Black
  • couplers and tips: #3, #1
  • disposable icing bags
  • squeeze bottles
  • toothpicks
  • small paintbrush
  • small ramekins
  • meringue powder
  • basket-style coffee filter
  • sparking or sanding sugar: yellow, pink and purple
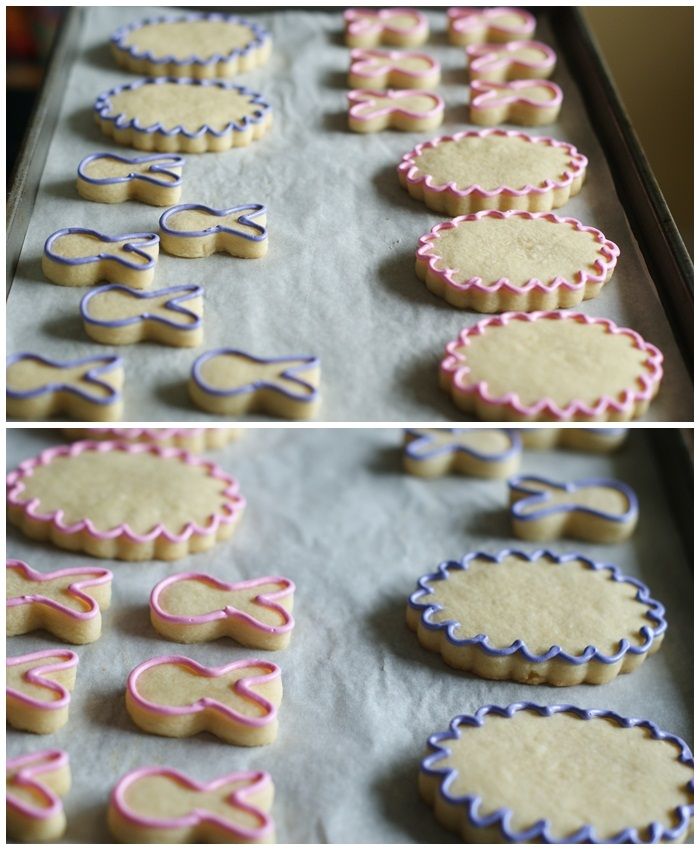
Use a #3 tip to outline the ovals and bunnies.  Reserve some of this piping consistency royal icing.

{PS...I'm officially obsessed with this scalloped oval.  PPS...anyone else watch Fashion Police?  Now I can't say "I'm obsessed" with something without thinking of Kelly Osbourne.}

Thin the yellow, pink, purple and white icings with water, a bit at a time, stirring with a silicone spatula, until it is the consistency of a thick syrup.  You'll want to drop a "ribbon" of icing back into the bowl and have it disappear in a count of "one thousand one, one thousand two." Four is too thick, one is too thin.  Count of 2-3 is good.  Cover with a damp dishcloth and let sit for several minutes.

Stir gently with a silicone spatula to pop and large air bubbles that have formed.  Pour into squeeze bottles as needed.

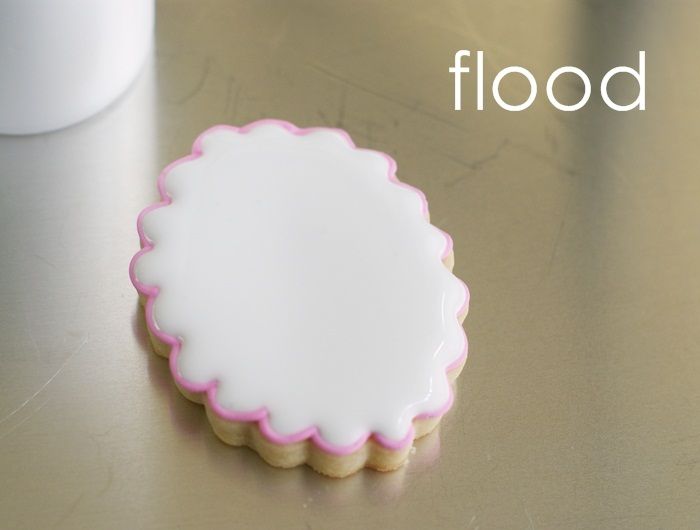
Working a few cookies at a time, fill (flood) the ovals with white icing.  Use a toothpick to guide to edges.

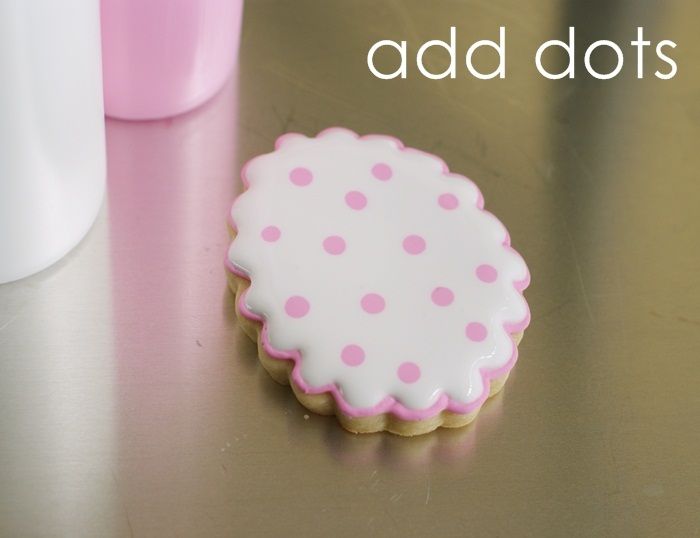
On top of the wet white icing, drop dots of the thinned colored icing, starting with the first cookie filled.  (Giving the base color a few minutes to set will help prevent bleeding.)

Fill in the bunny faces.  Let the cookies dry uncovered 6-8 hours or overnight.

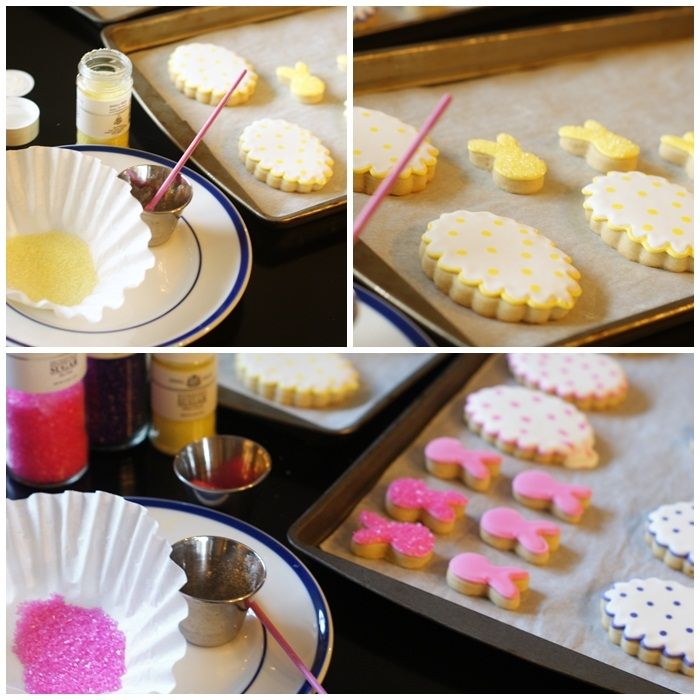
The next day,  mix 1/2 teaspoon meringue powder with 1/2 teaspoon water.  Brush this mixture onto the bunny faces.  Sprinkle on the sugar, shaking the excess off over a coffee filter.  Use the filter as a funnel to pour back into the jars. {psst...can you see where I overfilled one?}

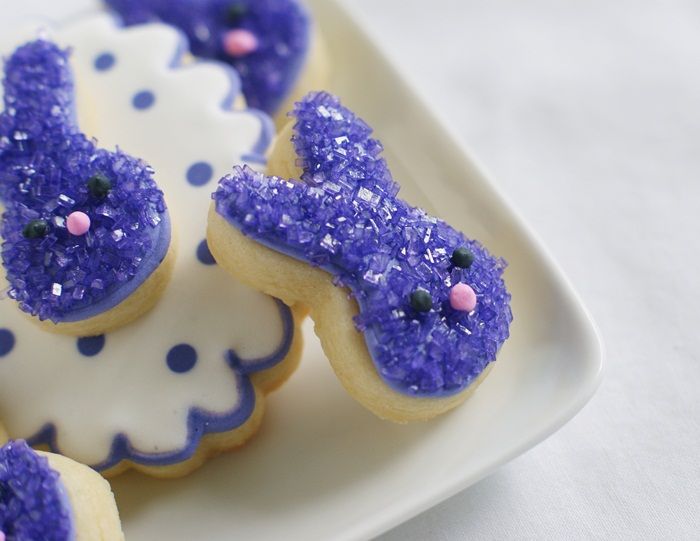
Use a #1 tip to pipe eyes on the bunny faces in black.  Add a nose in an alternating color.

Pipe a small amount of icing onto the back of the bunny cookies.  Place on the ovals and press down slightly to adhere.  Let the cookies dry for at least 30 minutes before packaging and stacking.


What are you baking this Easter?

Labels: ,