Thursday, January 23, 2014

And now, we will relive junior high. I'm sorry.

If we *really* cared about children, we would make a law that 6th - 8th grades are mandatory homeschool years. Especially for awkward, frizzy-haired, pigeon-toed, braces-wearing, overly-sensitive girls.  Junior highs should only be open to football players, cheerleaders, and teenagers with perfect complexions.
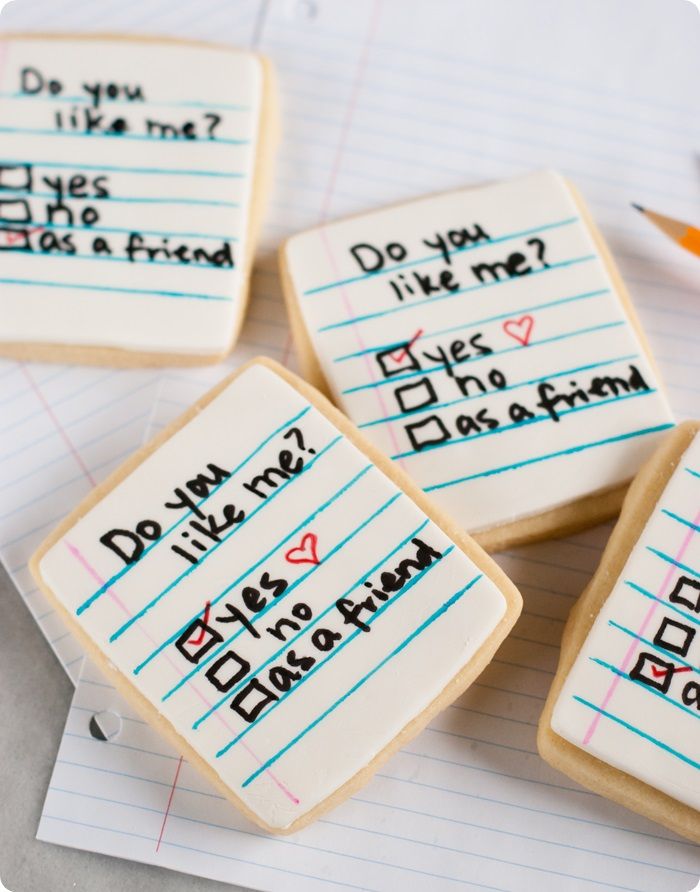
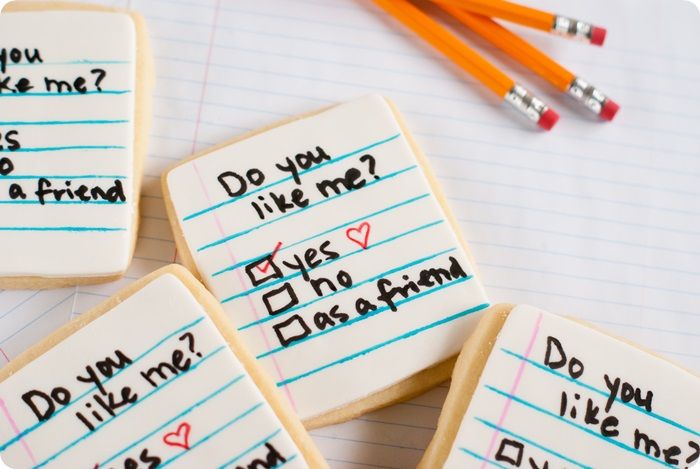
"do you like me" note cookies...simple and easy to make...perfect for valentine's day!
I mean, wouldn't that just make life nicer?

Some of my least favorite childhood memories come from middle school.  Included in those memories are these notes.  The "do you like me" notes.  The notes that NEVER came back checked with a "yes."
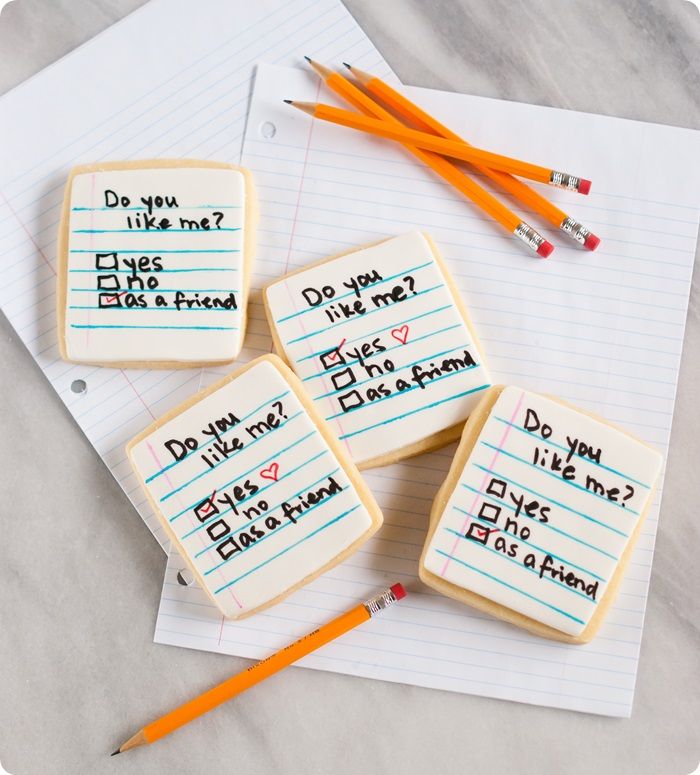
"do you like me" note cookies...simple and easy to make...perfect for valentine's day!
As I remember, usually a friend passed these notes on your behalf.  "Do you like Bridget?"  And then, the friend would share with you...and 20 other girls...the giant X in the "no" box.

{Have I mentioned how much I love NOT being in junior high?}

So, now we fix things.  Now we check YES!  (And, maybe "as a friend" because that's OK, too!)
Take THAT, junior high!  (I may have some unresolved issues here.)

Y'all...these cookies could not be easier.  I know I say that all the time.  I am becoming the queen of the easy cookie...in my old age, I'm too lazy for complicated. ;)
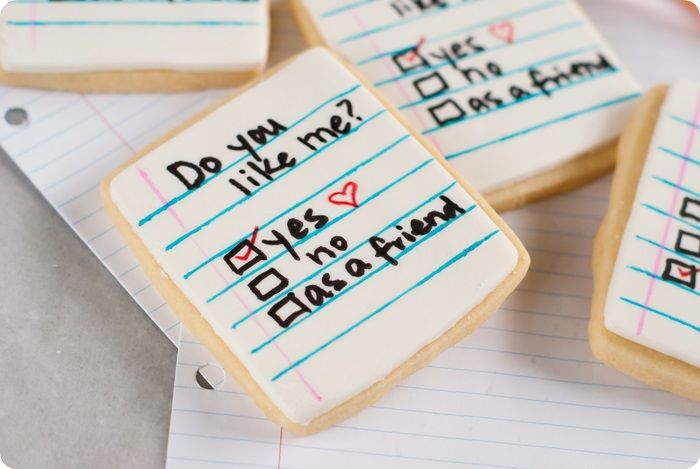
"do you like me" note cookies...simple and easy to make...perfect for valentine's day!
These "do you like me" cut-out cookies are topped with fondant, which means no making royal icing, no piping, no flooding, no waiting for the icing to dry.  In other words, you could bake, decorate and GIVE these cookies all on the same day.

My favorite fondant is Satin Ice brand.  It can be found on Amazon or at Sur la Table.  You can also make homemade fondant, which is super yummy, but I'll be honest...I normally buy mine.

To make these "do you like me" (junior high nightmare) cookies, you'll need:


Bake the cookies and let cool.

Meanwhile, roll out the fondant to 1/8" thickness on a surface heavily coated with cornstarch.  (Also, dust the rolling pin and cookie cutter with cornstarch.)  I like these guides for even rolling. Use the same cutter as used for the cookie to cut the fondant.

Brush the cooled cookie with corn syrup and place the cut fondant on top.  Smooth and lightly press to adhere.
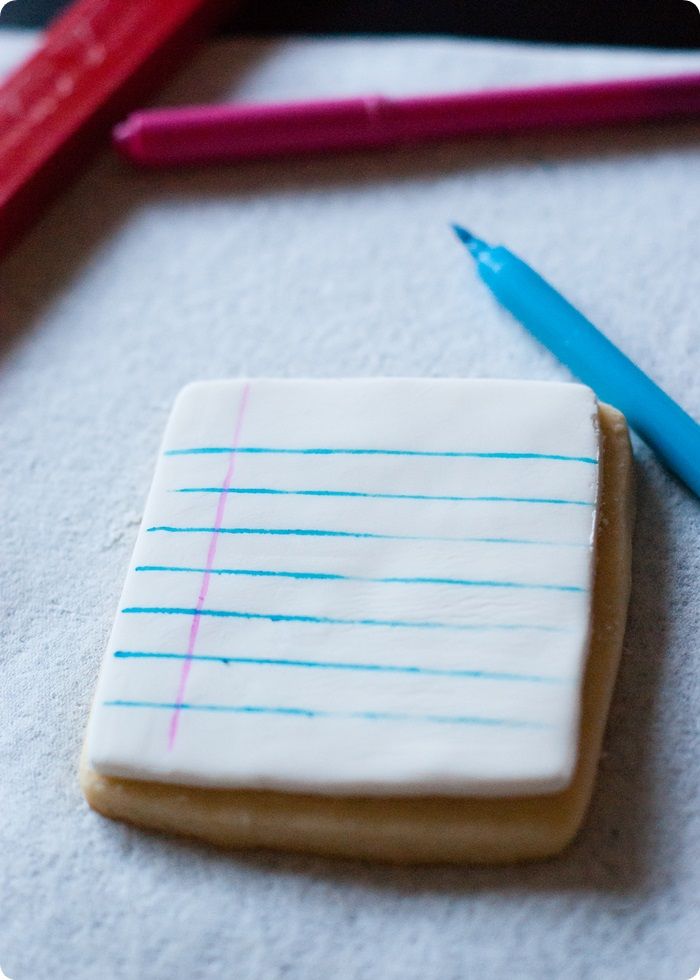
do you like me lines photo brightdoyoulikeme1of11.jpg
Use food coloring pens to draw lines on the cookie to resemble notebook paper.  I used my rolling guides as a straight edge.
(And wouldn't plain notebook paper cookies be cute, too?)
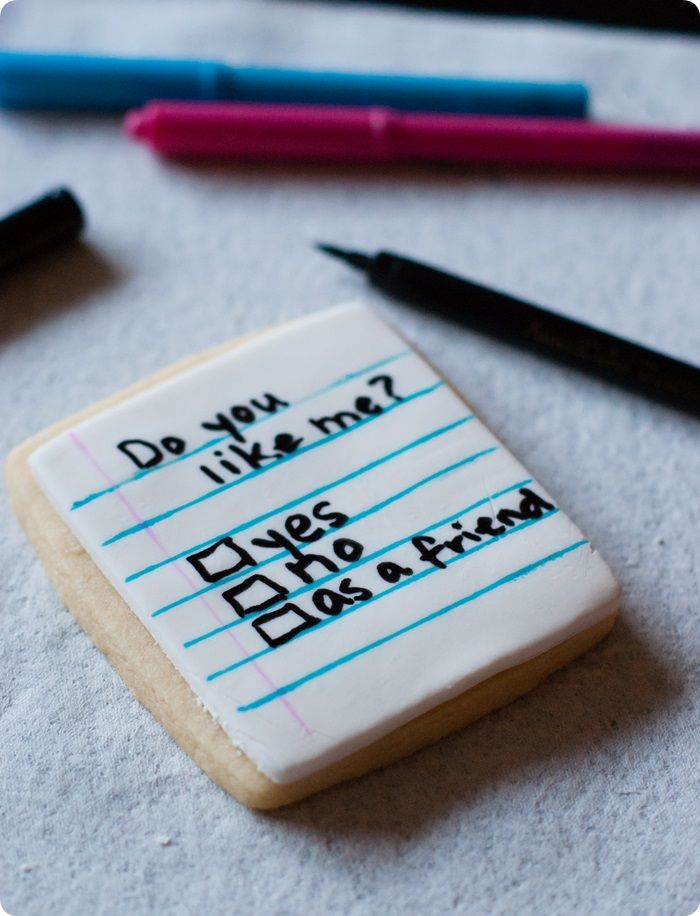
do you like me words photo brightdoyoulikeme3of11.jpg
Then, add the check boxes and words.

Give the cookies as is...and maybe attach a food coloring pen...
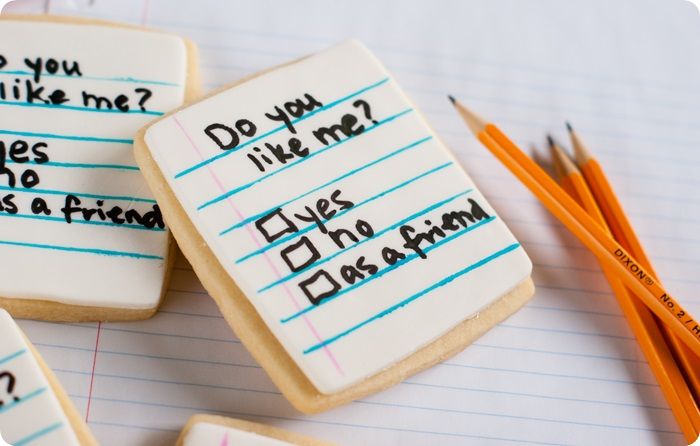
"do you like me" note cookies...simple and easy to make...perfect for valentine's day!
....or, just go ahead and check the "yes" box.  We're not in junior high anymore.
THANK GOODNESS. 
"do you like me" note cookies...simple and easy to make...perfect for valentine's day!


Labels: ,

Friday, February 15, 2013

Smitten: Mr. Bates + Anna

Valentine's Day has come and gone, but we can still talk about love, right?!?
As of yesterday, I'm caught up on Downton Abbey.
{Now, *what* will I do with my free time?!?}

Side note: Let me say that watching Downton Abbey has made me long for a return to chivalry, manners, dressing for dinner, and politeness.  Yesterday, at the Godiva store, I approached the cashier to buy a truffle from the case.  Instead of asking "how may I help you," or even "hello," the cashier said, "what's up?"  Only when I got in the car did I think that I should have answered, "yo." 

Anyhoo...no spoilers here, since I know many of you are just jumping on the Downton bandwagon, but ever since there was that little spark between Anna & Mr. Bates in the first episode, I've been completely smitten with these two.  ♥


And, I thought their cookies deserved a little lace.

Lace is about the easiest way to decorate a cookie with piping.  You really can't do it wrong...and you get major bang for your buck...or pipe...or whatever.  It looks classy and elegant and all you did was pipe on random designs.  (I'll link at the bottom of the post to some lace inspiration from other blogs.)


To make the cookies, you'll need:
Use a #3 tip to outline the cookies in black icing.  (I chose a #3 tip here since I really wanted the outline to show.)

Thin the purple and ivory icings with water, a bit at a time, stirring with a silicone spatula, until it is the consistency of a thick syrup.  (Reserve some of the white icing for piping details later.) You'll want to drop a "ribbon" of icing back into the bowl and have it disappear in a count of "one thousand one, one thousand two." Four is too thick, one is too thin.  Count of 2-3 is good.  Cover with a damp dishcloth and let sit for several minutes.

Stir gently with a silicone spatula to pop and large air bubbles that have formed.  Pour into squeeze bottles.

Fill in the outlines with the thinned icing, using a toothpick to guide to the edges and to pop large air bubbles. 

Let the cookies dry for at least one hour.

Use a #1 tip to pipe a lace pattern and/or personalization onto the cookies.  For inspiration, try an google image search for "simple lace" or "lace patterns."

Let the cookies dry, uncovered, 6-8 hours or overnight.

For more lace cookie inspiration, check out these beauties:

Now, without any spoilers...let's not ruin it for the Downton newbies out there...are you as in love with Mr. Bates & Anna as I am? ♥


Sur La Table 120x600 11.27.07

Labels: ,

Thursday, February 9, 2012

Sock it to me!


I'd be lost without you...
{Just like the 18 mismatched socks living in the bottom of our "clean clothes" laundry basket.}

...because we're the perfect pair. ♥

Yes, that was totally corny.  I can't help it, Valentine's Day brings out the cheeseball in me.

This idea actually came from a card I gave Mr. E last year.  It's not the first time I've been inspired by a Target valentine.  Have you seen these?
{Moral of the story: need cookie ideas?  Go to Target.}

To make these sock valentines, you'll need:
  • sock-shaped sugar cookies (I used a template.)
  • royal icing, tinted with AmeriColor Bright White, Soft Pink, Sky Blue, Super Black and Super Red
  • couplers and tips (#2, #3 and #1)
  • disposable icing bags
  • squeeze bottle
  • toothpicks
 
Outline the sock shape in white icing using a #2 tip.  Reserve some of this piping consistency white icing.

Thin the white icing with water, a bit at a time, stirring gently until it reaches the consistency of thick syrup.  Cover with a damp dish towel and set aside.

After several minutes, stir the icing gently with a rubber spatula to pop and air bubbles that have risen to the surface.  Transfer to a squeeze bottle.

Fill in (or flood) the outline with the thinned icing.  Use a toothpick to guide to edges and pop large air bubbles.

Let the cookies sit for at least 30 minutes.  (Longer is probably better here, since you are piping color onto white.)

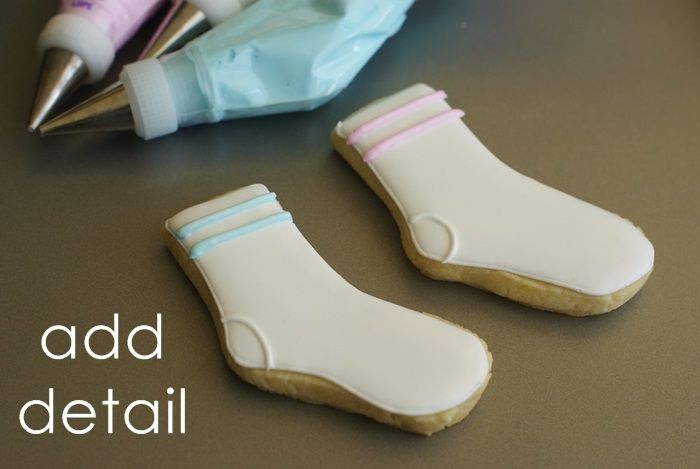
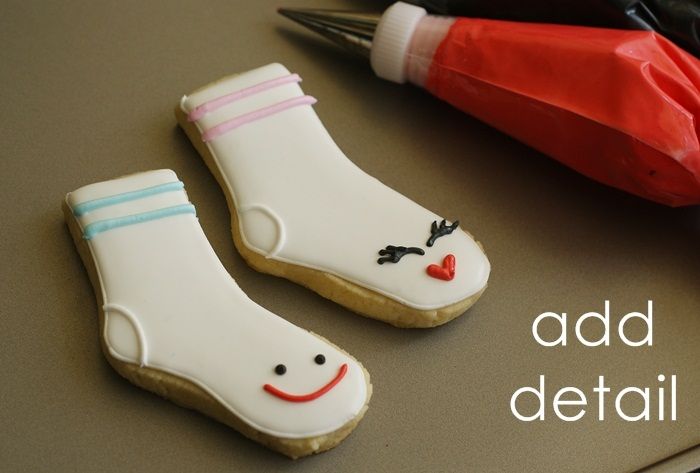
Use #3 tips to pipe pink and blue stripes across the top of the socks.  Use the reserved white icing and a #2 tip to pipe the heel detail.

Use a #1 tip to pipe eyes on the socks in black icing.  With a #2 tip, pipe the mouths in red.

Let the cookies dry over night.

Sock it to me, baby. 

Labels: ,

Monday, February 6, 2012

Double-decker, Stripey, Valentine Cookies

Hey guys!  We're invited to a Valentine Party today at my friend Shelly's blog, Cookies and Cups!

I have a deep love for the horizontal stripe.  I know, I know, they are not figure-flattering.  So, how about if we EAT the horizontal stripes, instead of wear them?  That won't make us look fat, will it?

{Don't answer that.}

These are some of the simplest cookies to make.  And what makes them extra special is that they're double-decker!  The cookies are just attached with a bit of royal icing...it's like yummy, yummy glue.

To make the cookies, you'll need:
First, use a #3 tip to outline the square cookie.  I used a #3 here because I really wanted the outline to show.  Switch the tip to a #2 and outline the hearts in red.

Go ahead and save some of this piping consistency red icing.  You won't need it until the next day.  You can just plop the icing bag right in your fridge.

Thin the red icing with water, a little at a time, stirring gently with a rubber spatula, until it is the consistency of a thick syrup. (Here is a video I made a few years ago showing how I do it.)  Cover with a damp dish towel and let sit for several minutes.

Stir gently with a rubber spatula to pop any air bubbles that might have formed.  Pour into a squeeze bottle.

Fill the hearts with the flood icing, using a toothpick to guide to edges and pop large air bubbles.  Set aside to dry overnight.

Thin the white icing and the colors for the stripes, using the method described above.  Transfer to squeeze bottles.

Working 6 cookies at a time, flood the square cookies with the white icing.  Guide to the edges and spread with a toothpick; pop large air bubbles.

{We're working 6 cookies at a time here to give the white a few minutes to set.  It helps prevent bleeding. If you wait too long, though, the icing won't lie flat on the base color and will be raised up.}

Starting with the first cookie flooded, add stripes in the colored icing. 

Let the cookies dry overnight.

The next day, remove the reserved piping icing from the fridge.  I like to let it come to room temperature, but you don't have to.  You may need to remove the tip and push a toothpick through if the tip is clogged.

Squeeze a little of the icing on the back of the small heart cookie.  You don't need much, and you don't want it to ooze out the sides.

Gently press it onto the square cookie.  Let dry for about 30 minutes to an hour to set.


So simple.  And perfect for sharing with your valentine. 

Now...you must (MUST!) go see all of the treats linked up to Shelly's valentine partyNo, really...you must.  I'm watching you.

Just look at all of these amazing valentine treats...

Here's the list:

1.  Confessions of a Cook Book Queen  ~ Valentines Twinkies on a Stick
2.  Buns in My Oven ~ Hot Fudge and Strawberry Donut Pudding
3.  Glorious Treats ~ Red Velvet Cupcakes
4.  Cookies and Cups ~ Glass Topper Valentines Cookies
5.  Bakingdom ~ Valentines Day Cookie Cakes
6.  The Hungry Housewife ~ Valentines Jello Hearts
7.  Sweet Adventures of Sugarbelle ~ Valentines Dotty Cookies
8.  Sprinkle Bakes ~ Red Velvet Cake Minis
9.  Bake at 350 ~ Double-Decker, Stripey, Valentine Cookies
10.  Two Peas and Their Pod ~ Red Velvet Crinkle Cookies
11.  Scarletta Bakes ~ Mexican Chocolate Hearts
12.  She Wears Many Hats ~ Valentines Popcorn


Are YOU baking for Valentine's Day?

Labels: , ,

Friday, January 27, 2012

True Love

Ah, romance. 
These cookies were inspired by some of the most famous romances in history.

Lucy & Ricky....obviously.

Danny & Sandy...as a young girl, I was fairly certain I would don a leather outfit and high heels & sing "You're the One that I Want" at a carnival with my true love.
{It hasn't happened. YET.}

Homer & Marge...unconditional love if I've ever seen it.

Ken & Barbie...have you SEEN Toy Story 3?

Jim & Pam...I've only seen a few seasons of The Office on cable, but Jim & Pam are SO DARN SWEET!  Oh, I just love them.

Carrie & Big...don't tell me if they break up in the movies.  I prefer my Carrie/Big memories right where they ended for me, with the last TV show.

Gomez & Morticia...they just might be my all-time favorite TV romance.  Go back and watch The Addams Family again.  They make me smile EVERY time! ♥

I asked Mr. E if he could name some famous couples.  His first response? "Charles and Diana."  My (yelled) reply, "CHARLES AND DIANA?!?"  He looked at me like I was the crazy one.  After he explained himself for a minute, it occurred to me.  "Do you mean William and Kate?!?"  Him: "Yes."  Men.

No true love list would be complete without Rhett & Scarlett.  Every time I read Gone with the Wind, I hope they'll run across the yard at Tara and into each other's arms.  It never happens.  Darn it.

I had a few more on my list (Elvis & Priscilla, Fred & Wilma, Han & Leia, PW & MM, Roy & Dale) but as is always the case with "writing" on cookies, I had several mistakes.  Even on the "good ones,"  my handwriting is not as cute as it was in my head. :)

These are as simple as an outline and fill with royal icing...
  • I used AmeriColor Super Black for the outline and writing,
  • #3 tip for the outline, #1 tip for the writing,
  • hearts: soft pink, deep pink mixed with electric pink, and super red (all AmeriColor)
  • to avoid bleeding, I let the flooded hearts sit for a few hours before adding the names
 
Easy, peasy.

Actually, I liked the way they looked plain, too.  Simple black outline.  Love it every time.

What names would you put on YOUR true love cookies?


Labels: ,

Saturday, February 12, 2011

Mr. E & me sitting in a tree. . .

{.....K-I-S-S-I-N-G.....}

These cookies are inspired by my sister and her hubby who carve their initials in a tree wherever they live. {Insert "aww..." here.}

 
If you are ever on an Army base in Hawaii, and see a tree with a M + M carved on it, that's them. ;)

Even if you don't make the trees, the little initial hearts are about the easiest Valentine cookies EVER!  Just outline, flood and, the next day, use a food coloring pen to write on initials.  Easy Peasy.
 
The make the trees you'll need:
 
Cut out cookies using a circle cutter and with a knife, cut a thin rectangle.  Smoosh (technical term) together before baking to make a tree shape.


Once the cookies have cooled, outline the top of the tree and the trunk of the tree using #2 tips.  Pipe a heart in the center of the trunk. (The red icing won't be used until the next day, cover with plastic wrap, pressing onto the icing, and store in the fridge.)

Reserve some piping consistency green icing. Thin the brown and remaining green icing with water, a teaspoon at a time, stirring until it reaches the consistency of thick syrup.  Cover with a damp dish towel and set aside.

After several minutes, stir the icings gently with a rubber spatula to pop and air bubbles that have risen to the surface.  Transfer to squeeze bottles.

 
Flood the tree top with the thinned green icing and the tree trunk in brown.  Use a toothpick to guide into edges and pop air bubbles.

 
Wait at least one hour, then with the #2 tip, pipe grass on the bottom of the trunk.  Let dry overnight.


With a fan brush and Chocolate Brown food coloring thinned with water, add the wood grain.  To make the wood grain, I used a technique I learned from Renee. You can see her wood grain on cookies video on University of Cookie (she's so good).


Thin the red icing with water, as described above and fill in the heart.

Let dry overnight.

The next day, use the food coloring pens to write on initials.

Have you ever carved your initials in a tree?  I'm thinking Mr. E & I need to.

Labels: ,